Between Abercrombie Canyon and Chitina lies nearly 70 miles of some of the most remote, inaccessible railroad in North America. Twisting and turning along the west bank of the Copper River, these miles would offer a great deal of scenic value, but little operational potential. There was no industry through this stretch, and damned few people at all. Those that were there consisted largely of native people, fishermen (largely in the lower canyon – there was once a salmon cannery around Abercrombie at MP 55), railroad workers, and of course the random outdoorsman. From a modeling perspective, it would be miles and miles of track on a narrow shelf, perched between the mountainside and the swirling blue-grey waters of the Copper. So, as I needed somewhere to shift between decks, I chose these remote 70 miles to compress into the great helix.
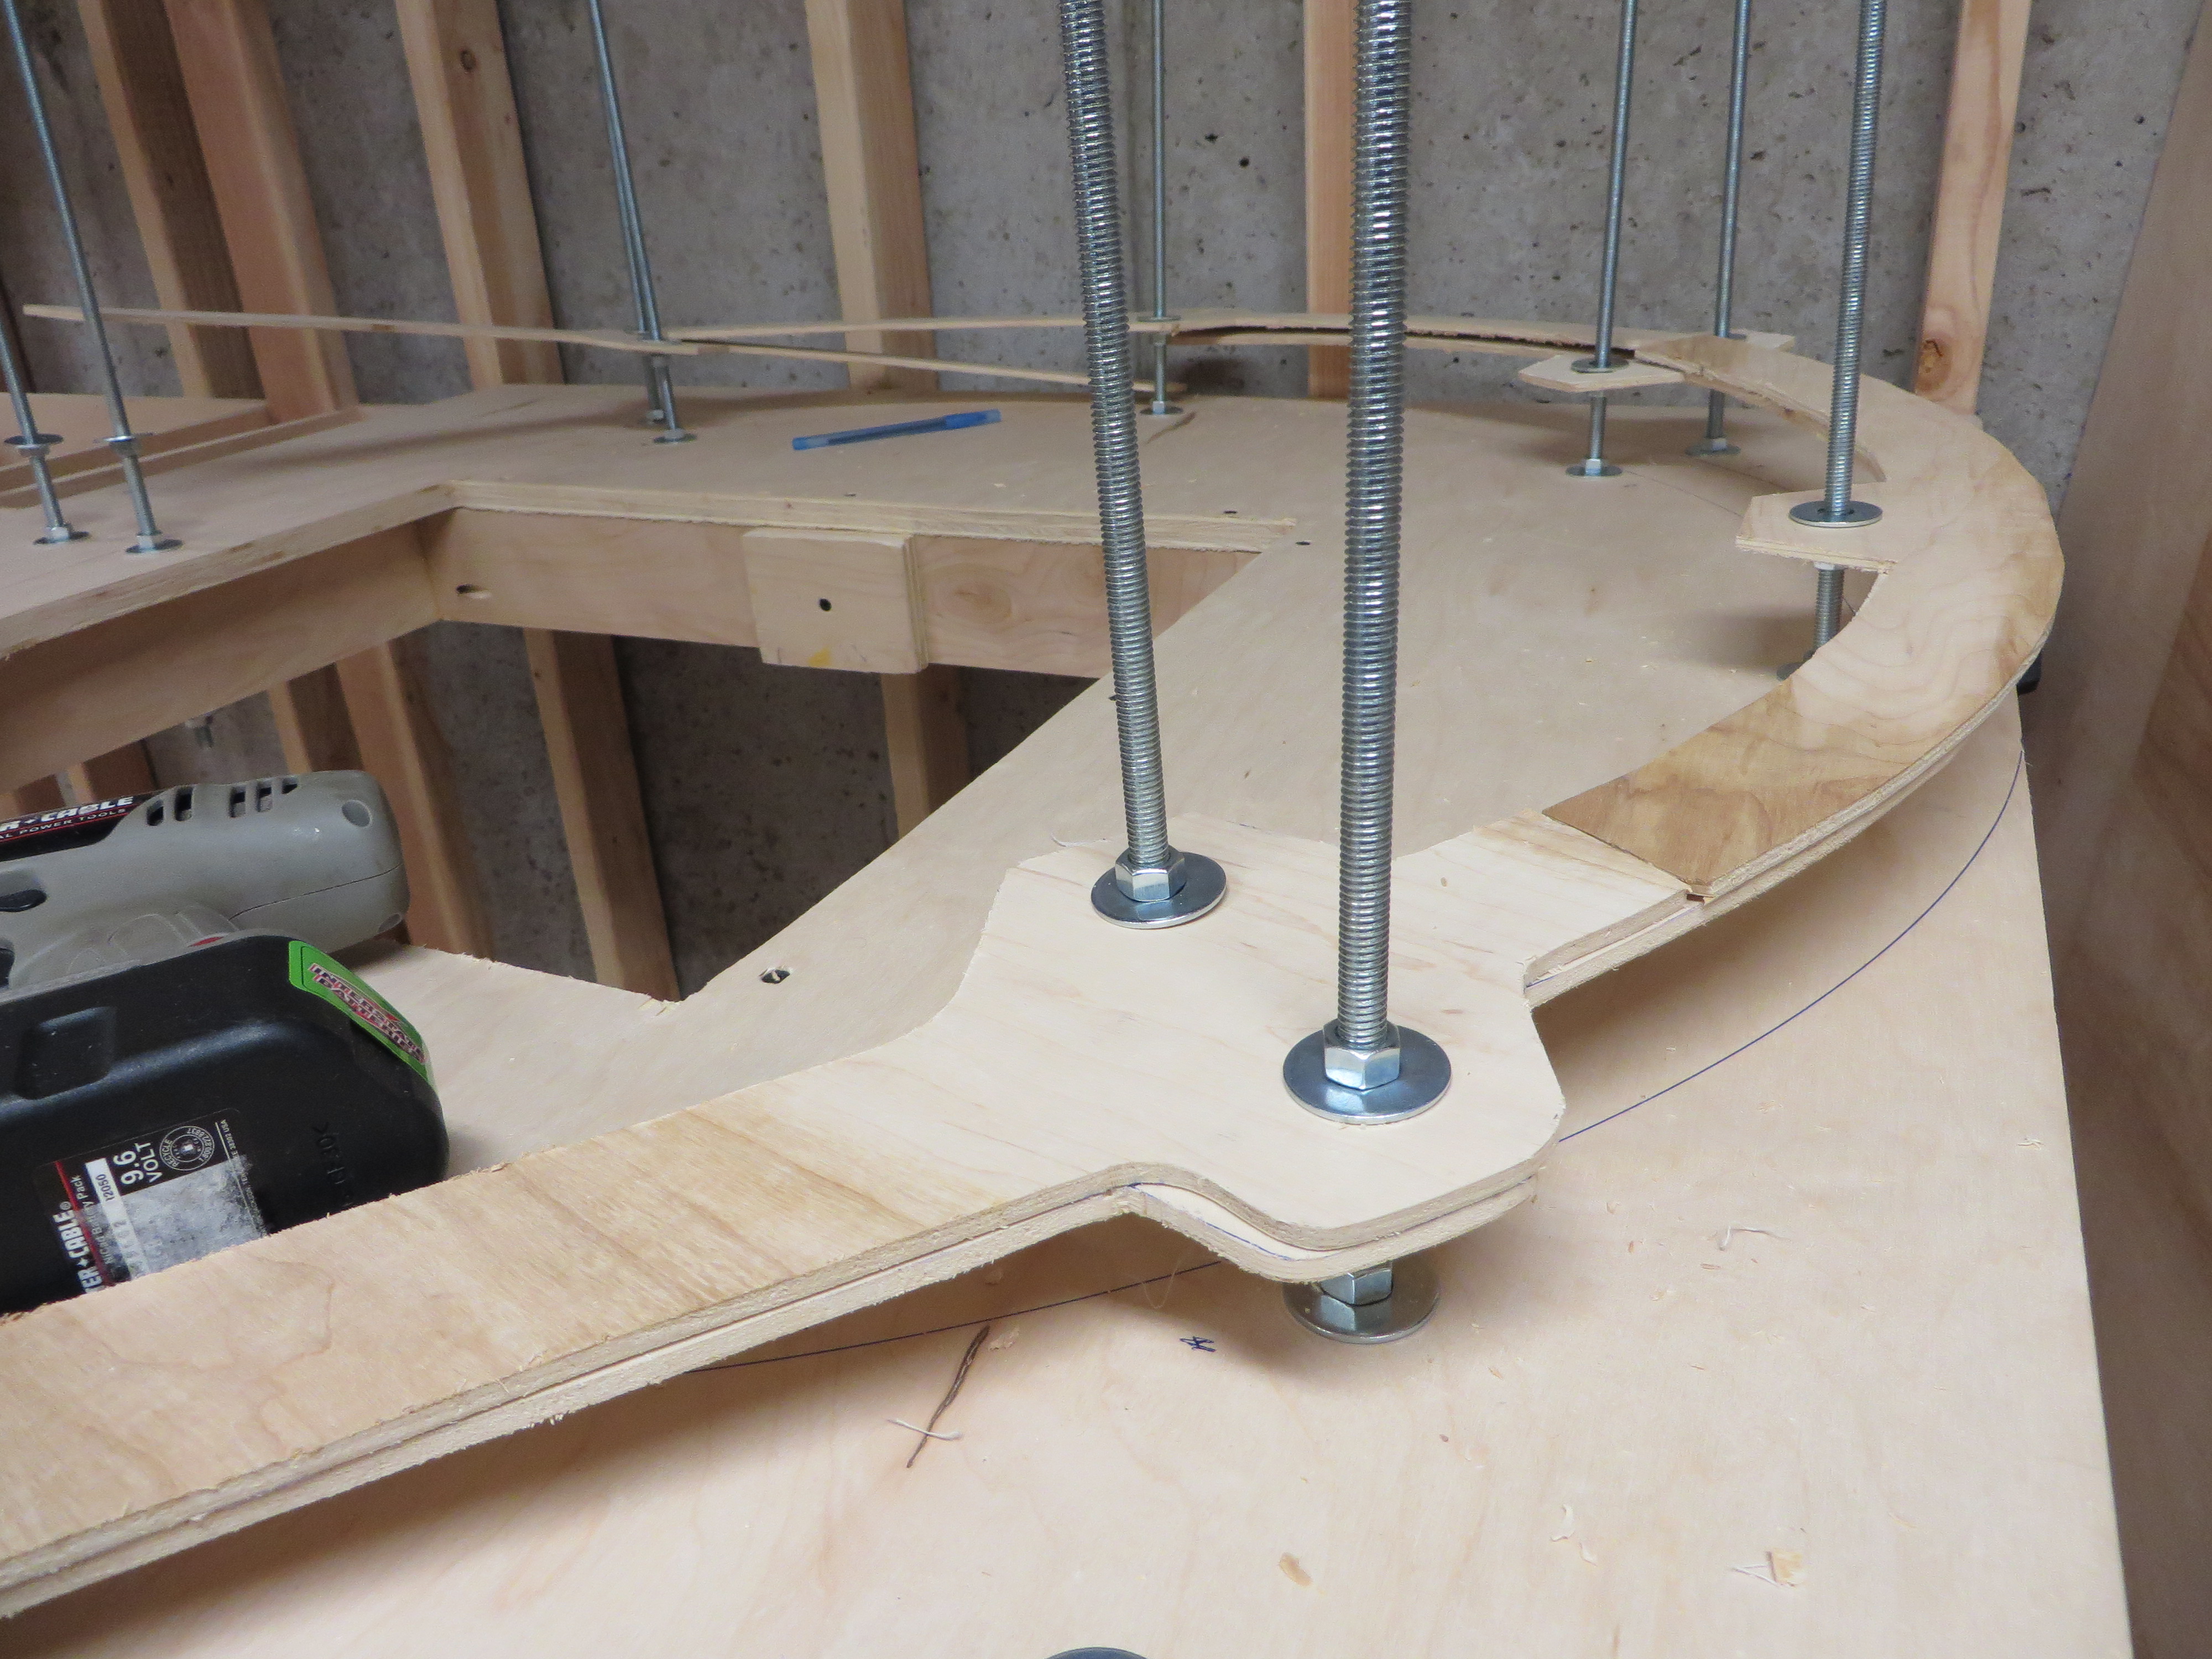
The structure will be a 20 inch radius, 8 turn helix connecting the lower deck at 35 inches above the floor with the upper level at 60 inches. This comes out to a grade of just under 2.5%. Inspired by other designs I’ve seen lately, I chose to use threaded rod as the main vertical supports. It’s simple to install, requires no precision cutting on my part, and allows for adjustment after installation.
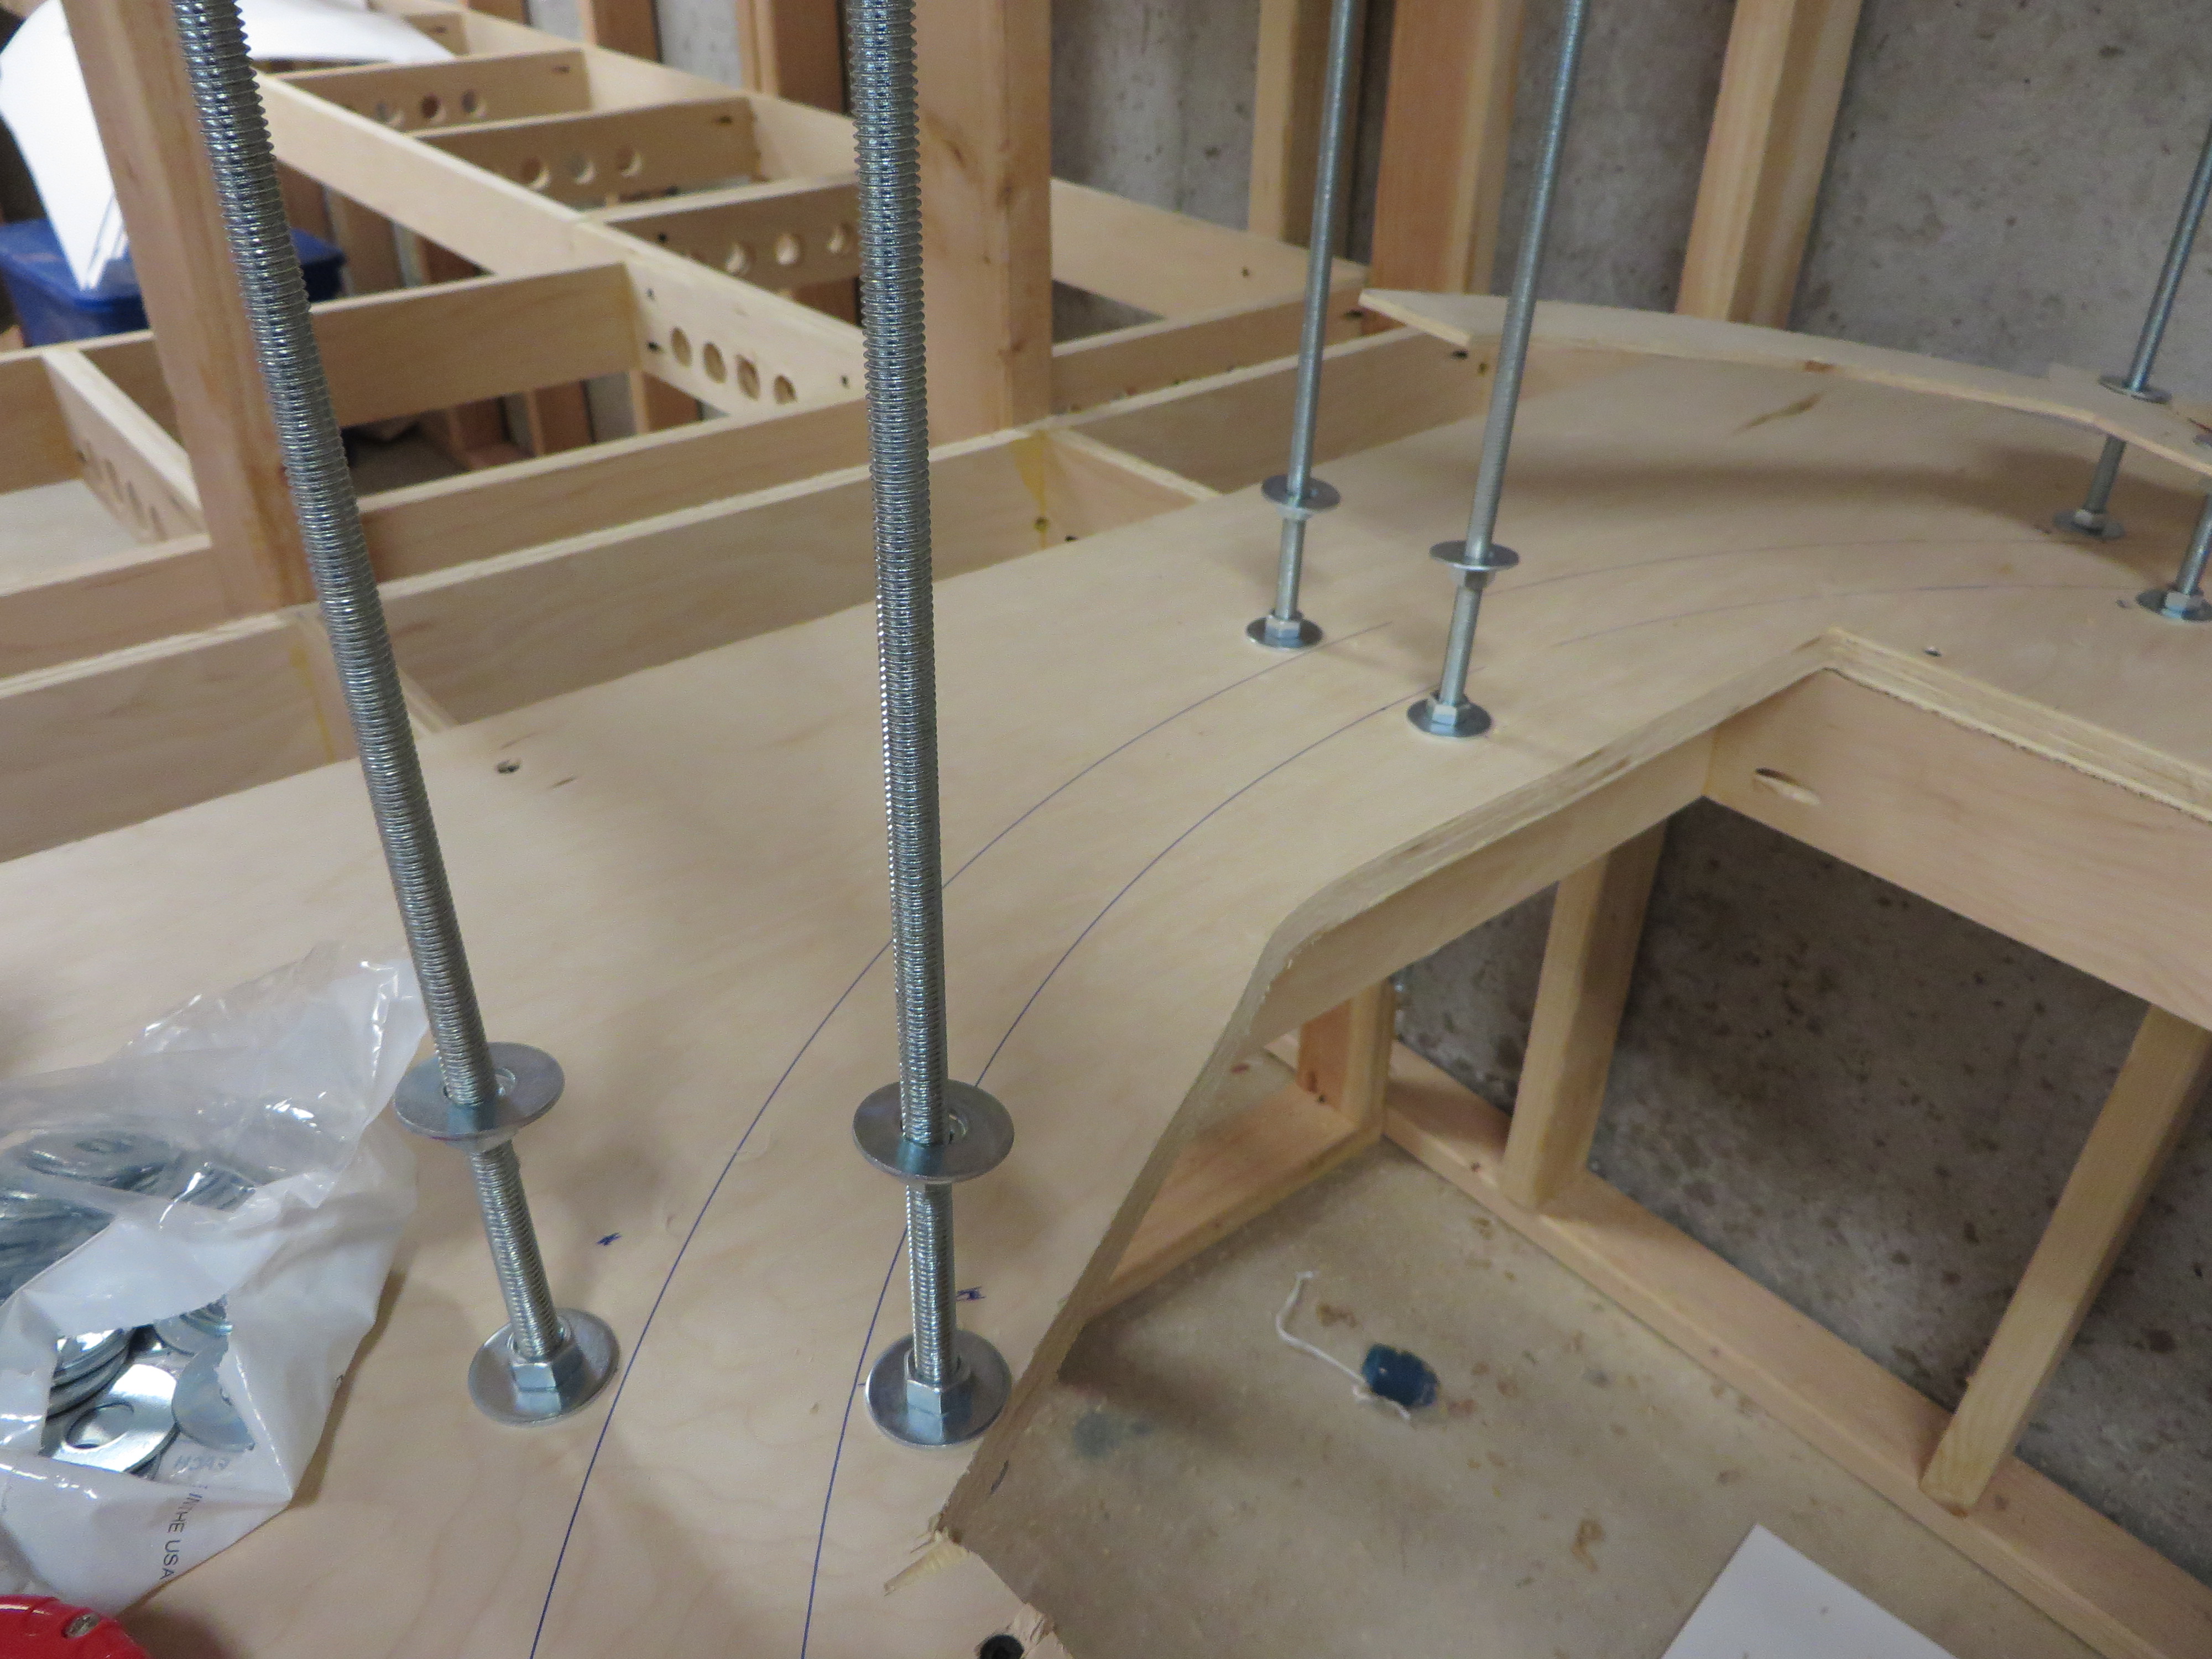 The basic design would consist of 8 sets of rods, each set 45 degrees apart and spaced by about 3 inches. These would be mounted into a lower plywood platform and extend upward through each helix level. Thanks in part to the explosion of 3D printers on the market (which often use threaded rod for linear drives), 3/16-16 threaded rod is abundant and cheap. I picked up 16 rods, each 36″ long, from eBay for something like $40 shipped. Nuts (part 90473A031) and washers (part 90108A032) were ordered from McMaster-Carr.
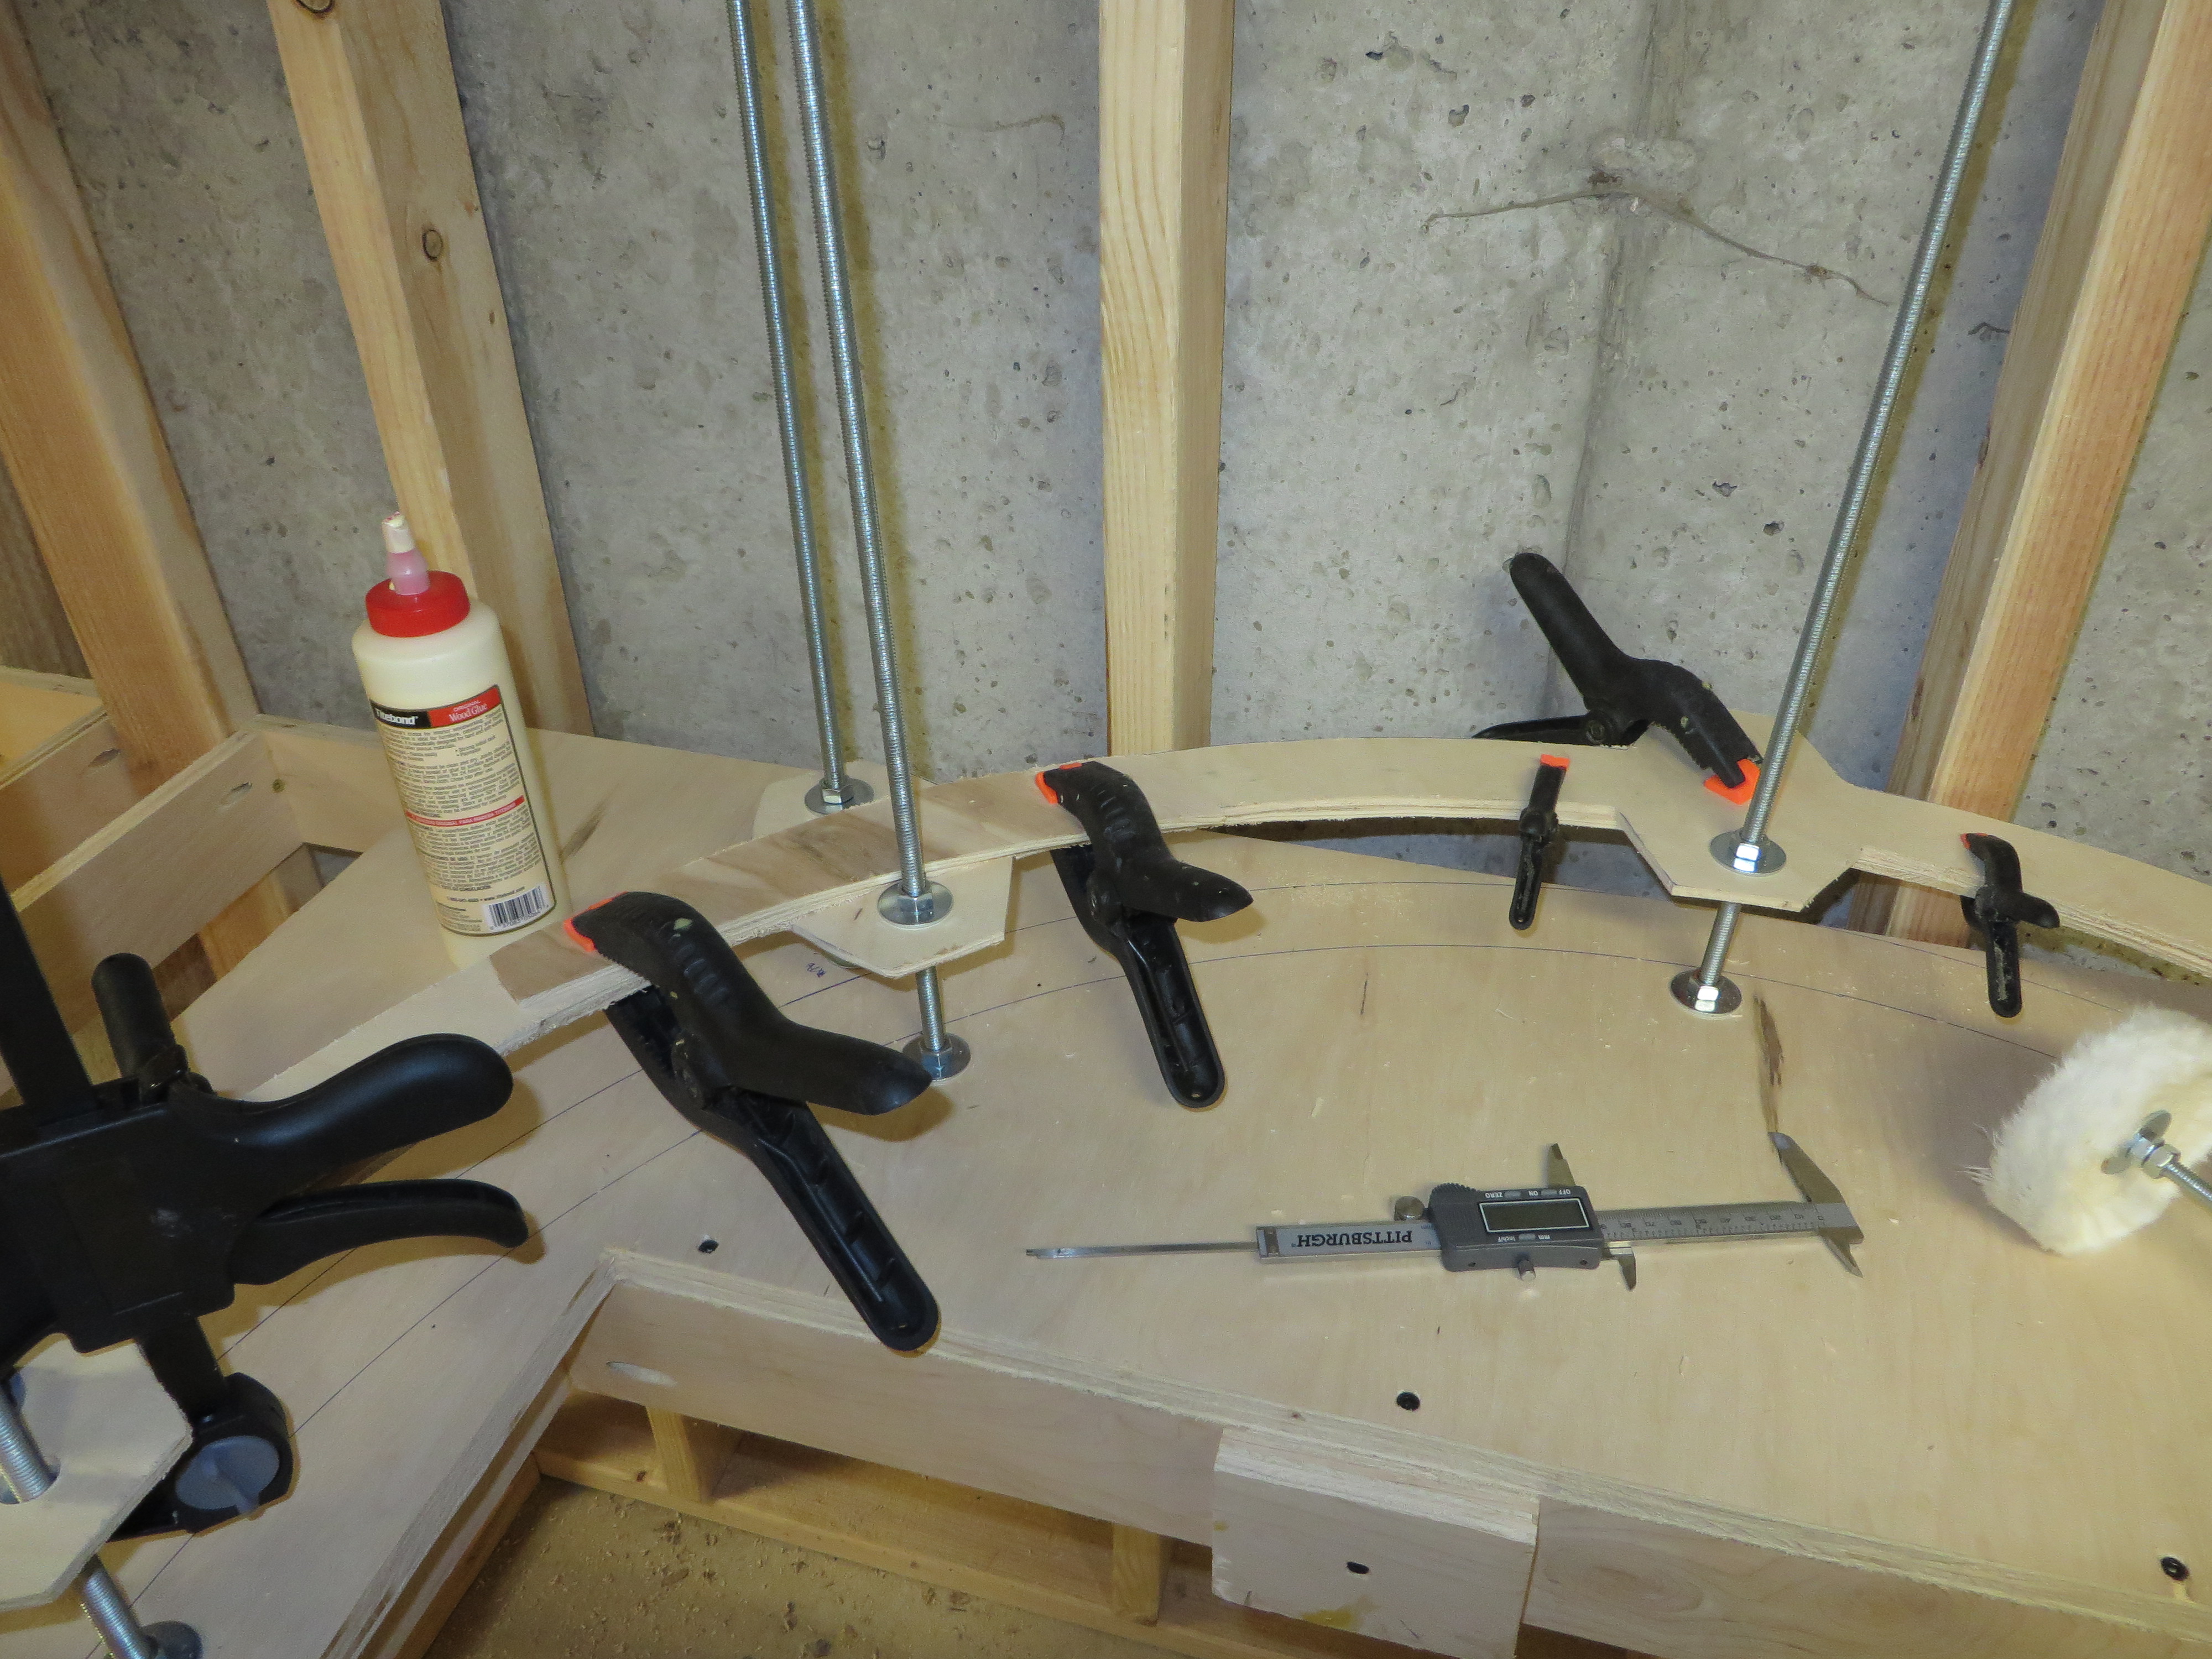
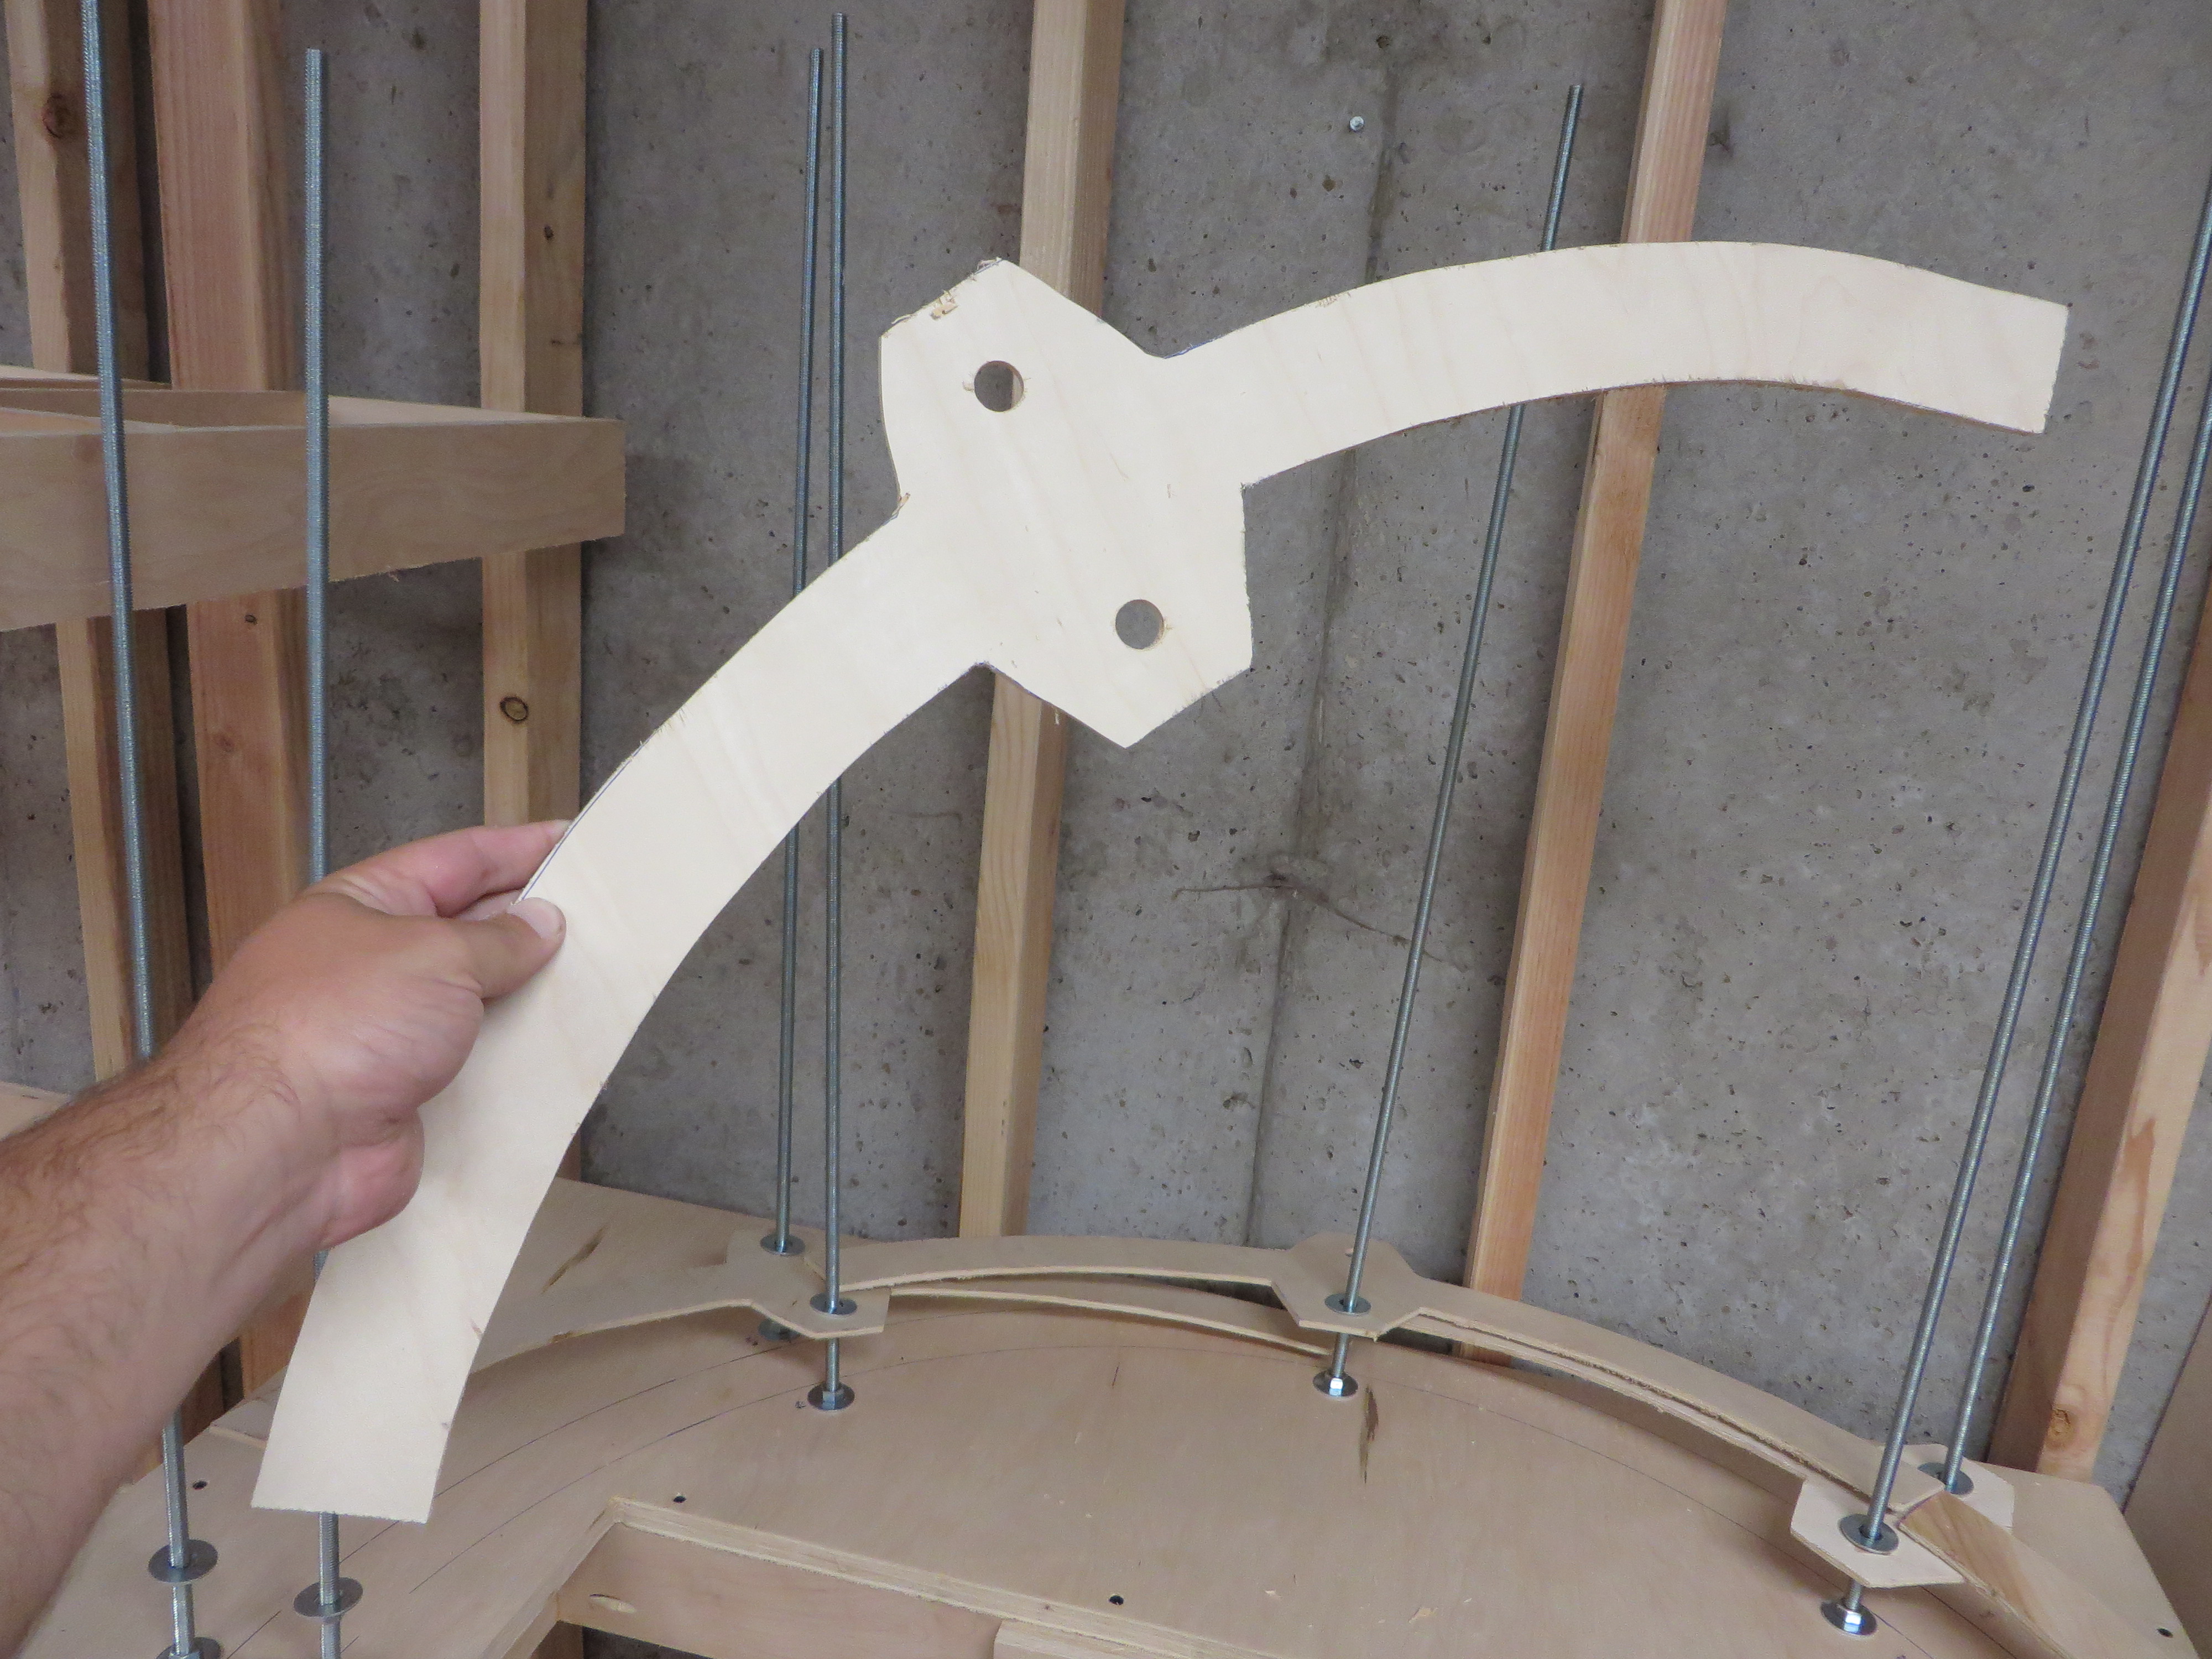 The roadbed itself would consist of 90 degree segments (quarter turn) cut from 1/4″ plywood, with ears at the halfway point for connecting with the rods. Two layers of these segments would be installed for the track bed, 45 degrees offset from each other. The segments are glued together using standard wood glue and clamped while they dry. For the threaded rods, 5/8″ holes were drilled (very oversize for the 3/16″ rod) so that there was plenty of adjustment room. I specifically chose large flat washers so that I could have large holes for fine-tuning the alignment. Even though only the upper or lower roadbed segment is attached at each set of rods, this still provides a very strong roadbed once the glue sets and it’s bolted down.
Here’s a handy tip – turns out spinning a few 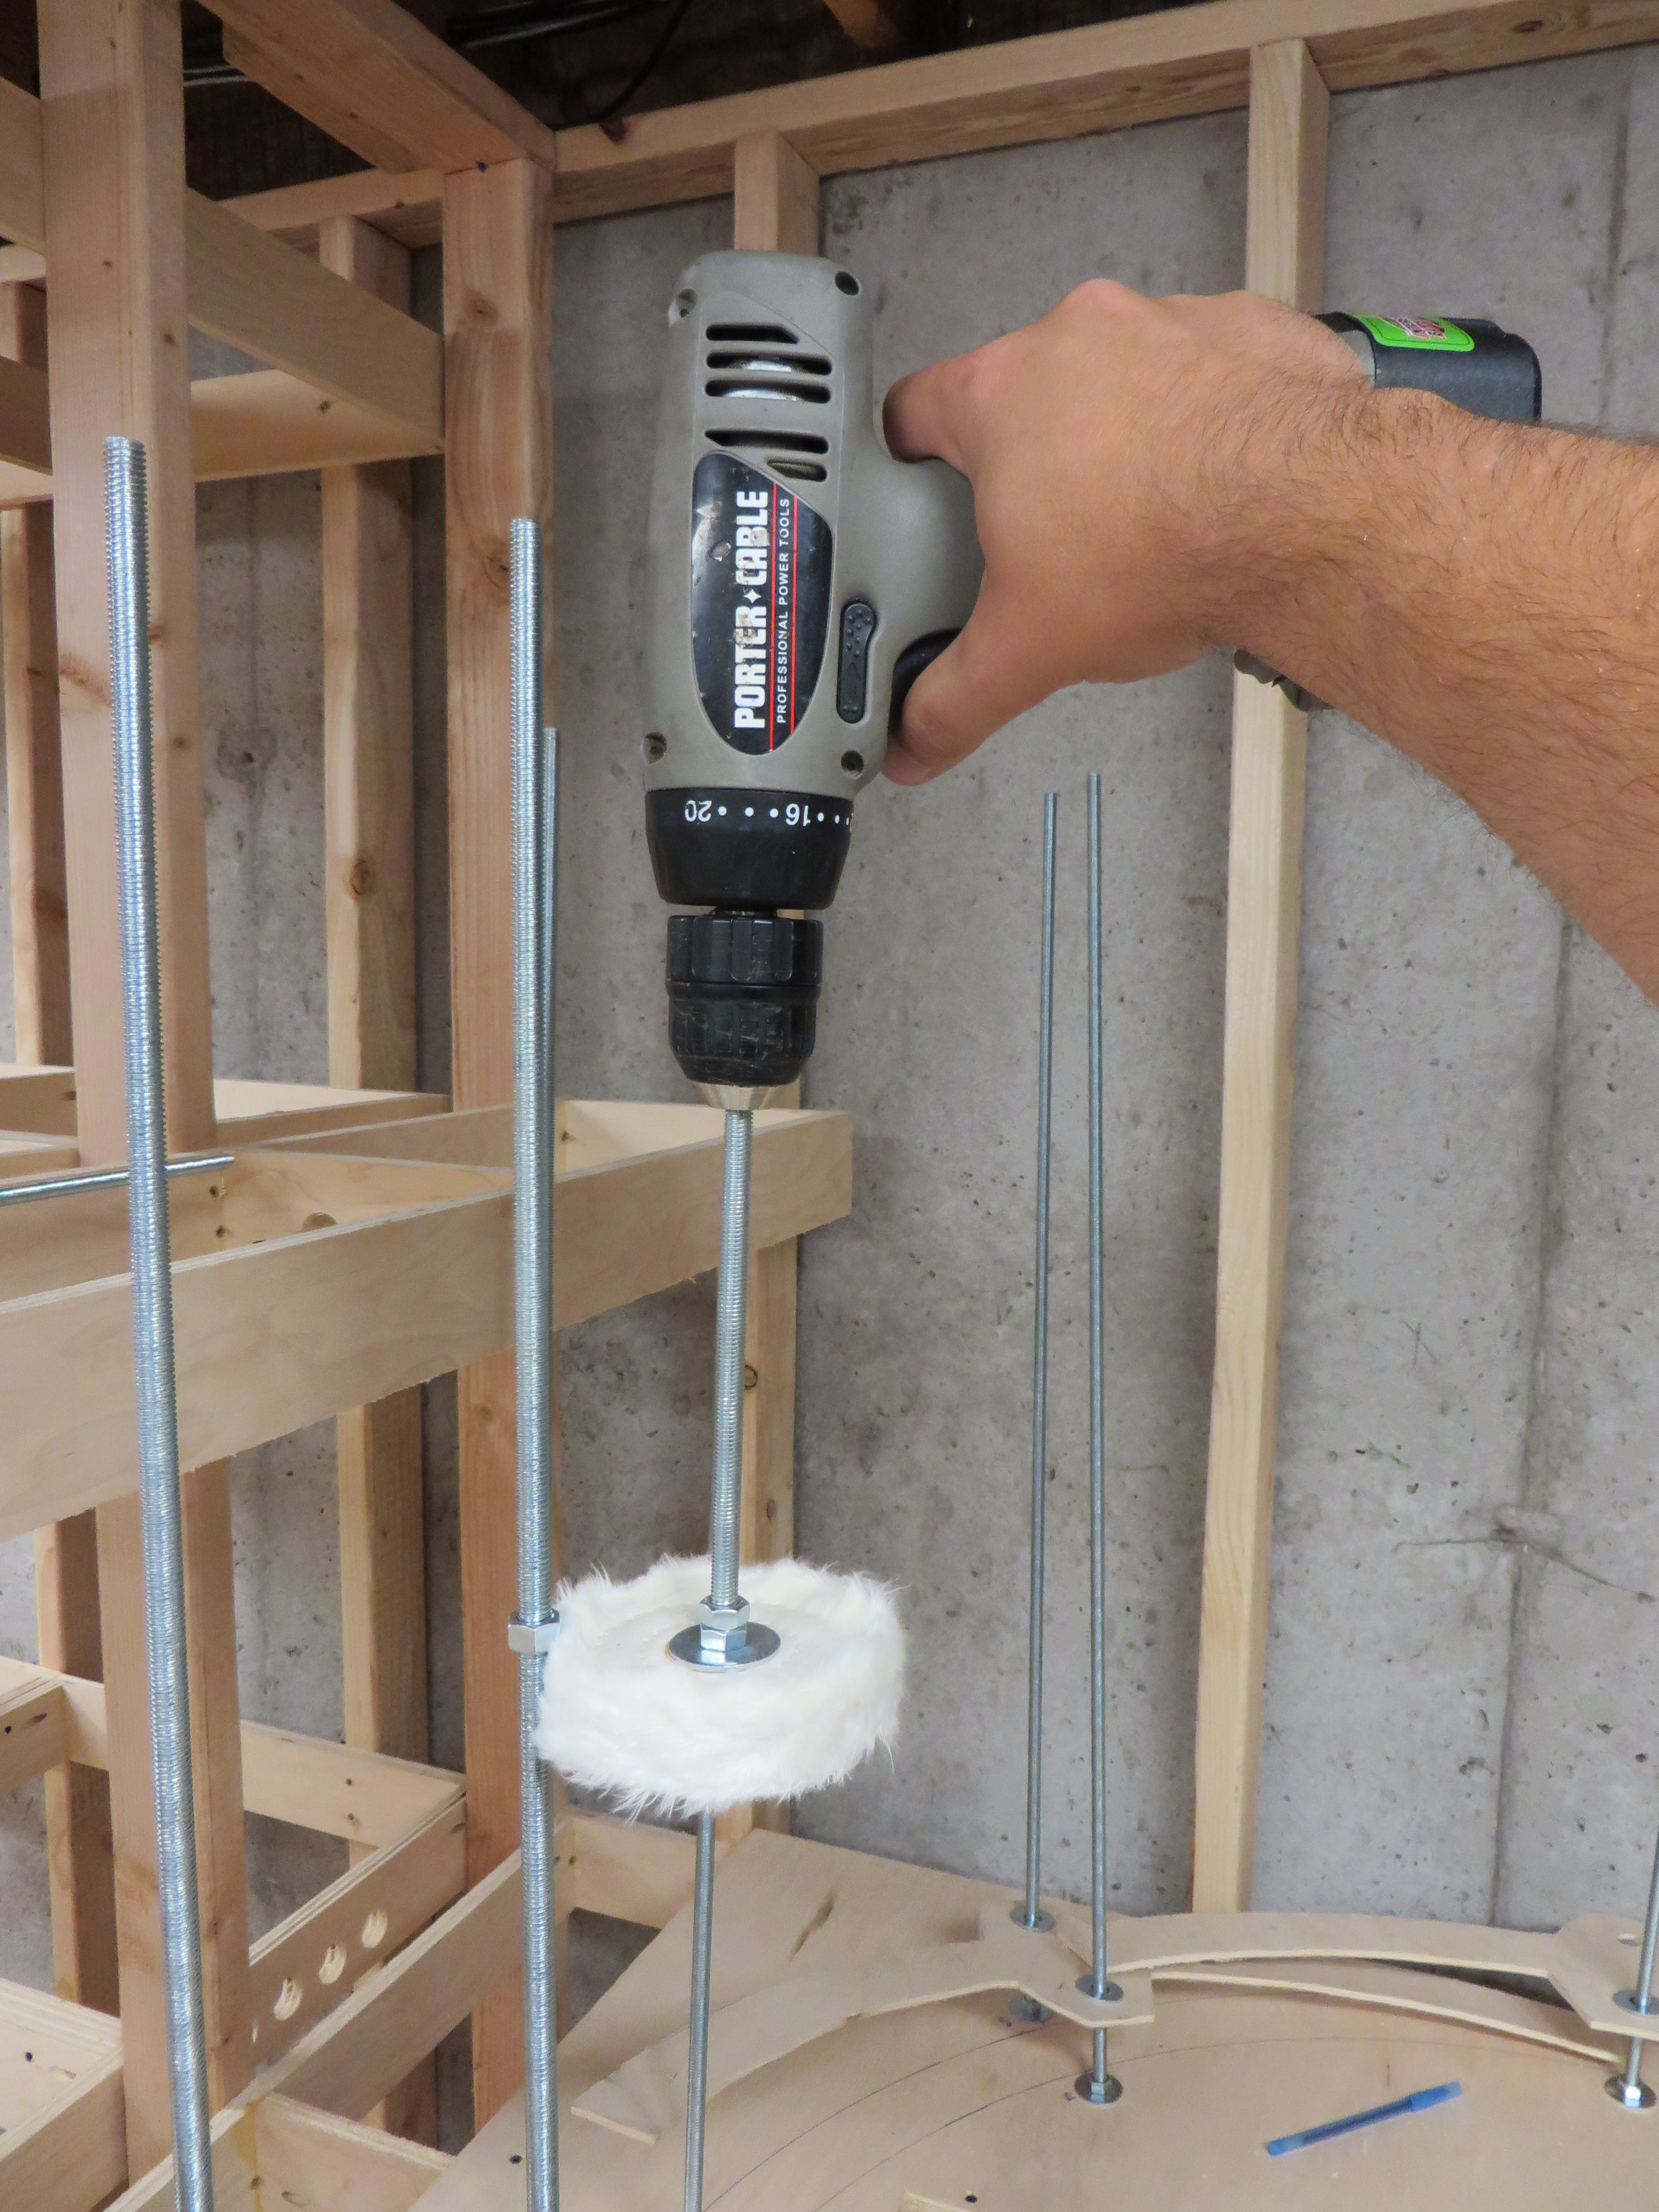 hundred nuts down a few feet of threaded rod is absolutely no fun. In fact, it’s downright maddeningly slow. Fortunately, there’s a better, faster way to do it. Just get a 4″ buffing wheel (meant for a bench grinder, maybe $5 at a home improvement store) and a short piece of threaded rod. Put a big washer on each side and a couple nuts, pop that sucker in a drill, and you have a nut turner. Makes very short work of spinning each nut down the rod. About the only gotcha is the occasional string that gets loose from the buffing wheel and jams the nut, but that’s easily cleared with just your hand.
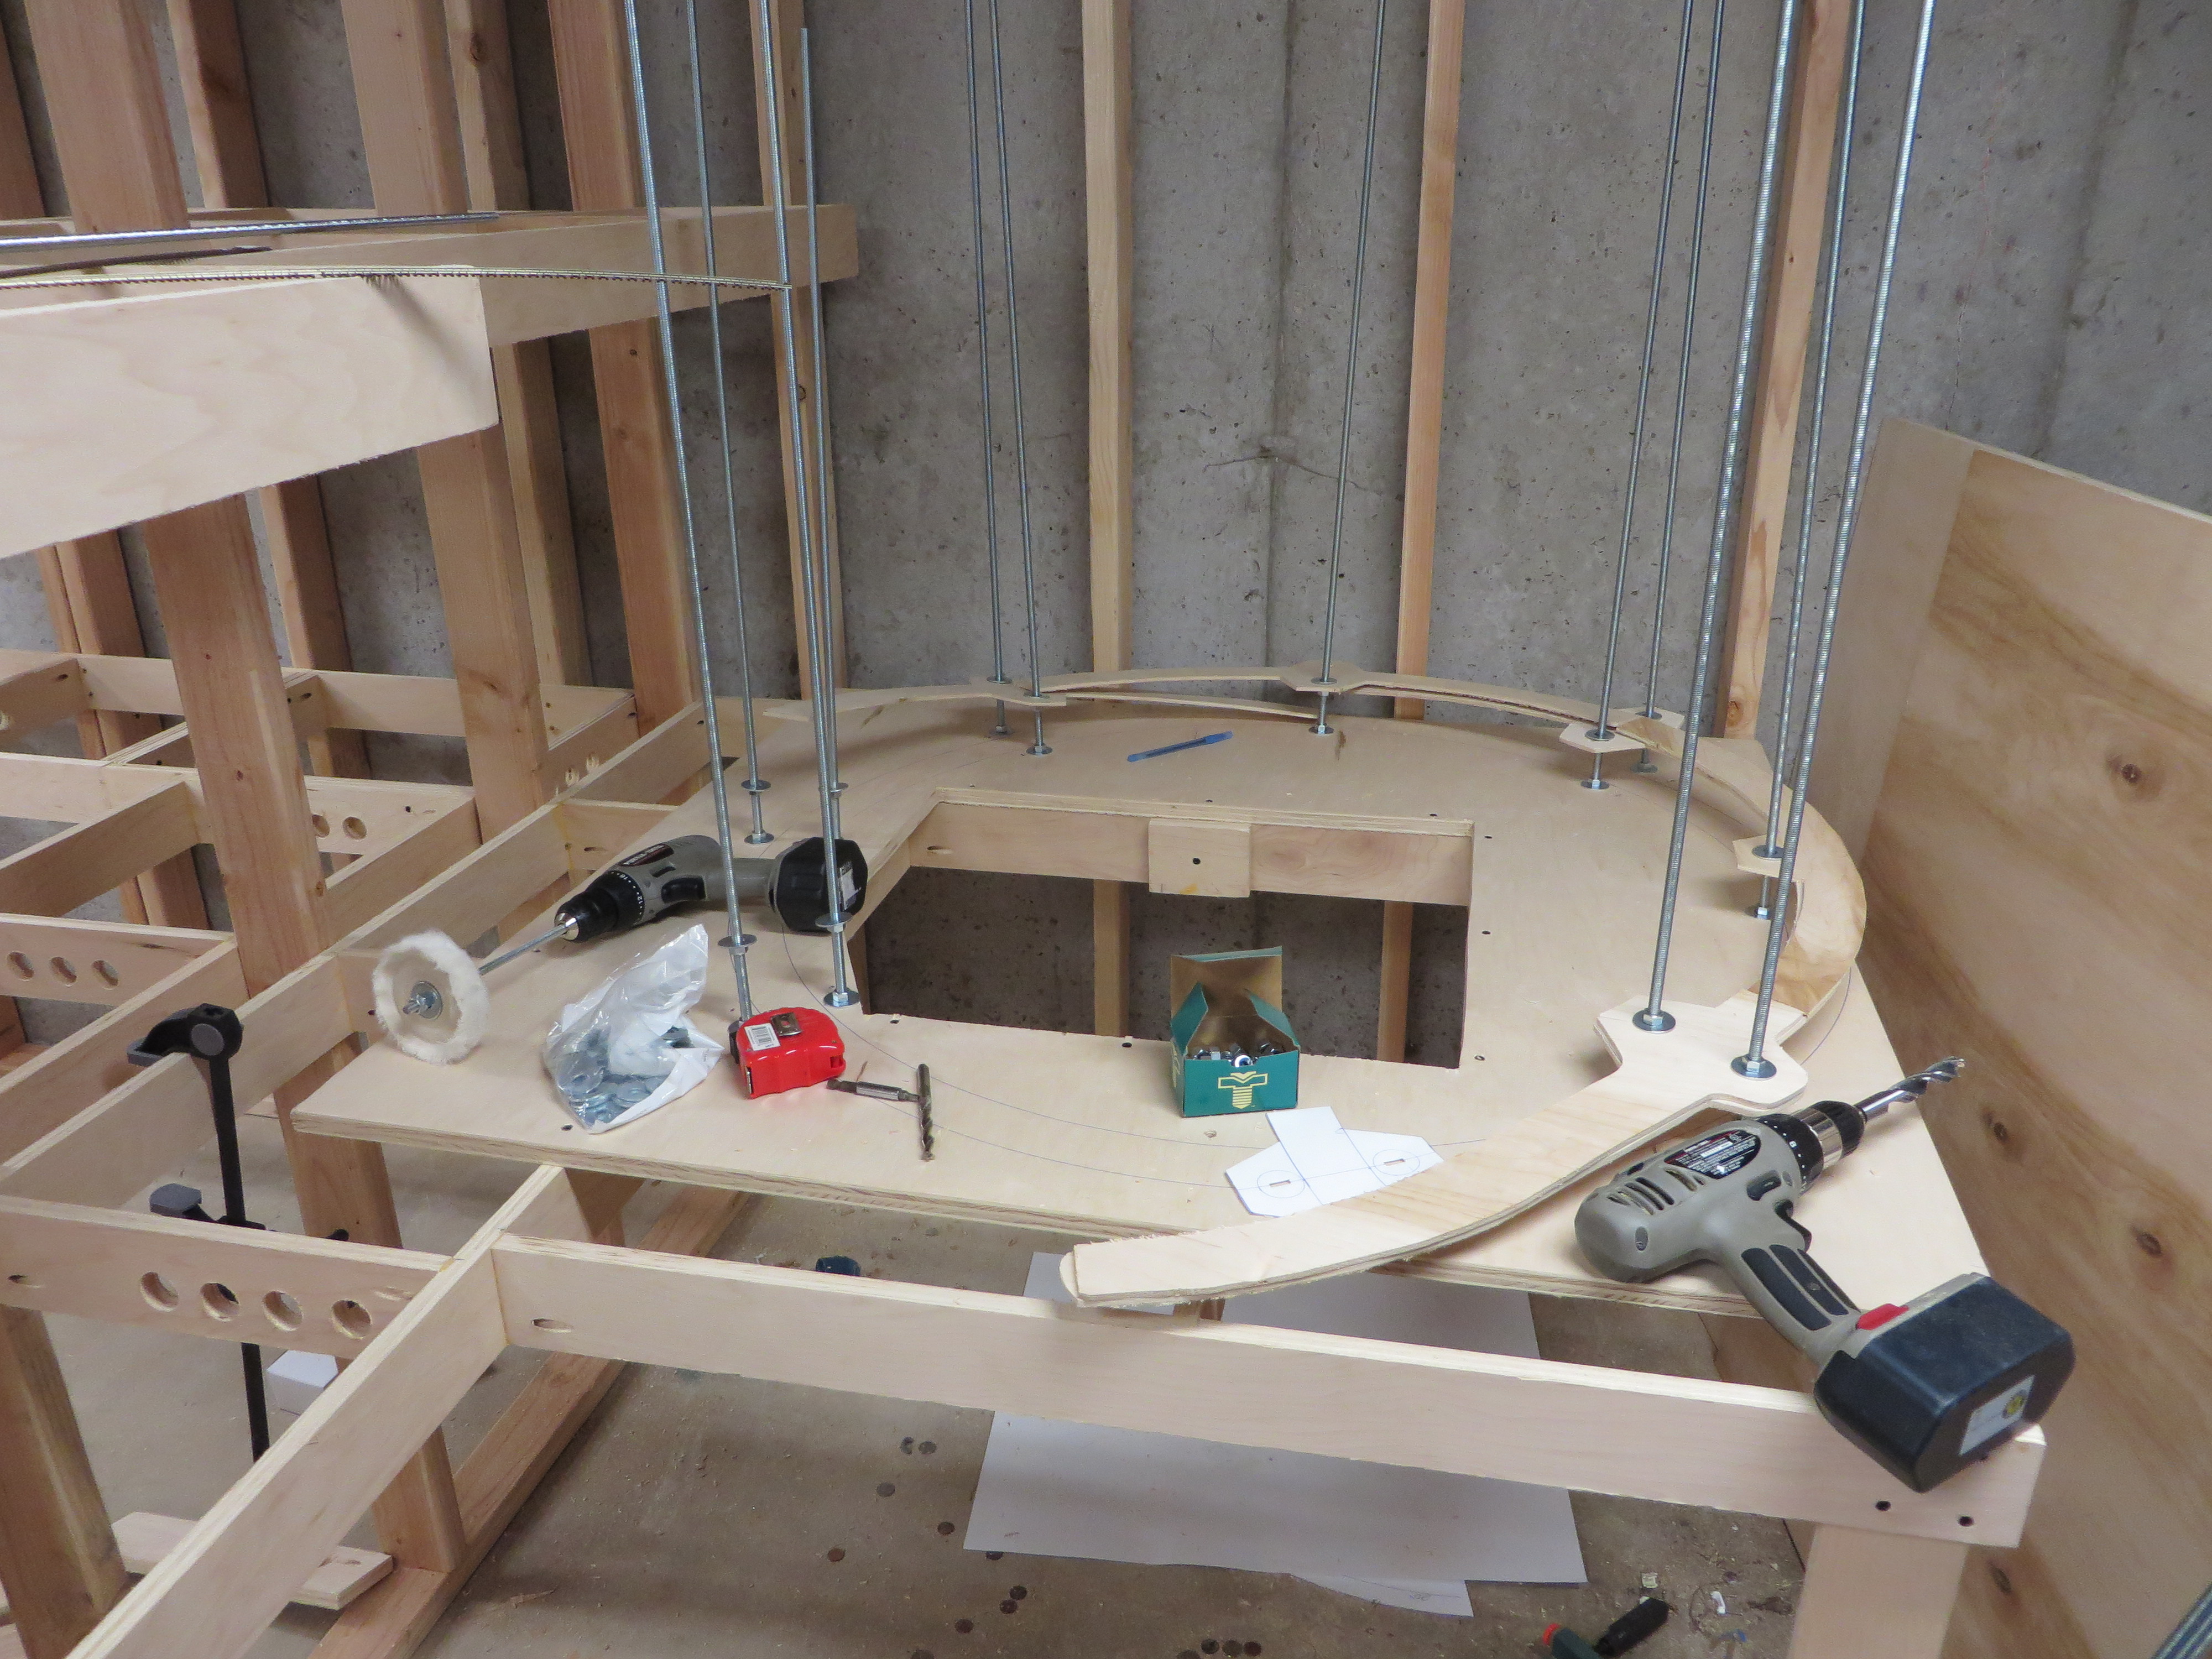
After that, it’s all just one step at a time. Add a couple segments, then go back and lay track before you cover up a helix turn with the next one. I typically have been keeping the track about 1/2 turn behind the benchwork, so that I can alternate between setting benchwork segments and laying track.
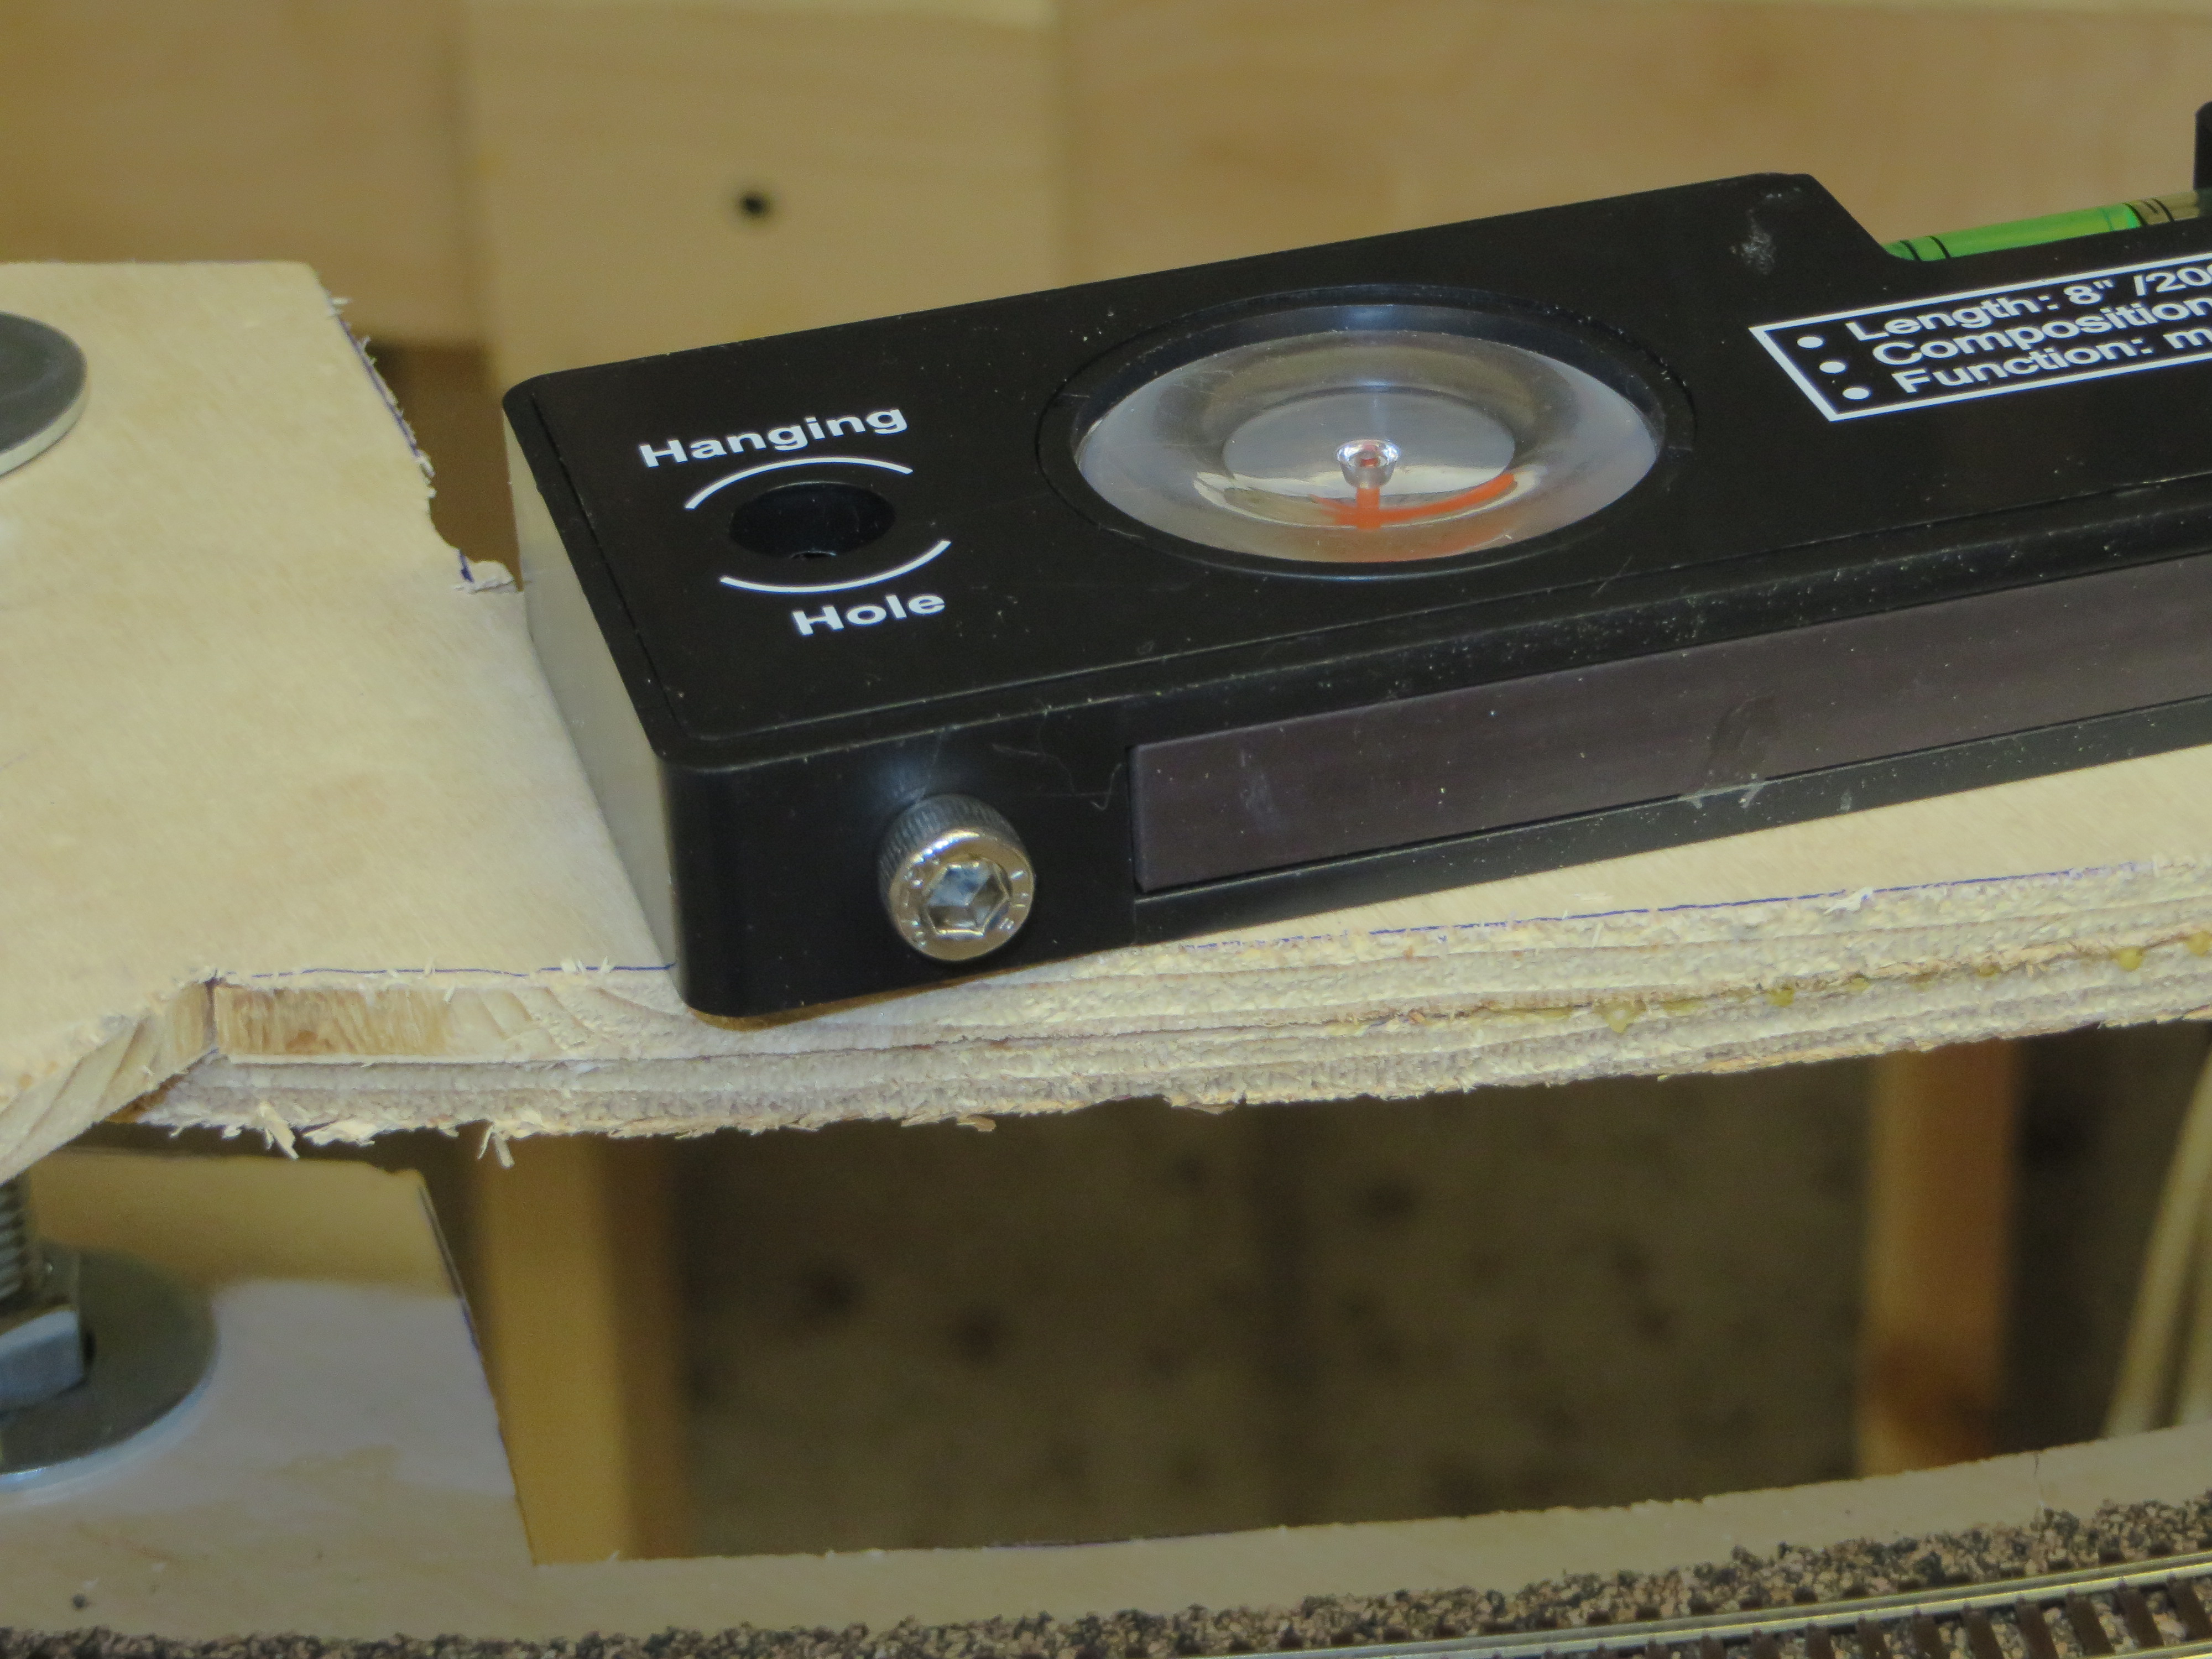
 To keep the grade constant, I built this handy grade measuring device out of a $3 Harbor Freight level. Over a span of 8″, a 2.5% grade will rise 0.2″. So, I had some hex cap screws lying around that had heads 0.2″ high. I drilled a hole in one end of the level and threaded in a cap screw. Ta da! Almost a perfect 2.5% grade level. I just place it halfway between each set of rods, progressively working up the helix as I build the roadbed. I keep checking that the distance from one level to the next is a consistent 3-1/8″, but so far I haven’t had any issues using just the level method. Once each piece is determined to be the right grade, I firmly set the nuts against the washers and the roadbed.
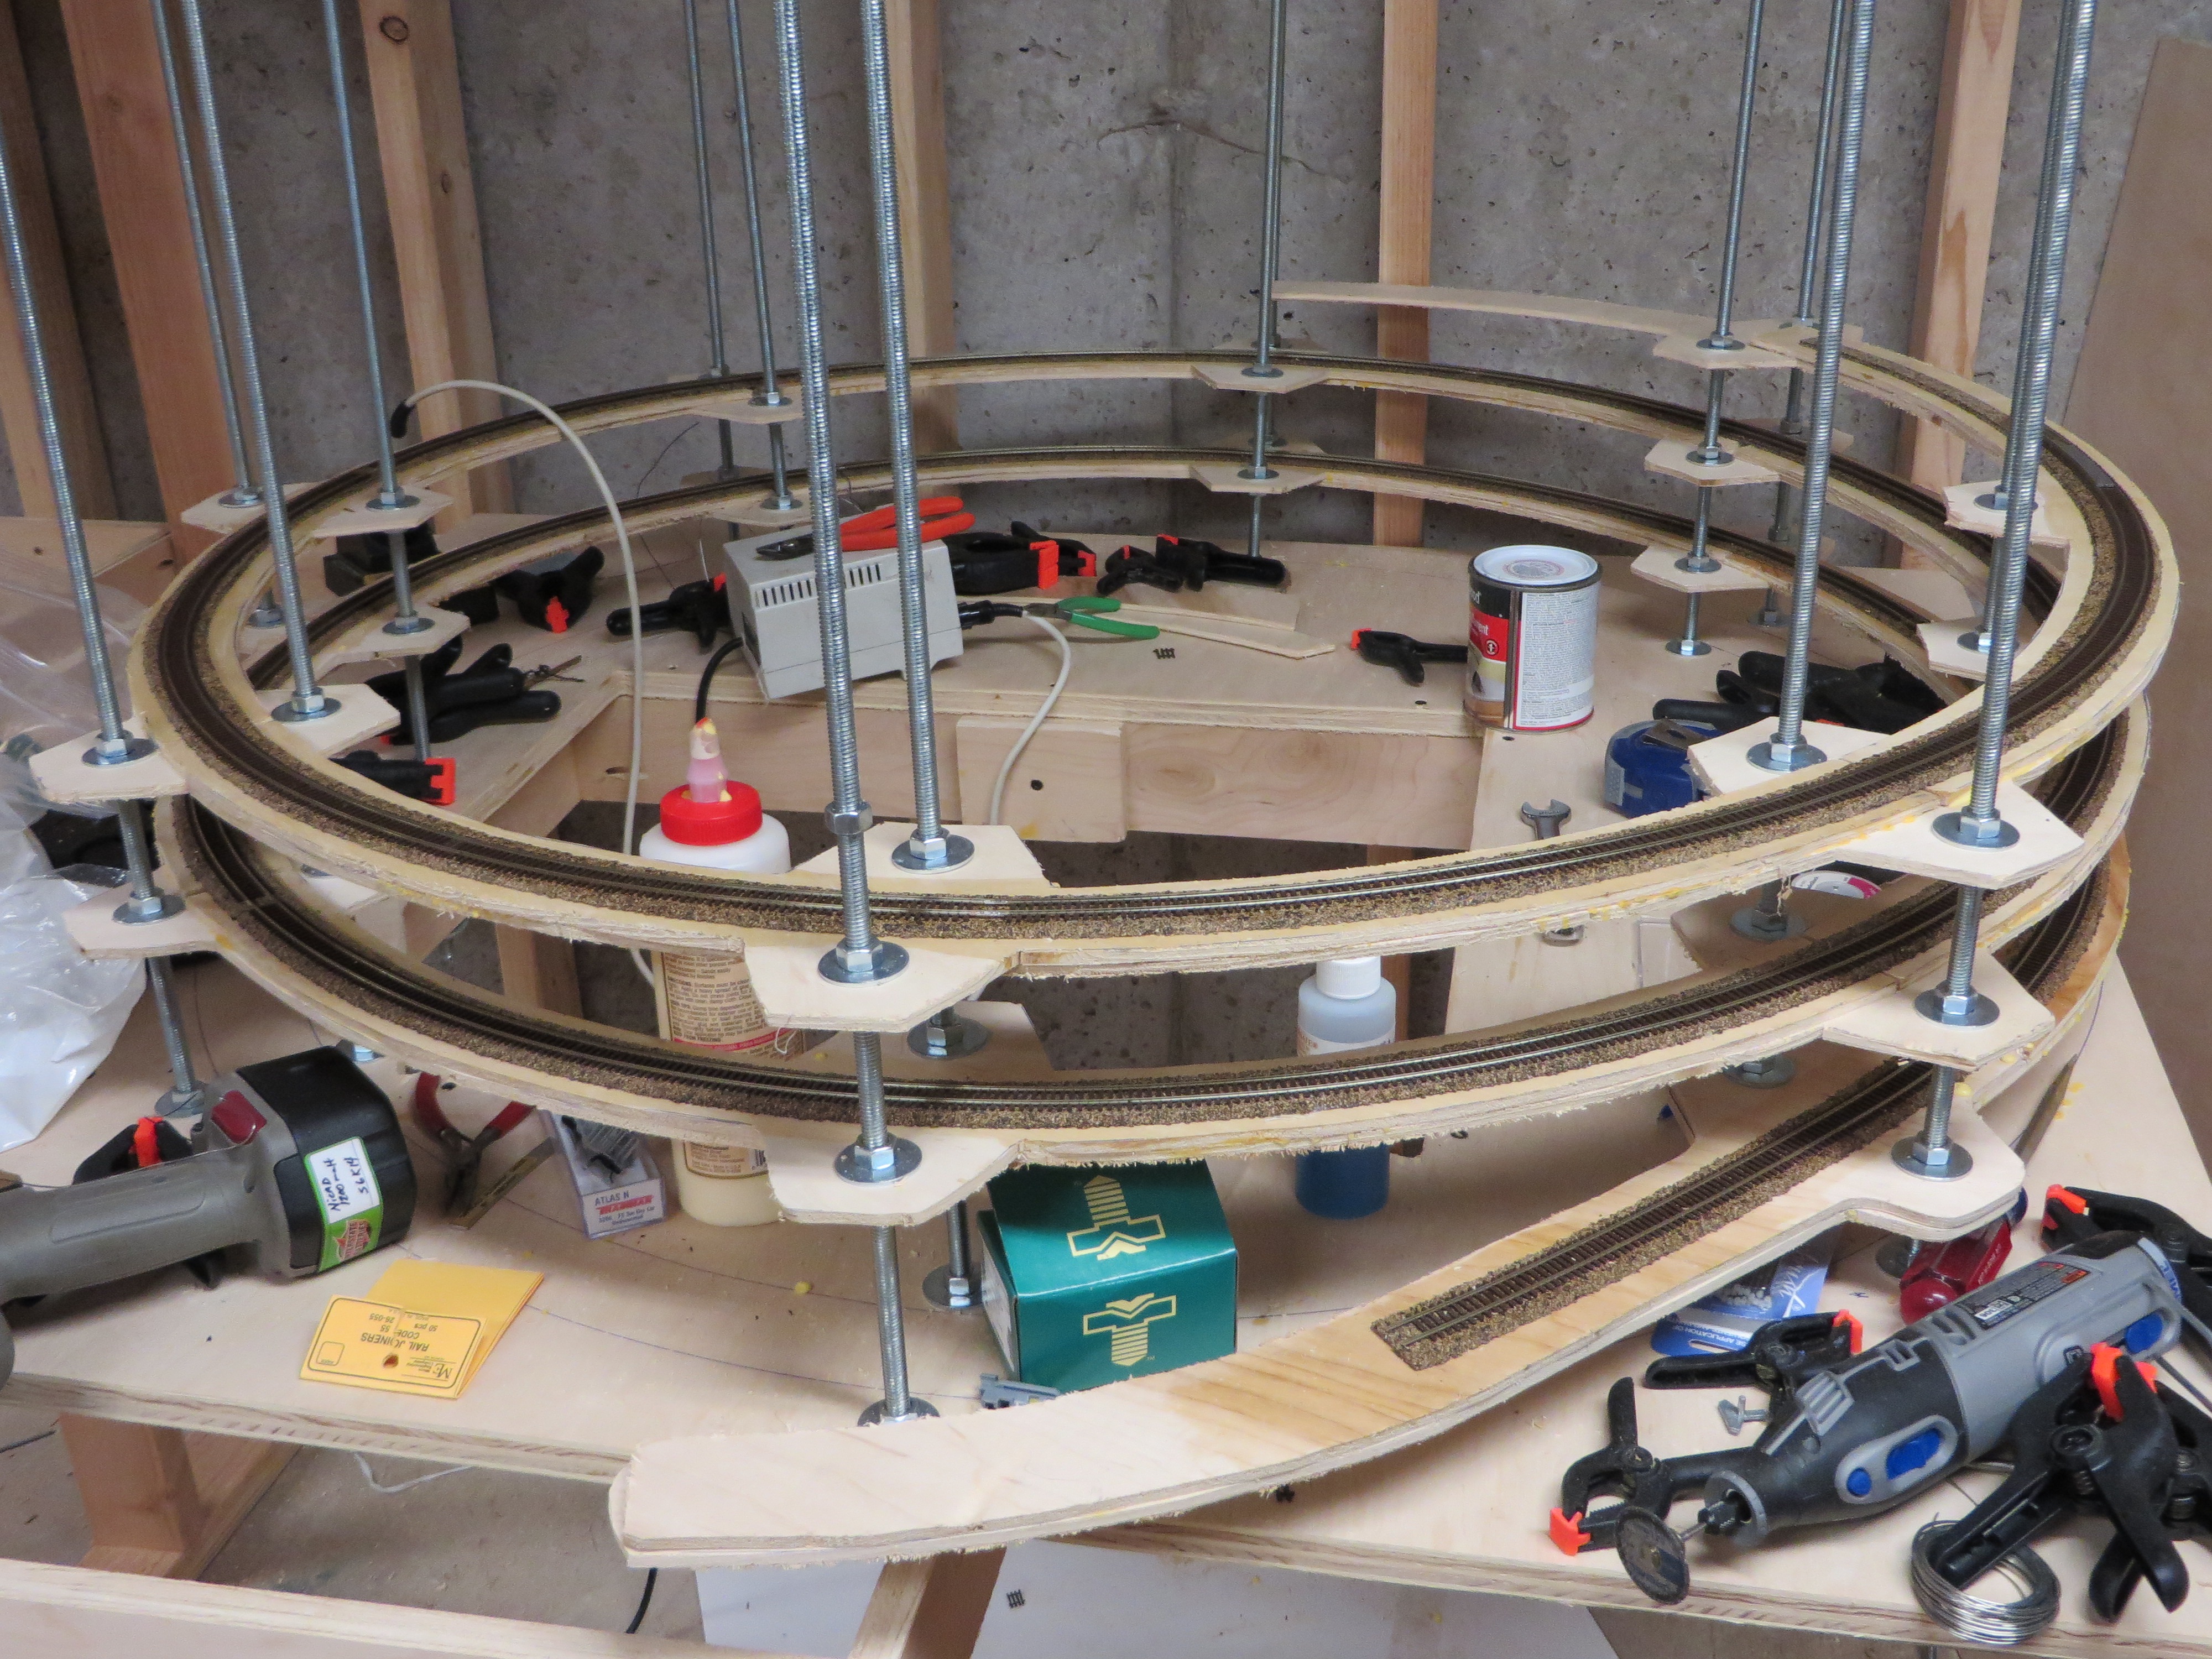 As of when I called a night tonight, this was the status of the helix – about halfway through the third turn. The roadbed and track are both held on with my usual method of DAP Weldwood contact cement. I’m out of plywood segments that have been cut, so I’m calling it a night at this point. I’m taking Labor Day off to take in a baseball game (and then some – the Rockies still have three make-up innings against the Giants from a rained-out game last May, so tomorrow will be at least twelve innings). Regardless, it’ll be a break from the basement. I do plan to do some pull tests using a couple SD60Ms and ore cars to make sure we’re in the ballpark – no pun intended – of having the right grade for the trains I plan to run.