Since 2020 is officially the year of not leaving the house, I’ve actually made some progress on the CR&NW. More of my time has gone to other projects, like resurrecting a 1940s searchlight signal in my back yard, but the layout is moving forward.
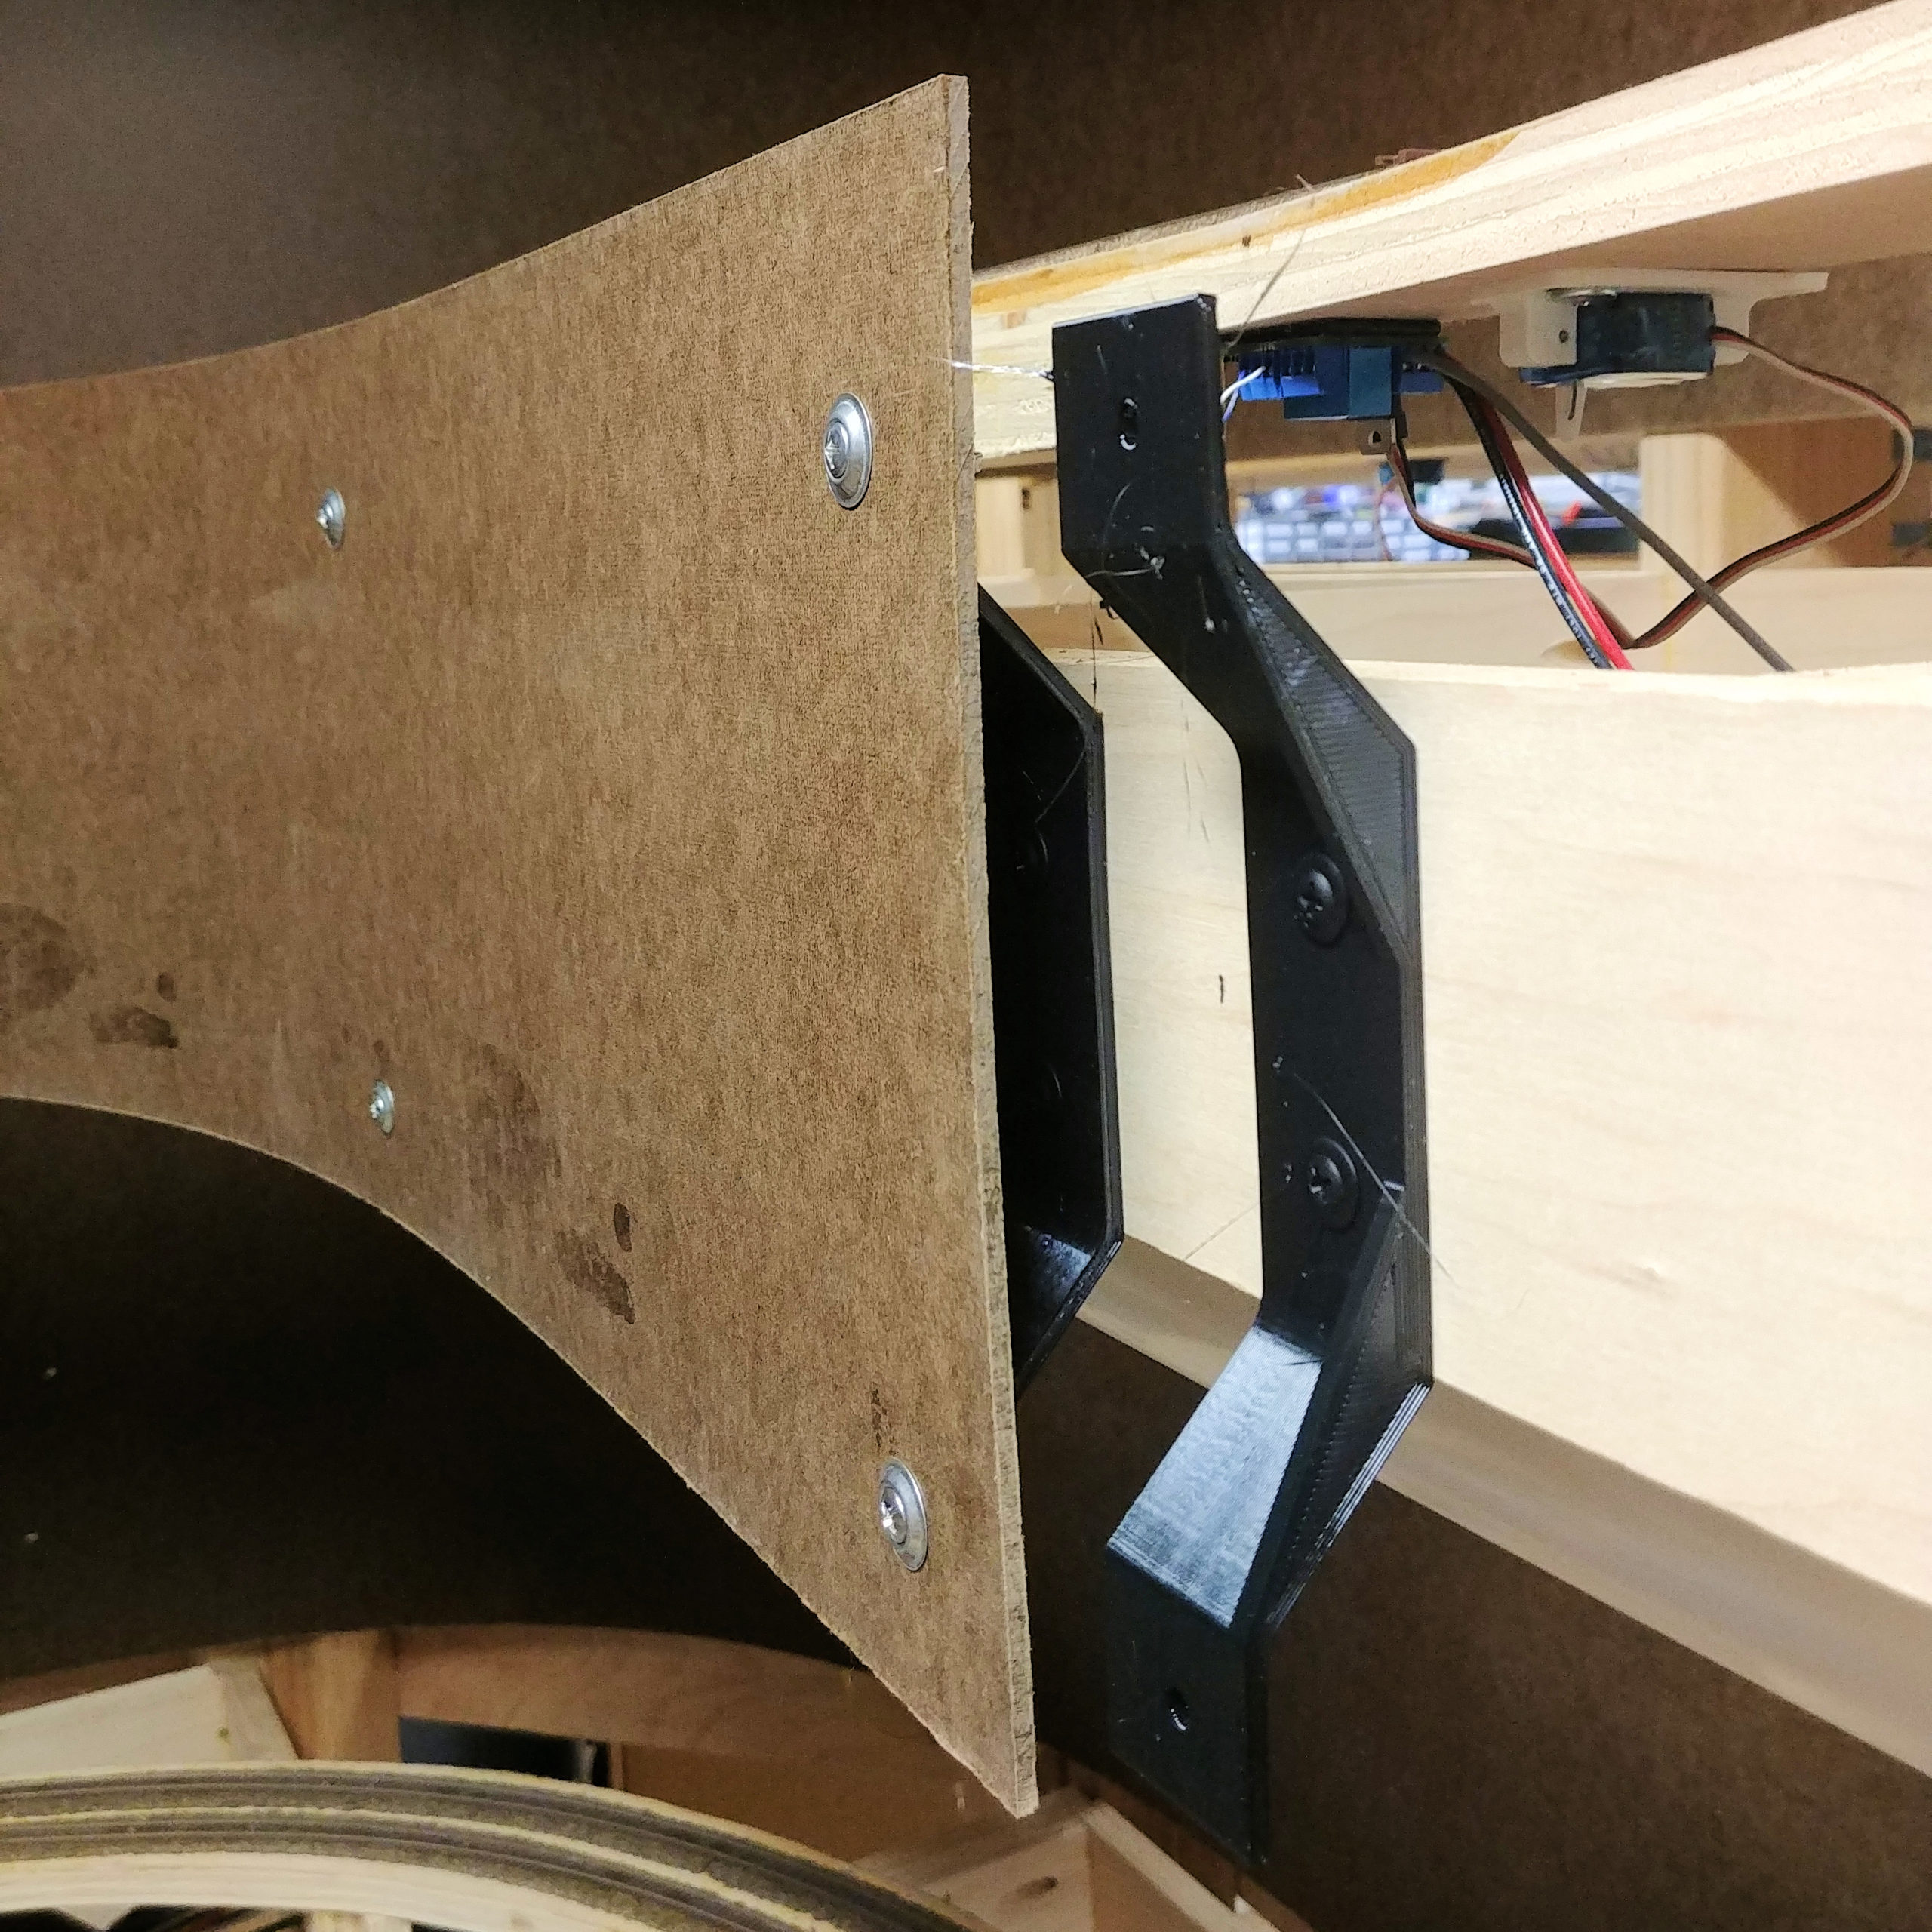
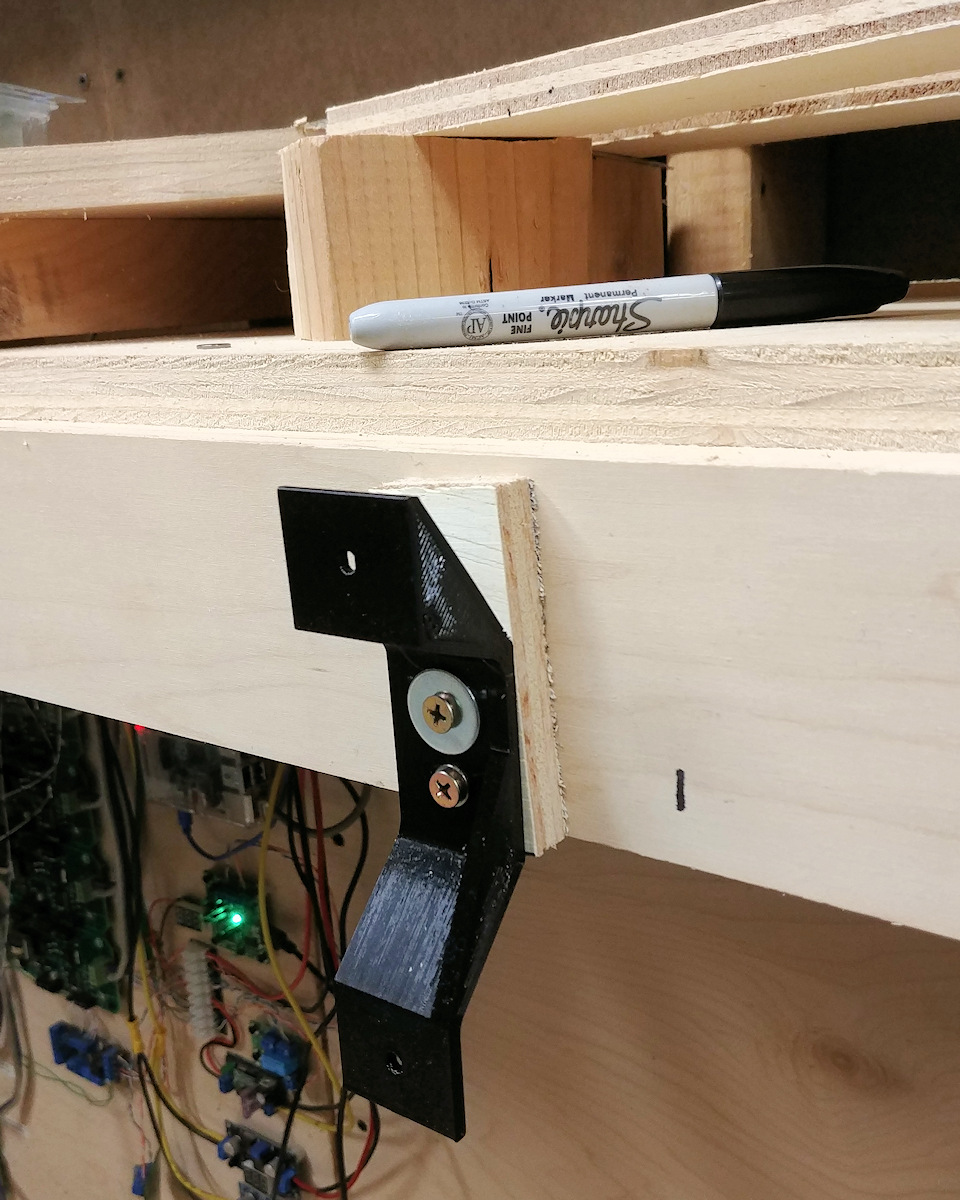
One thing that’s never been quite clear to me is how folks attach fascia board to open grid benchwork in a secure way, such that it’s solid enough to support the weight of an operator who stumbles, yet there’s enough room behind it for the mounting of controls and some modest wiring. If you just screw it straight into the front of the grid, it’s solid but there’s no room for switches and wiring. If you mount it on some standoff wooden blocks, there’s room behind, but has a lot of flex to it. Plus that’s a lot of standoff blocks to cut.
Then I realized I have a 3D printer and this seems like an excellent way to solve the problem – printed standoff brackets.
Bracket Types
My standard fascia board is 9″ high for the front of both main track decks, and 7″ high on the upper lighting valance. If this is mounted so that the top of the board is roughly even with the top of the 3/4″ plywood subroadbed, that gives 2.75″ of fascia below the benchwork grid. That’s plenty to hide the LED light tubes, wiring, and everything else that lurks under the benchwork.
I’ve standardized on three styles of bracket:
Dual Mount Point 7 Inch – These are the general purpose brackets, used for pretty much anywhere that the scenery level will be nearly even with the track and thus the 9″ fascia will be left full height.
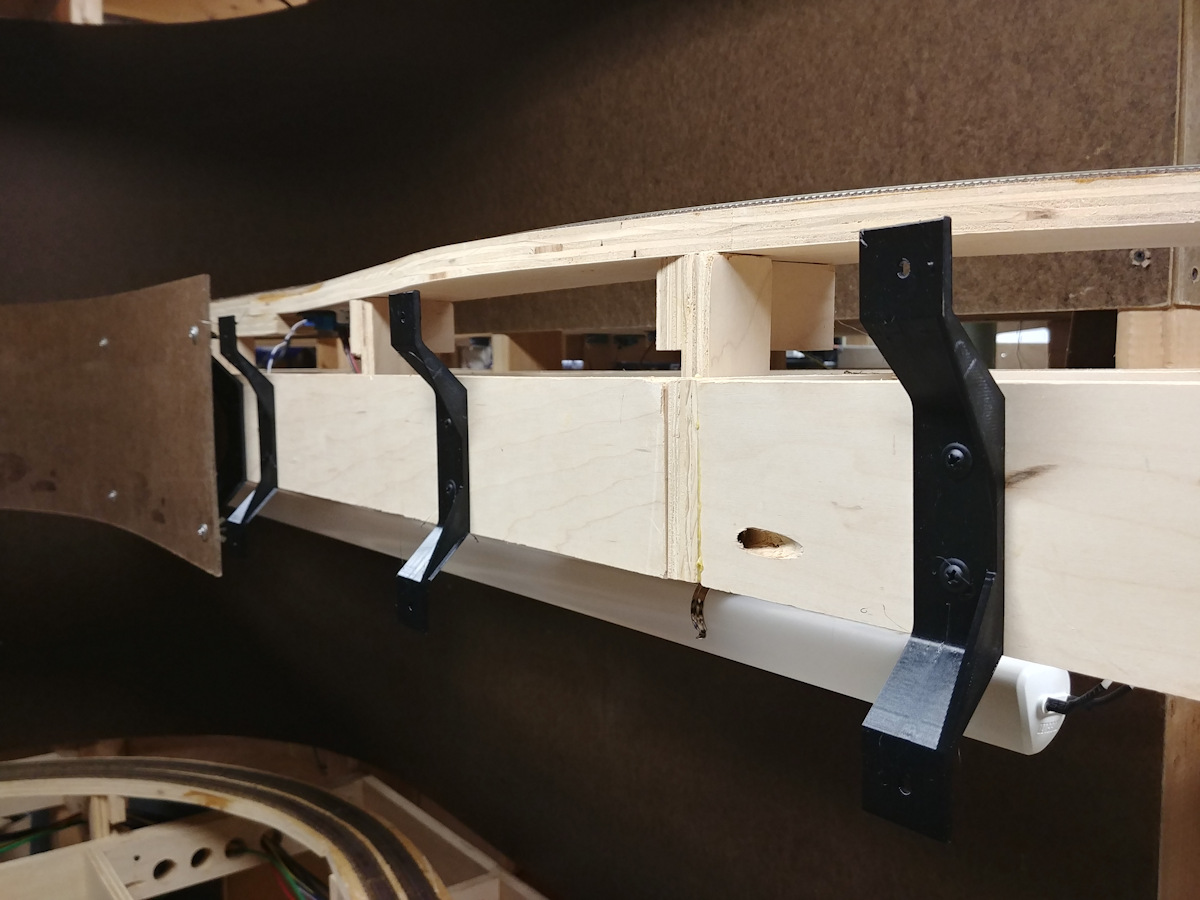
Dual Mount Point 5.25 Inch – These are the short brackets that support places where the scenery will be significantly below track level and thus the fascia will be cut to a shorter level. Applications include the Cordova harbor, the various river crossings (Kennicott River, the various Copper River crossings, etc.)
Lower Mount – These are essentially “half brackets” made for places where the top of the fascia attaches to sheet plywood, such as in the McCarthy, Cordova, Chitina, or Eyak yards.
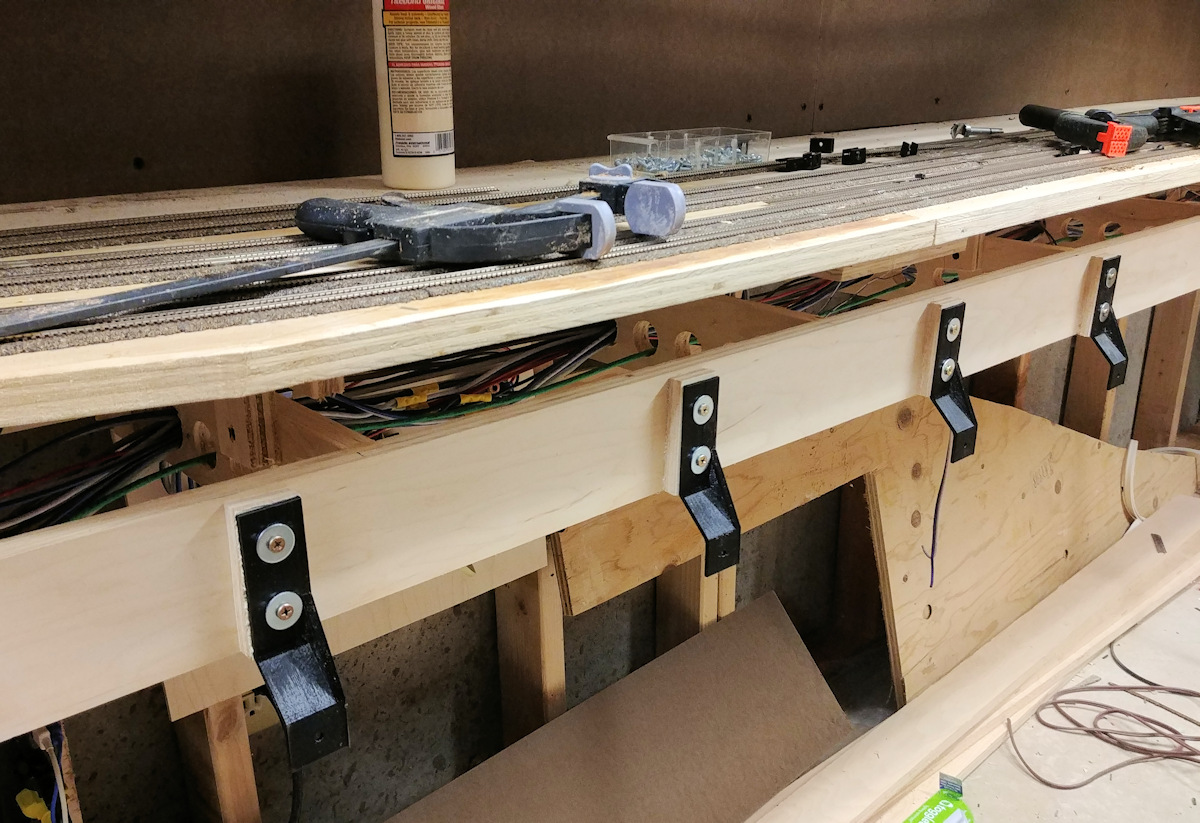
I’m putting the brackets at roughly 1.5″ in from each end of a piece of fascia, and then roughly every foot in between. Once they’re located and attached (using 3/4″ truss head lath screws), the fascia is then formed over the brackets and held in place with temporary clamps. Starting at one end, I drill 5/32″ holes from the back through the bracket and hardboard. Then I put in the following hardware stack-up to hold it:
- Bracket screws are McMaster part 91802A196, 8-18 stainless Phillips Oval Head 5/8″ screws. Alternately, for attachments near joints, 91802A197s are used (3/4″ version of the same thing) to allow for a splice plate on the back.
- The front has a 8-18 stainless flanged washer, McMaster part 90333A009. That meshes with the screw head nicely, preventing it from snagging passing clothing, and spreads the load over the hardboard so it won’t pull through.
- The back has a zinc-plated oversized washer, McMaster part 91090A101. That spreads the load over the printed plastic bracket. I went zinc-plated steel here because it’s out of sight, and it was considerably cheaper than stainless.
- Finally there’s a wing nut on the back, again zinc-plated steel, McMaster part 90866A009. I went with wing nuts so that I didn’t have to try to get pliers or a wrench back behind to snug everything up – just my fingers.
Where the fascia is going directly on to the wood frame, it’s attached using a #8 x 3/4″ oval head stainless wood screw and one of the flanged washers. Also, at the end of segments, I’ll cut two 1″ hardboard strips and run one between the two top screws and one between the two bottom screws on the back side of the bracket (so between the bracket and rear washer). This helps assure the two pieces of hardboard won’t move independently (much) and create an uneven joint.
All of the bracket STLs and Fusion 360 files are here on Thingiverse.
The Results
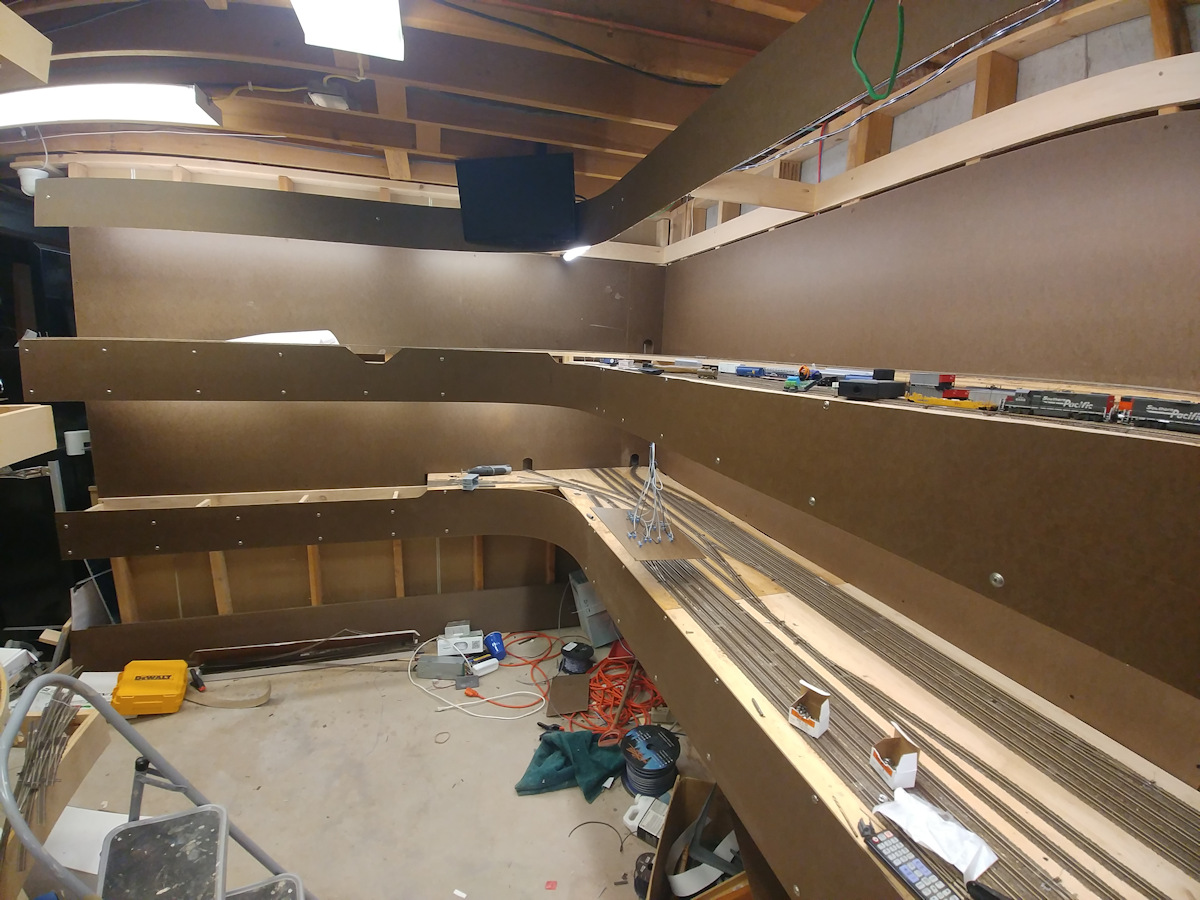
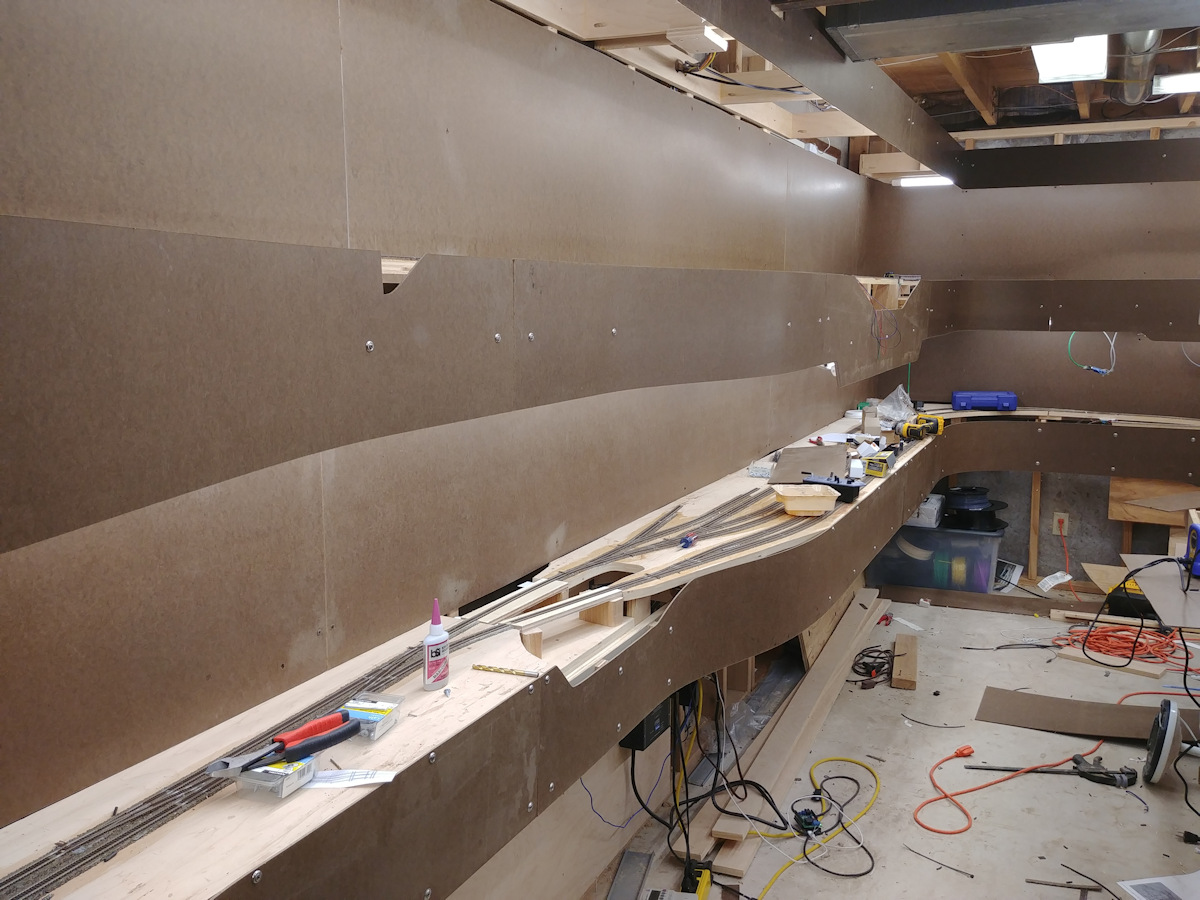
I can’t believe what a little backdrop and fascia will do for making things feel much more “finished”. After many delays, this feels like a real, concrete step towards an operational layout.
Fascia and backdrop board now extends all the way from the Cordova / Kennicott end of the layout back around to roughly Strelna (on the top deck) and Alaganik (on the bottom deck). I need to get more hardboard cut before I go much further, as I’m out of 7″ strips for the valance and down to only a couple 9″ left. My table saw is ancient and terrifies me (safety guards, what are those?), so I’ll probably head out and use Michael’s at some point this week.