As long-time readers (or others who know me) know, I have a bit of a fascination with layout lighting and making it part of the overall operating day experience. Plus, it’s easier to work on a layout – either from a construction, detailing, or operations standpoint – when there’s excellent lighting. So in today’s post, we’re going to look at what I settled on for lighting the Copper River.
Early Bad Ideas
When I started the layout years ago, I made several abortive and overly complicated efforts to use LED strip lighting to allow me to change light color temperature for night, morning, noon, and evening. These all proved impractical, mostly because at 12 or 24VDC, lighting a layout adequately is tough and requires a mountain of current. (A rough estimate – about 800W, or 67 amps, would have been needed at 12V.) Multiple noisy high-power supplies and large, heavy gauge power supply lines would have been needed to supply the necessary power for 200 linear feet of lighting (100 per deck). In addition, it turns out LED strip lighting from the 2013-2014 era was largely crap. Testing some of the strips I bought back in 2013 only a few years later, many had failed due to internal corrosion issues. I would have wound up replacing the whole system even before the layout was complete.
My Lighting Solution
Fortunately, LED lighting has really come a very long way in the last 10 years. For my purposes, one of the most important advances was the direct-wire (meaning, runs straight from 120VAC, no ballast), dimmable T8 tube replacements. These would allow me to use 120V through a standard triac-style dimmer to light the whole layout, use reasonably light (16ga) wire, and do it very evenly without all the little points of light created by raw LED strips. Plus, since they were already packaged as an end-user product, all of the longevity, thermal, and electrical safety issues had already been addressed.
My tube of choice became the Toggled D-series at a color temperature of 4000K. They’re light (being all plastic), they’re dimmable, they’re an American company (though actual manufacturing is overseas), they’re available at Home Depot (though I ordered directly from Toggled since I needed 32 of them), and they’re available in 2, 3, or 4ft lengths.
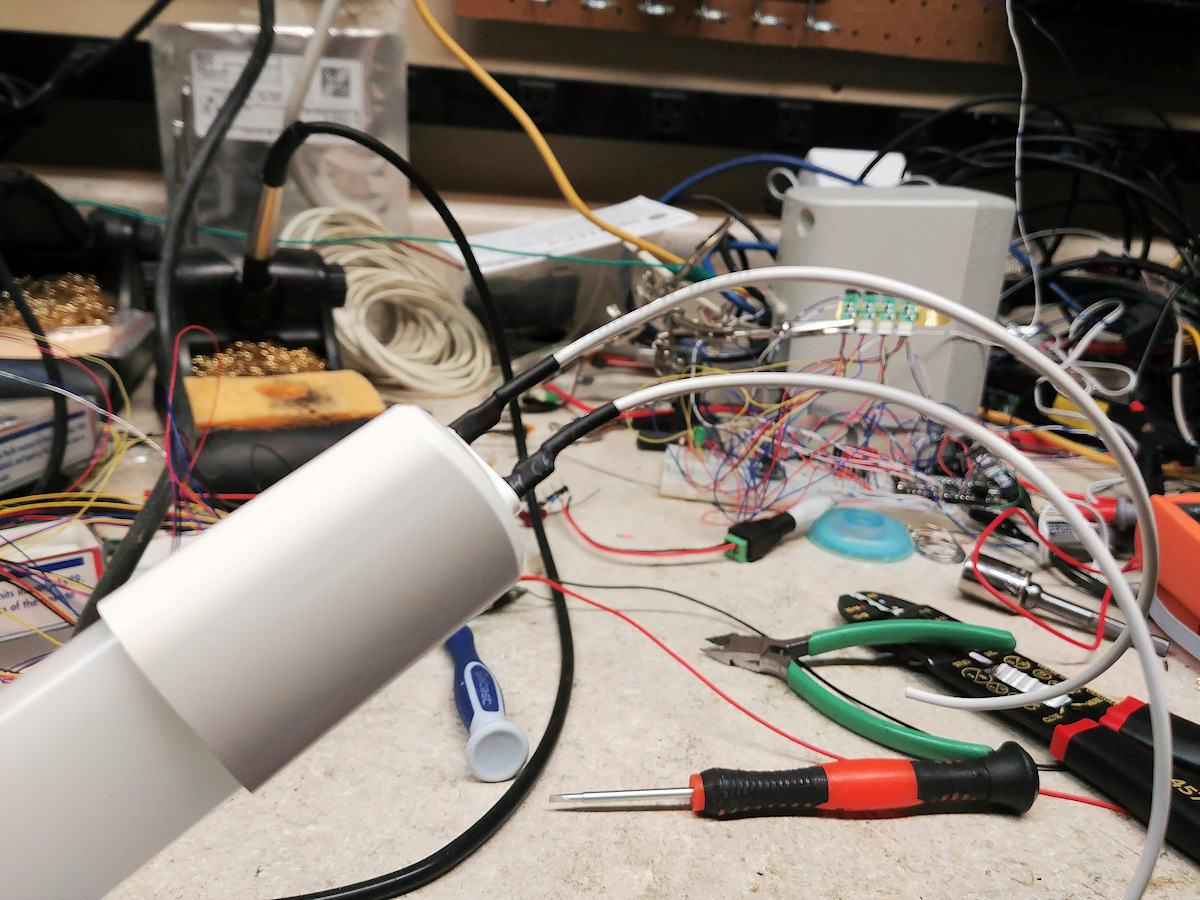
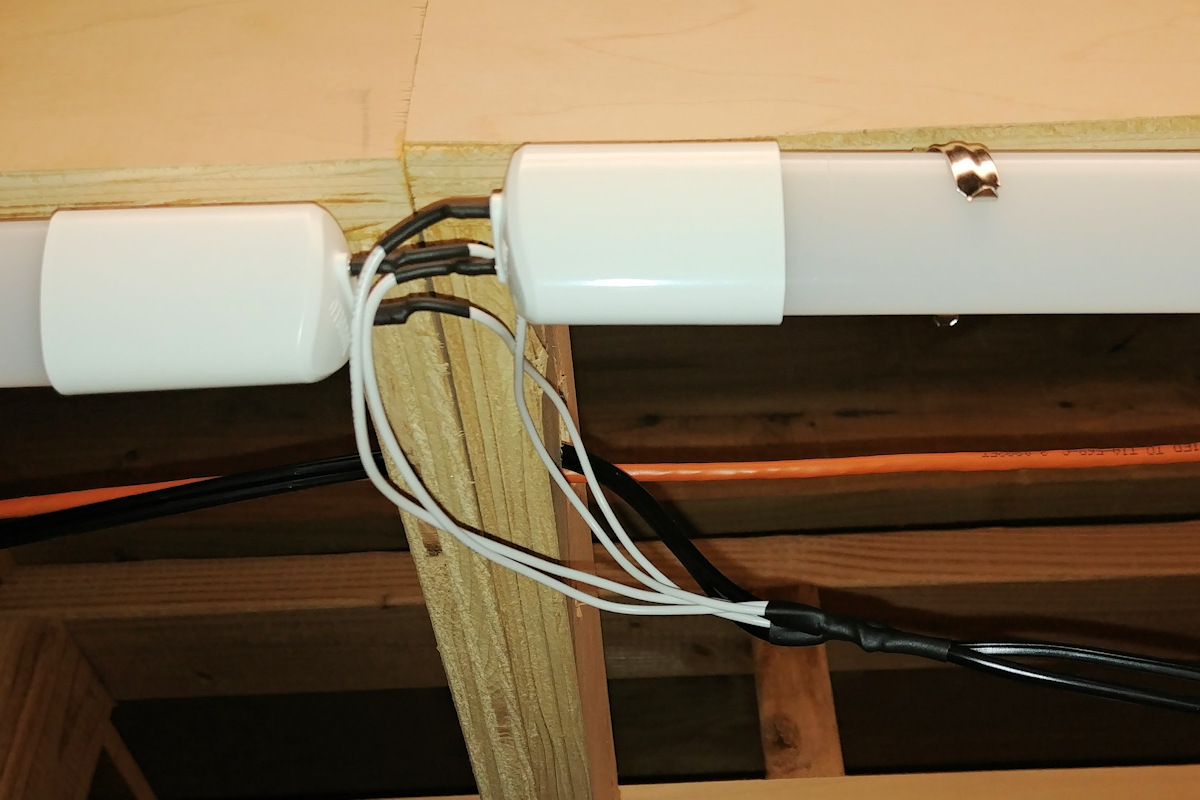
On each tube, power is fed in from one end only – hot to one pin, neutral to the other. Rather than mess with fiddly fluorescent tombstones, I just solder wires (each about 8″ long) to each pin and then heat-shrink over them for safety.
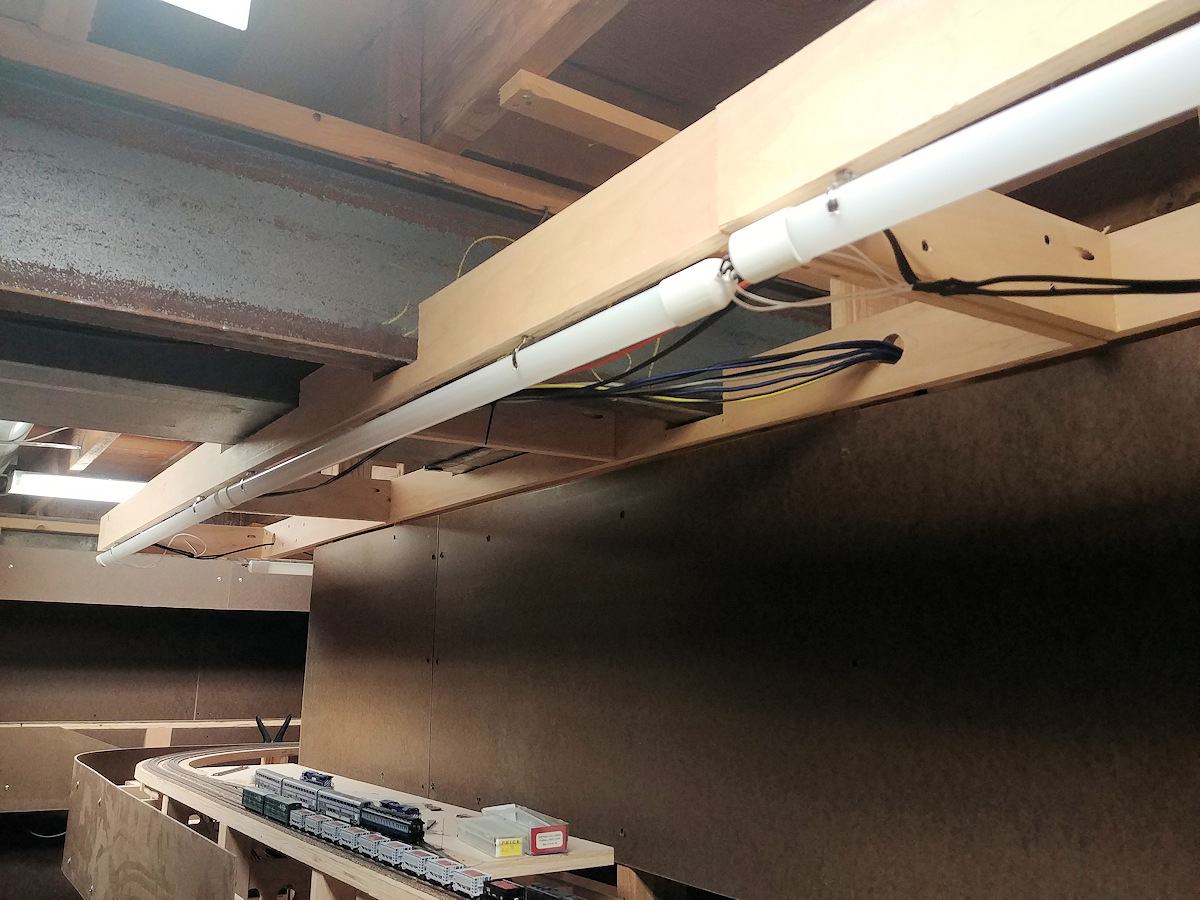
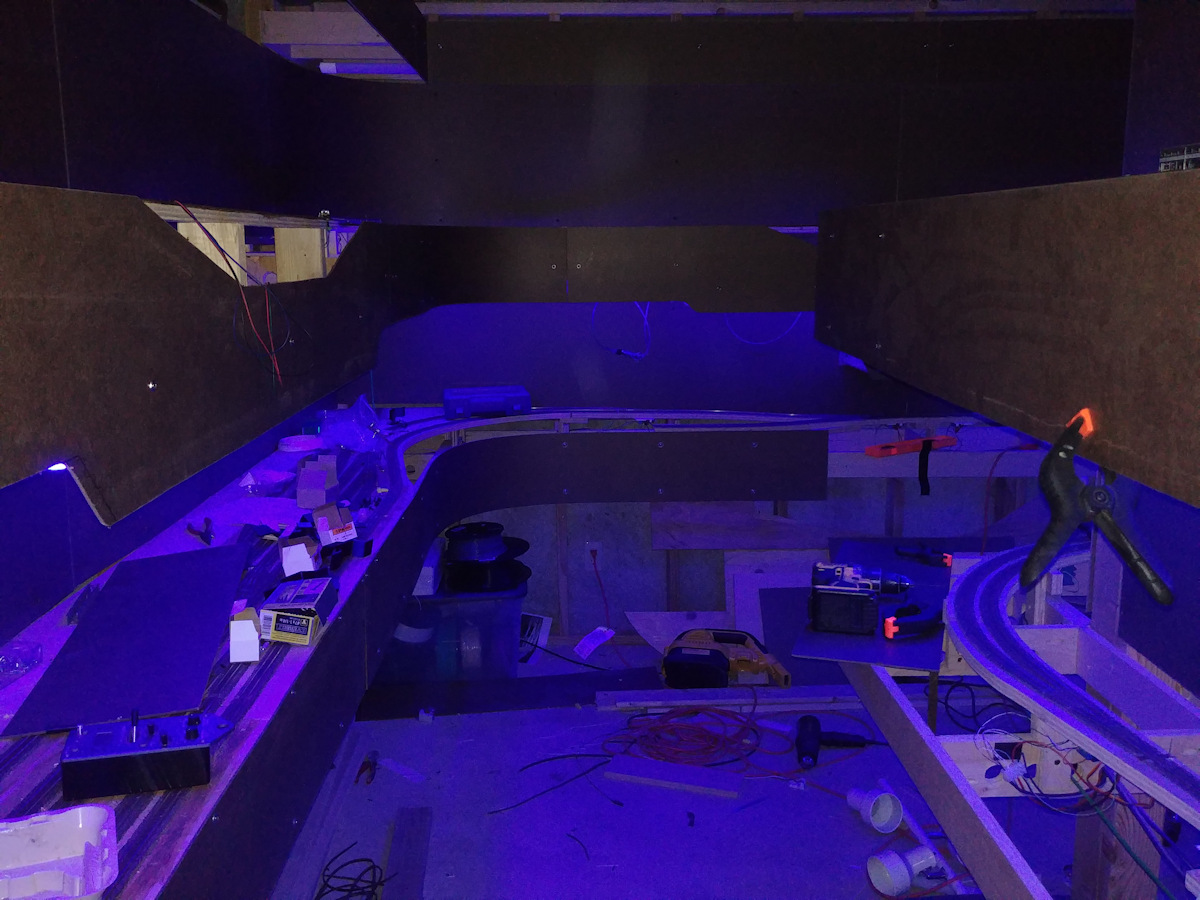
Metal clips designed to hold T8 tubes (found on eBay) are attached to the front underside of the benchwork using #6 1/2″ pan head screws. The Toggled tubes are inserted into those and angled slightly back, so that they send most of their light towards the layout instead of sending a sizable fraction into the back side of the fascia board.
Night Lights
While I’d mostly abandoned my idea of shifting the color temperature of the light over the course of a scale day, I had not abandoned the idea of night operation and the need for “night light”. Kennicott, at the north end of the line, is still far enough south to have ~4 hours of night (more like deep twilight) even on the summer solstice. Since on my layout it’s always September, you’re looking at a bit over 8 hours of true darkness at the beginning of the month and 11 hours at the end.
While the white LED tubes can be dimmed way down (about 10-15% of full intensity), it’s still bright white light. So for simulating night operations, I’ve run a strip of 120V blue LED “neon glow” rope light around the layout. I found mine on Amazon by searching for “LED neon rope light”. This stuff has an LED strip embedded inside a tough flexible plastic shell that acts as a diffuser. It’s quite bright, and provides more than enough illumination for night operations.
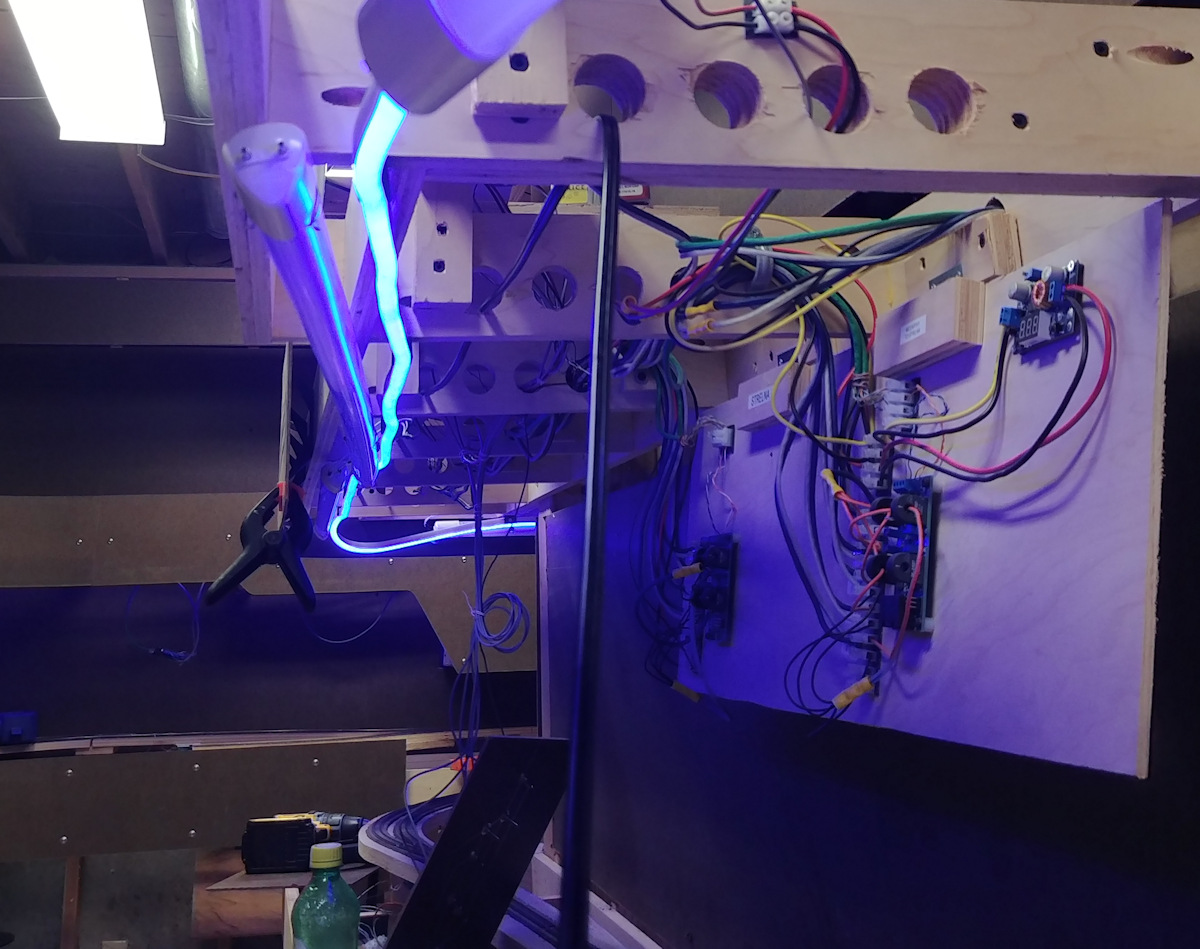
The rope light is mounted just on the inside edge of the LED tubes using 3D-printed clips I found on Thingiverse. Those are screwed into the benchwork using the same #6 1/2″ screws that hold the LED tube clips. (Well, typically the rope light is mounted on the inside edge of the tubes – there are exceptions on some corners where the strip wanders out and around the tubes.)
Wiring it All Together
Once the tubes are installed, I ran 16 gauge black lamp cord around each deck, soldering and heat-shrinking the connections for each interconnection to a tube or pair of tubes. Typically I’d try to put the powered ends together on long runs, so that I’d only have to make half the number of splices (could connect a pair of tubes at one point). Here’s a photo of a typical connection:
Given that the tubes, no matter the size, are roughly 4 watts/foot, that gives me ~400W total load on the upper deck and ~400W on the lower deck. It won’t be perfectly even, as the Chitina yard extends back over where the helix is on the lower deck, but it’s close. 400W / 120VAC = ~3.3A. Even allowing a safety factor of 2x, that’s still less than half of the 10-13 amps that 16ga lamp cord is typically rated to handle.
Back at the layout electrical panel, the line from each deck is plugged into a channel on a DMX512 dimmer pack. Yes, the type used by theater lightning folk and DJs at dances and weddings. Why DMX512, you ask? Because it’s a simple, relatively robust industry standard for controlling lighting. Thus, there’s a lot of tested, proven gear out there like my dimmer pack, and as such it’s a perfect way to dim these 120VAC lights. I’m also building support for DMX512 into the next version of Iowa Scaled Engineering’s Fast Clocks, so I’ll be able to directly control and sync my lights from my fast clock head unit.
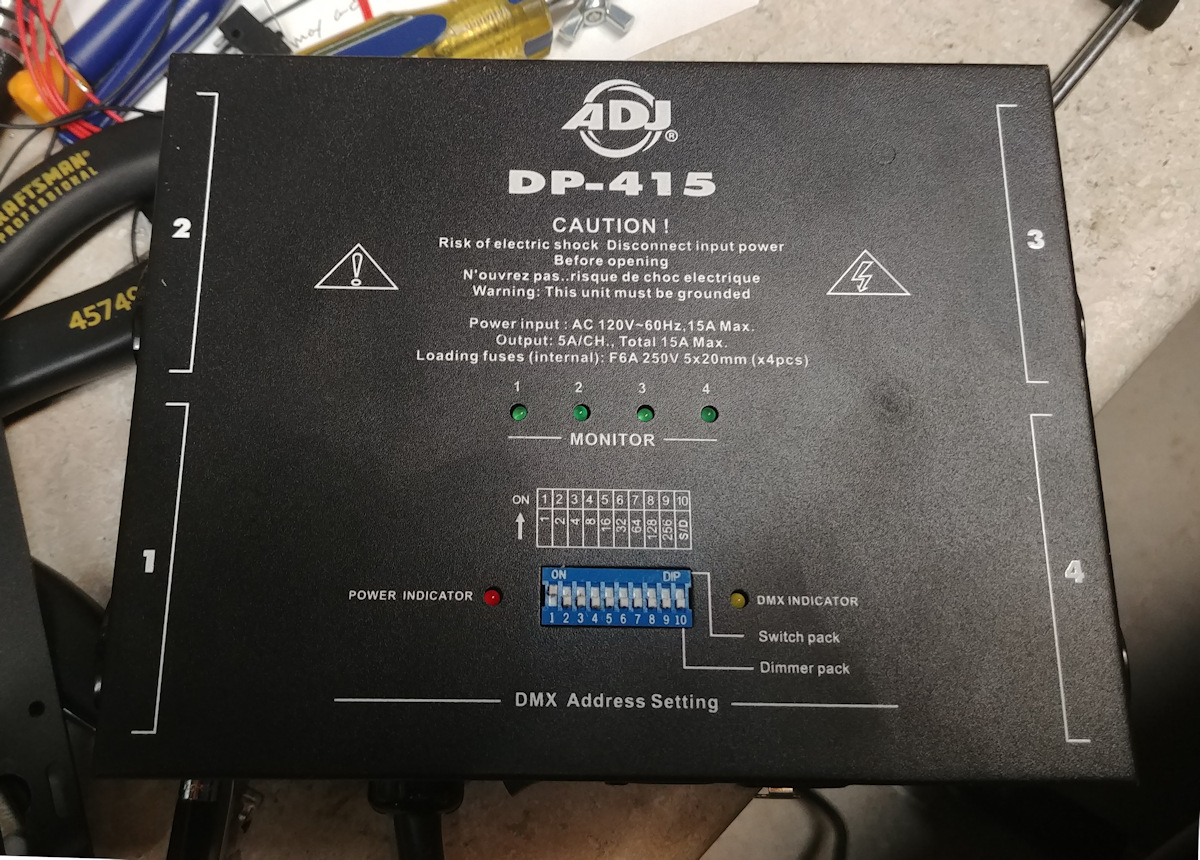
My dimmer pack is slightly used American DJ DP-415 that I picked up cheap off eBay and repaired. Pretty much only two things go wrong with them – fuses blow or the triacs self-destruct from a short or an overload. The fuses are just standard 5x20mm fuses, and are easily changed with the cover off. The triacs are standard ST parts (BTA16-600B, to be exact – 16A, 600V, 50mA trigger current, 4-quadrant), and are easily changed (and up-rated!) with parts from your favorite electronics house.

So this brings me to the more important reason that each deck’s LED tubes are controlled separately – at 3.3A, it’s under what each channel of the dimmer pack is rated to handle. If I’d combined them all, I’d exceed the output capacity of one channel. That said, even at 3.3A, the inrush current when dimming was enough to blow the fast blow fuses that came with the dimmer pack, so I swapped them out for slow-blow 6A fuses. However, if this came face to face with a real short, it might be a tight race whether the triac or the fuse would go first. No matter, I have a soldering iron and it’s all inside a metal box. Plus I try very hard to not short out my mains wiring. As long as something inside a fireproof box fuses, I don’t care much what it is.
The Results
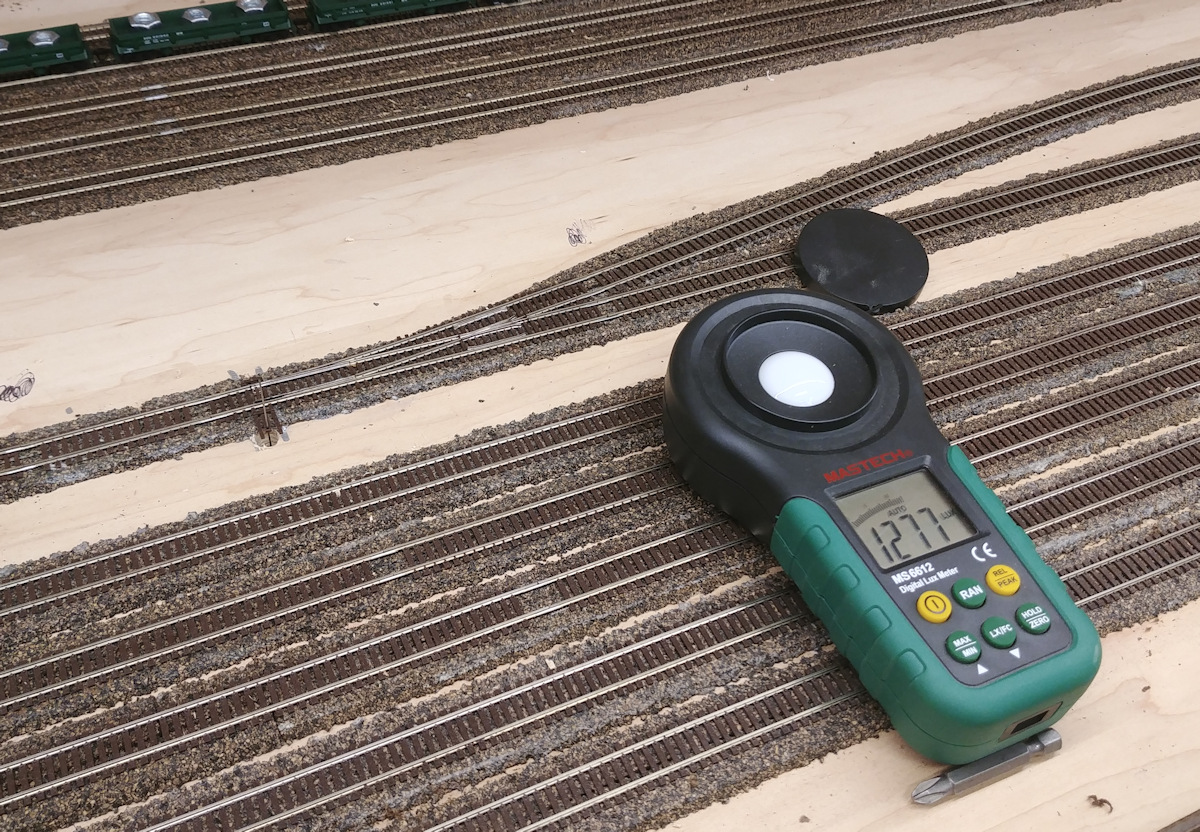
The results are excellent! Lighting up just the layout lights (room lights off) gives me between 1200-1500 lux at track level all over the layout. That’s well into the “good workbench light level” range