Honestly I got almost nothing done this weekend in terms of benchwork. Nearly all of my efforts went into other, non-model railroad tasks and then into working on the LED lighting system a bit more. I’m running another set of boards soon, and wanted to get enough groundwork done to get the LED driver boards into this batch.
Tasks left to accomplish were as follows:
- Work out mounting to layout and characterize thermal/electrical parameters in operation
- Solve the inductive ringing problem in the LED drive
- Plan how lighting control would be distributed and design power control board
Task 1: Mounting Considerations for LED Lighting
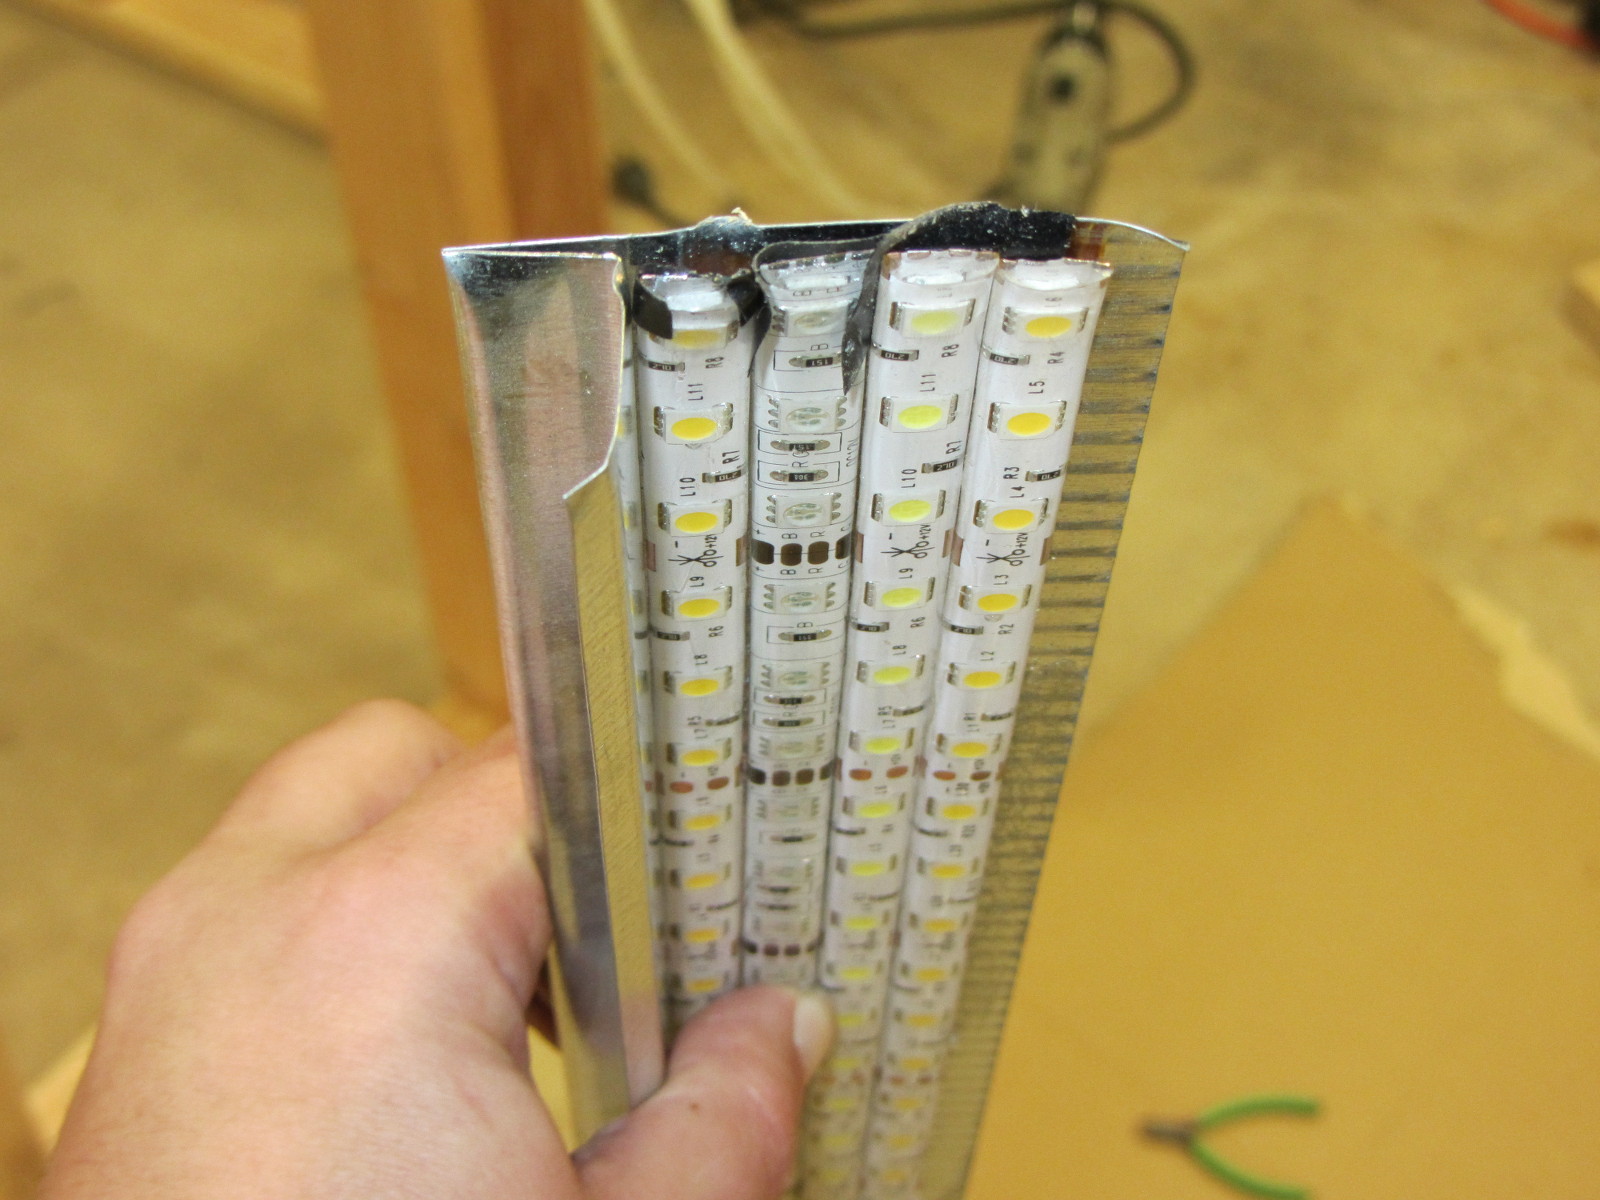
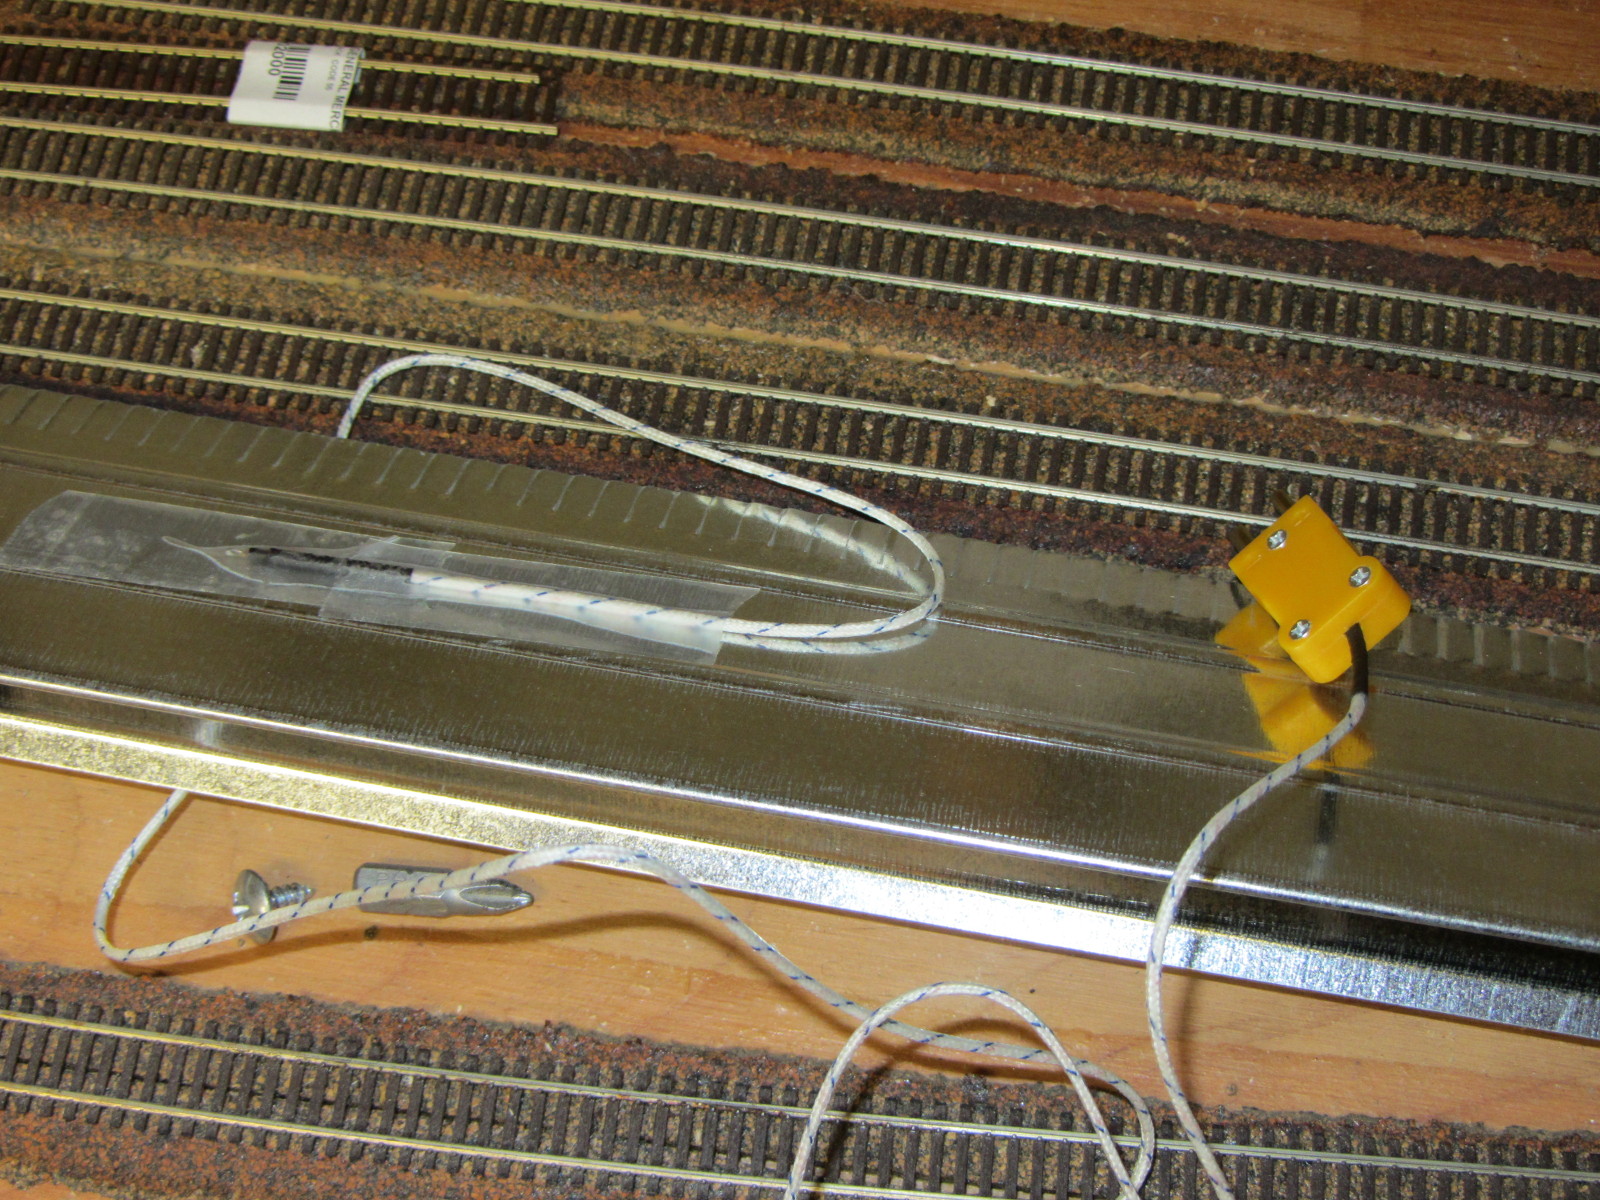
Some time back, roughly when I started benchwork construction, I found some great T-shaped galvanized steel drip edge (intended for roofing) at Lowes. Strong due to its folded shape, light, wouldn’t rust, metal (to provide some heatsinking and protection between a potential high current short and the wooden benchwork), and cheap ($~4 for a 10 foot strip when I bought it), it seemed the ideal material. Plus, the folded edge would reflect light back towards the layout and away from the aisles. I put a single strip in with one of my lumber purchases, and it’s been sitting in my garage for the last four months.
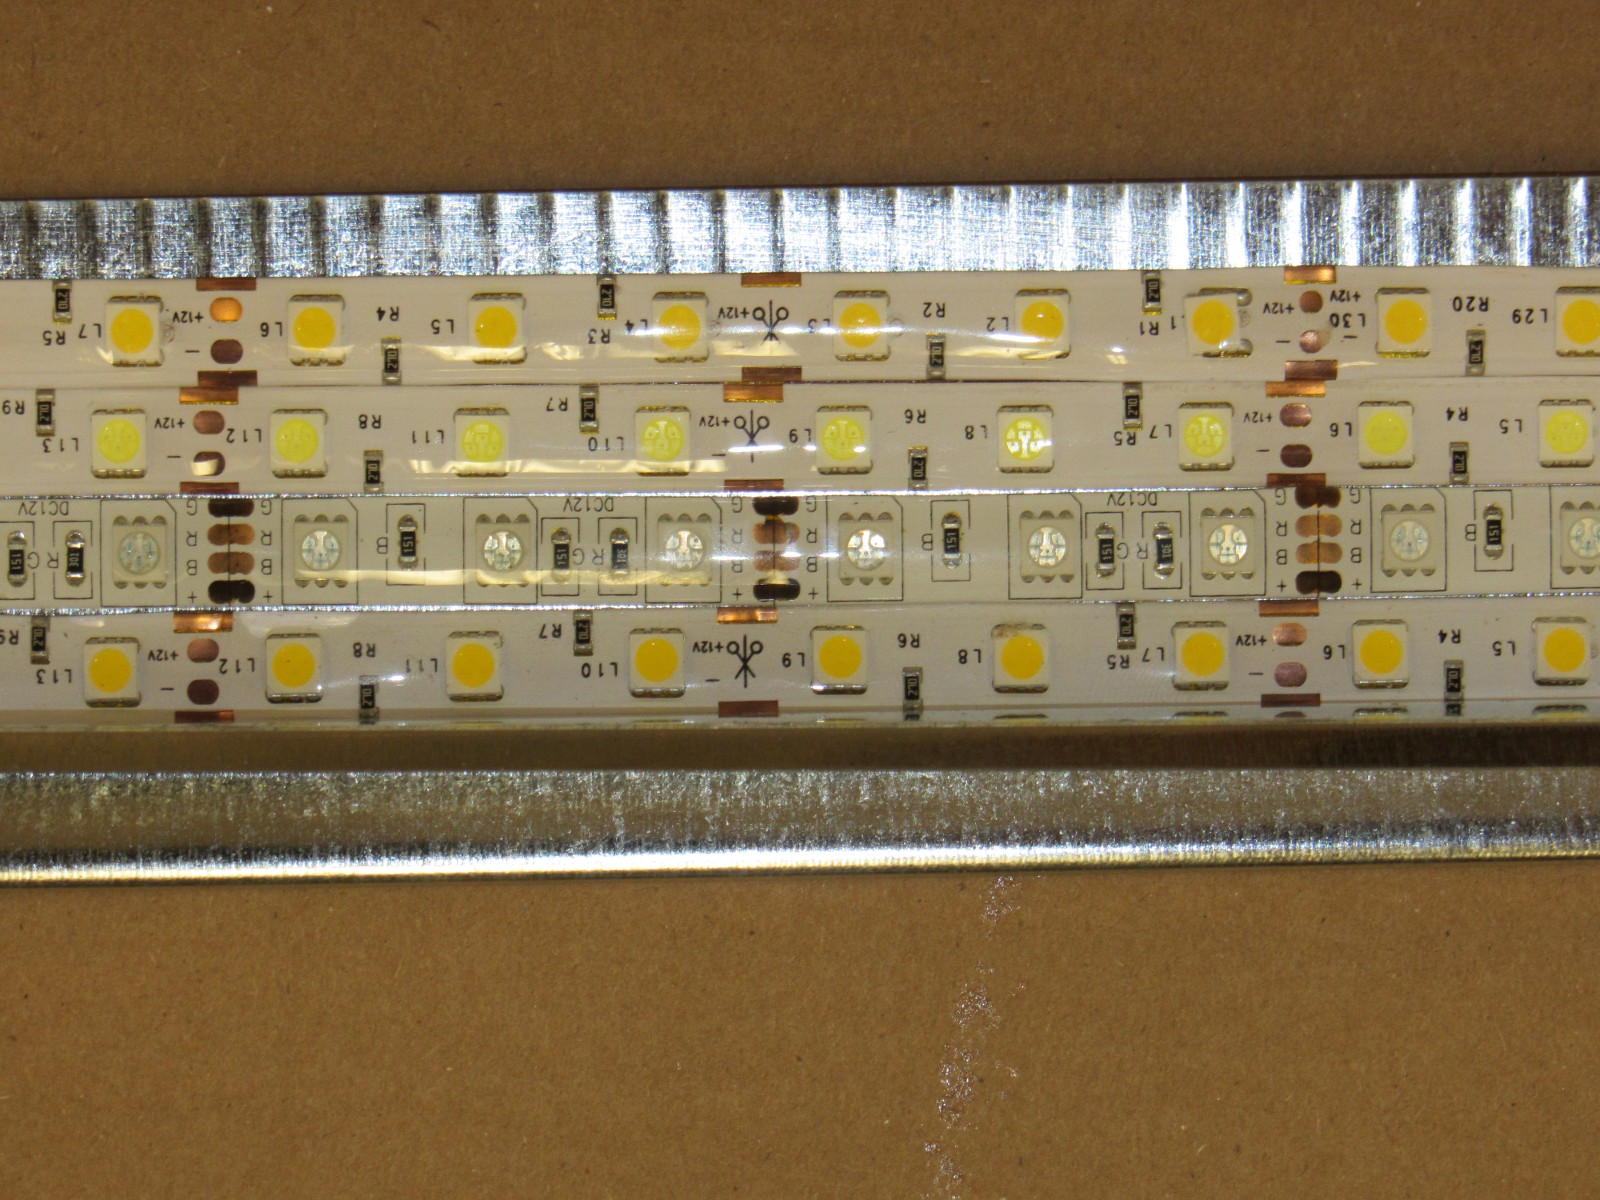
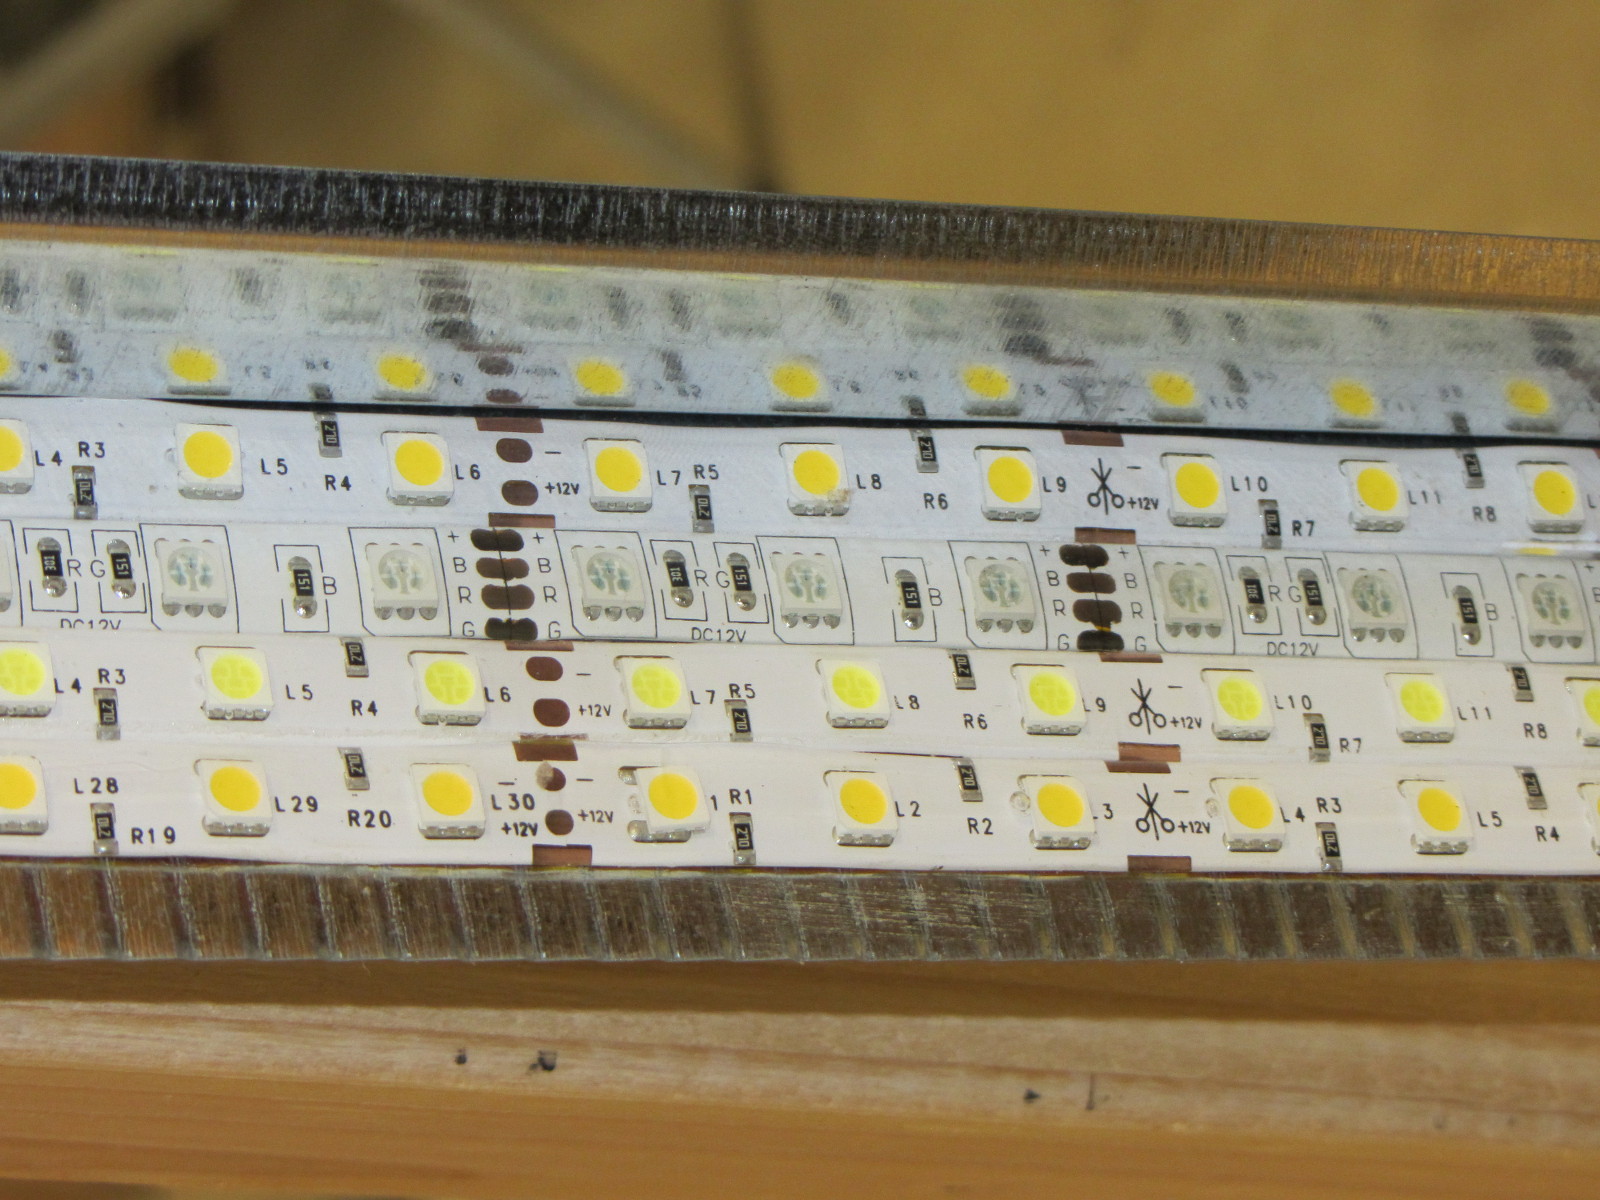
Today, I cut off a four foot section of the stuff, since that matched the LED strips on my test piece. Using a thorough coating of Loctite 300 heavy-duty spray adhesive (I’d previously tried my usual go-to adhesive – 3M 77 – and was underwhelmed), I laid out the four planned LED strips on the steel -warm white #1, RGB, cool white, and finally warm white #2. Each strip was harvested from the original test 2×3 board, so these have been used a number of times now…
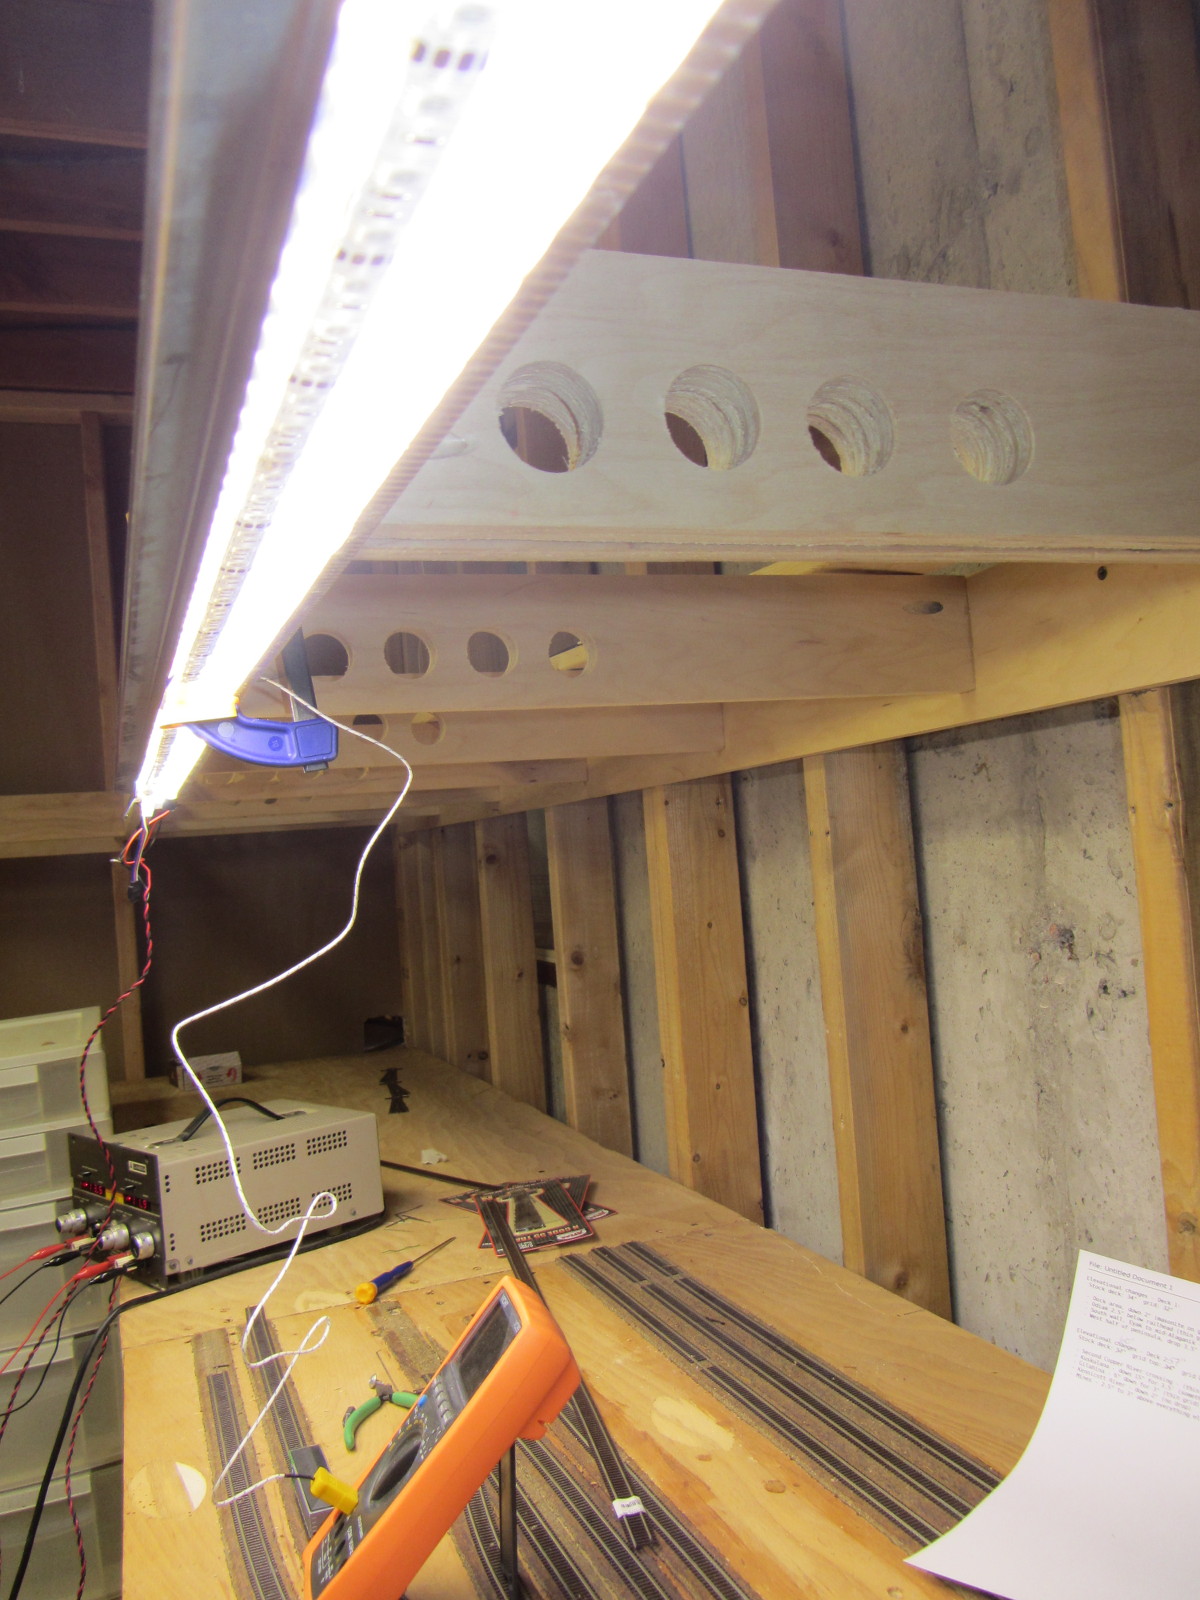
With the strip prepared, I then mounted a thermocouple to the top of the steel to monitor the temperature. Using a bar clamp, I attached it to the layout (in the usual test position, over what will become the Cordova yard someday) and powered it up with an old bench supply. Ambient temperature at this point was about 23C (73F). Current was approximately 3A for 3x 4′ strips of white being lit simultaneously.
I left the lights alone for an hour as I did other things, so that I could see where the temperature would stabilize. Turns out, the answer is at approximately 45C (113F). The steel was warm to the touch, but the strips were notably cooler after an hour of running then when they were mounted to a piece of wood. It looks like the heatsinking works! LED longevity is closely linked with temperature, and once you pass an operating temperature of 50C, things start going downhill in a hurry. 45C for three strips running at 100% (more than I plan to run in actual operating conditions – my plan is currently at most 2 at 100%) is pretty darn good.
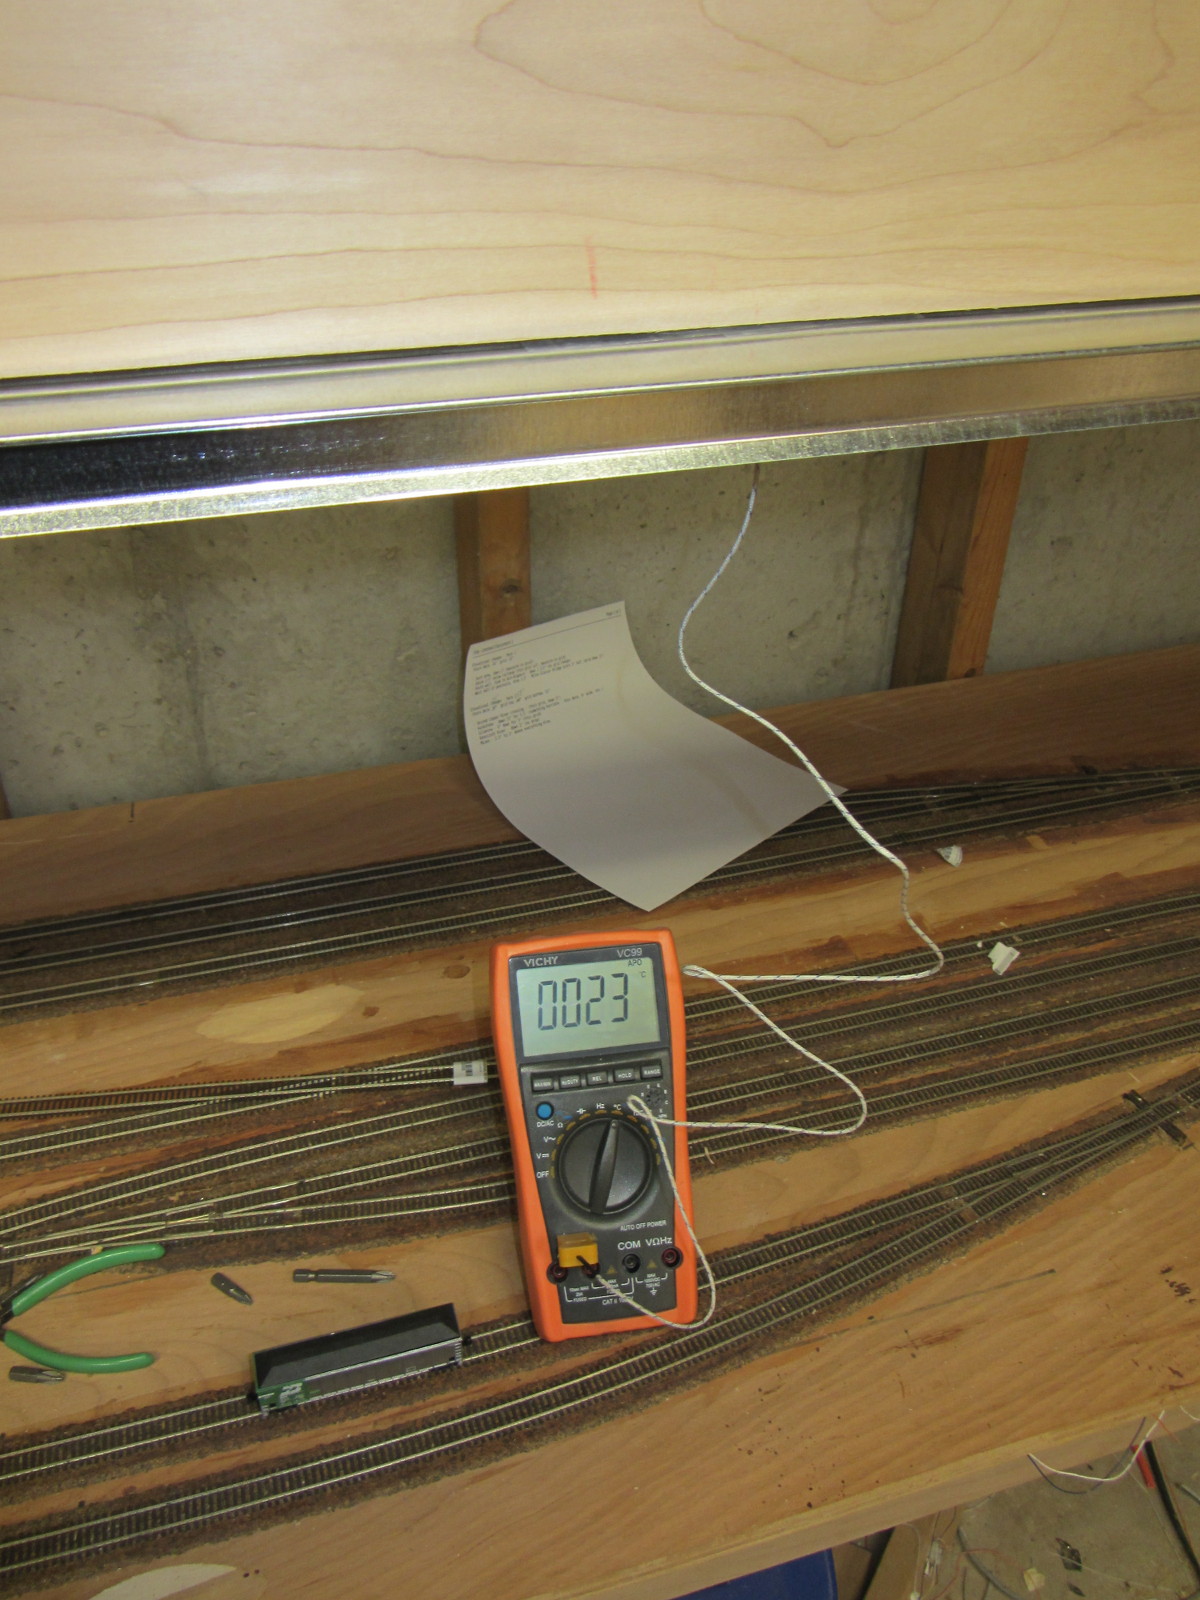
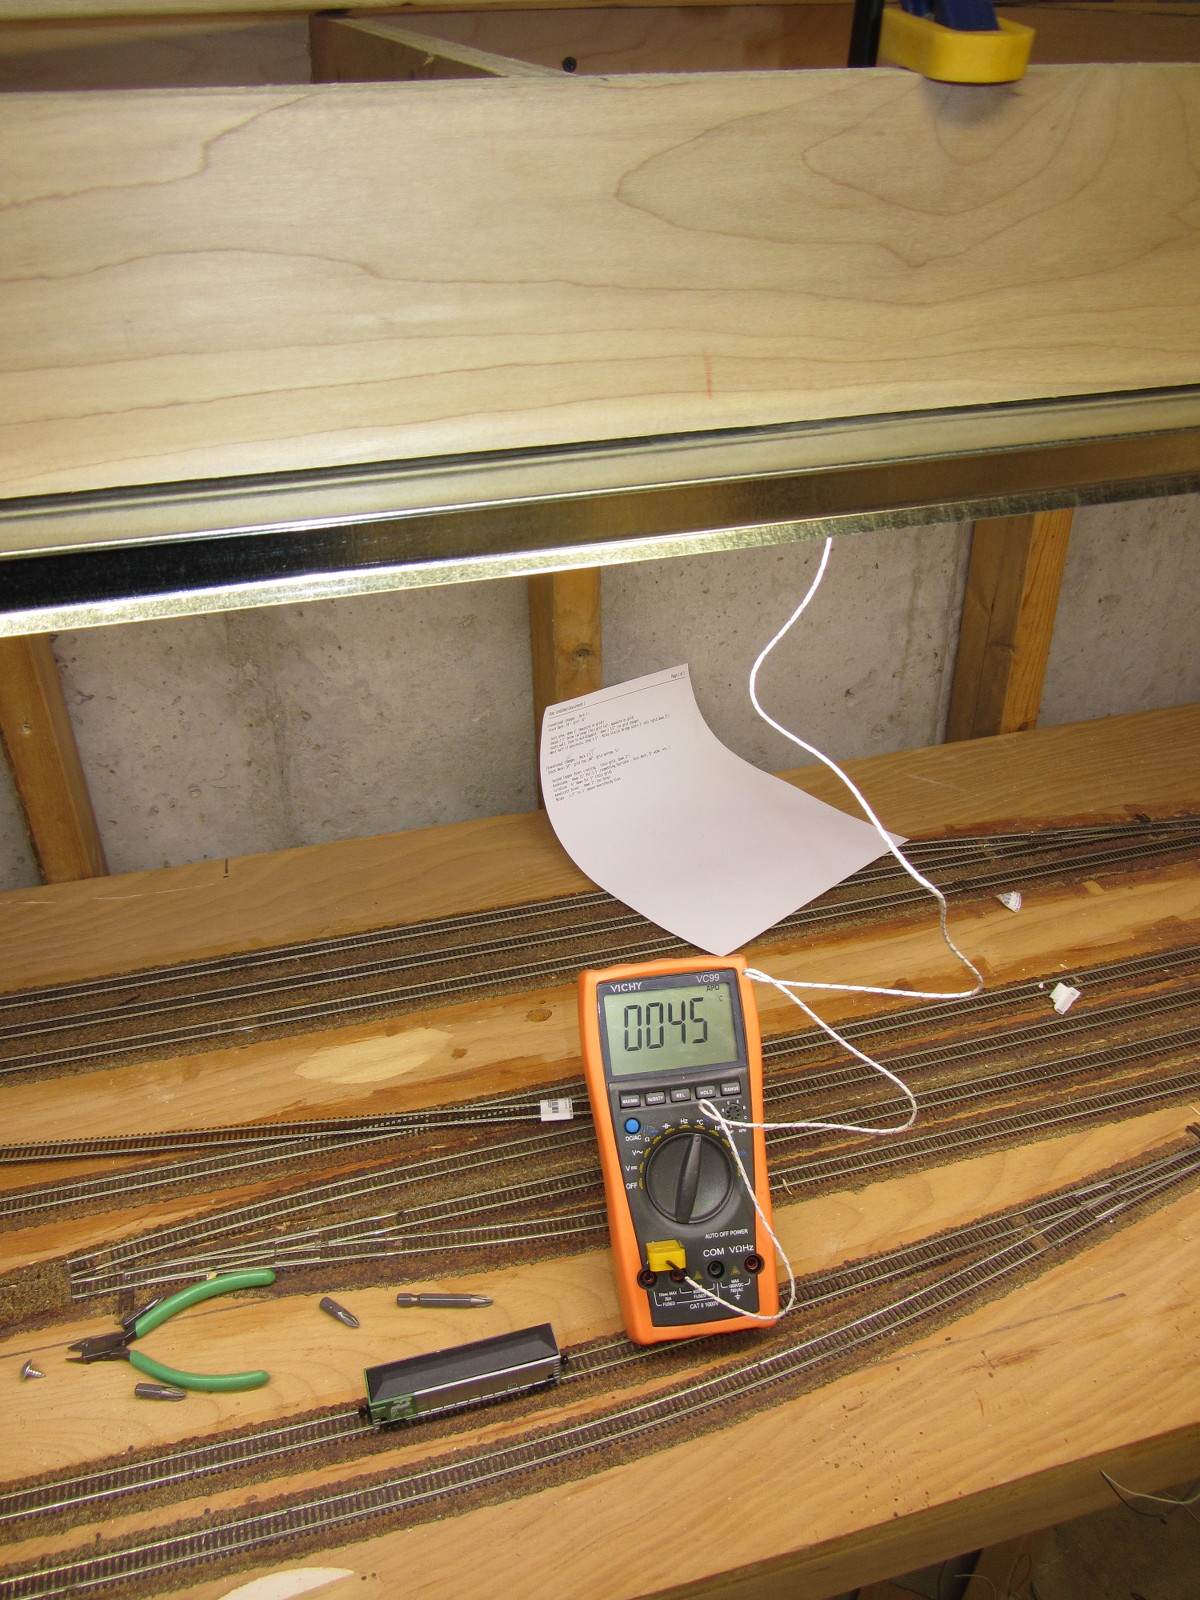
One interesting note – the operating current at 45C had increased to 3.3A. This makes sense – bandgap of LEDs decreases with increasing temperature. So, with less voltage drop across the LEDs, the ballasting resistors (56 ohms total, split into two 1206 resistors – see more about this later) allow more current. So, as a note, LED strip lights appear to have a 10% current rise over the 20C between room temperature and operating temperature. Almost all of that additional power will be dissipated in the resistors, so it’s not even going into providing useful light. (See analysis in the final section.)
Task 2: Fix the Inductive Ringing
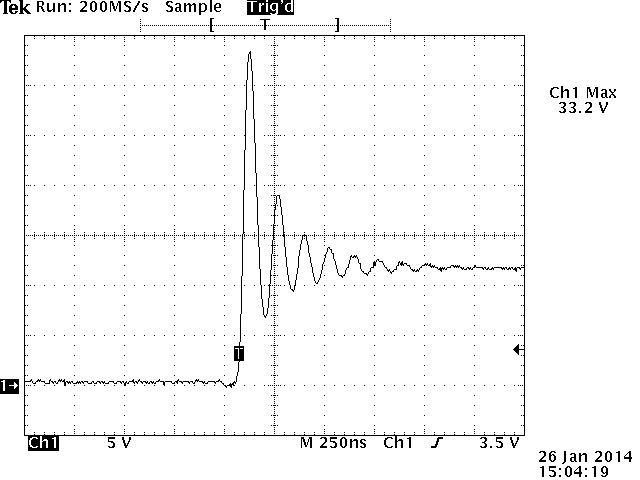 When I initially investigated doing variable LED control for layout lighting, I noticed some reasonably nasty inductive spikes whenever the MOSFETs controlling the strips would shut off. The screen capture from my scope on the right is a pretty typical kick – the FET shuts off, and the drain side of the FET would ring up up obnoxiously high voltages.
Since I’m only planning on using FETs with a 30-40Vds rating, these spikes could easily turn into circuit-killers. Plus, they’re likely radiating lots of electromagnetic noise that will cause other issues down the line when I have 100+ amps of LED strip lights running and switching on and off.
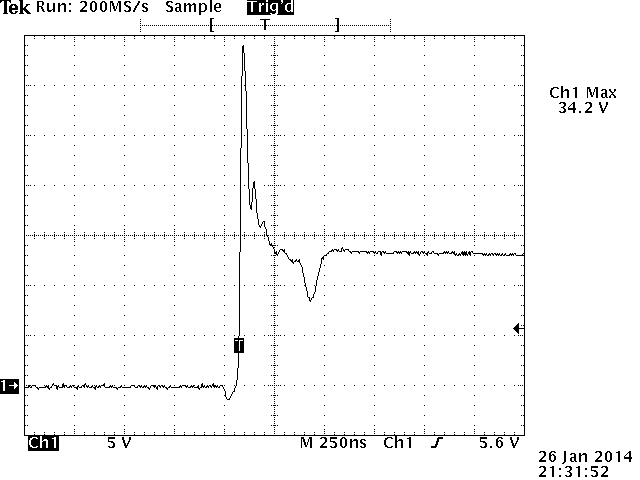 My initial hope was that a freewheeling diode from the drain up to the+12V rail would solve my problems. I was operating under the assumption that my problem here was inductance in the LED lines, and that if I gave the current somewhere to go, my problem would go away. At low currents, it looked promising, but as I started pushing 2-3A through my test setup, I got the waveform on the left. Better (less ringing), but still with the 30+V spike before the diode got going. All I had on hand for reasonably quick diodes were some old FR155s. While great at reverse recovery time, I can’t find a spec on how fast they go into forward conduction. Regardless, a decent Schottky diode should beat them hands down. I just don’t have one to try.
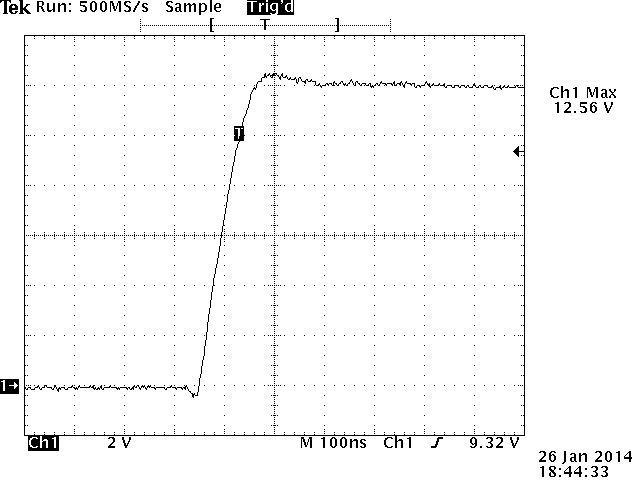 An alternate approach I tried was to damp the system by applying a small capacitor between the FET’s drain and source. As little as 22nF was enough to significantly clean up the waveform, and 0.1uF damped it out completely. I don’t like the idea of a capacitor in there, though, because this will almost certainly need to be quasi-matched to the parasitic inductance in the lights. I’m going to try a faster diode first and see if that fixes my problem. If that doesn’t work, however, we’re back to some sort of RC snubber circuit.
Task 3: Plan a Lighting Control Scheme
Safety in designing this light system is paramount. Given that the layout will consume at most ~150A of current to run the lighting (at 12V, but 150A is still a lot of I2R heat in any short or questionable connection), fuses in all the right places are a key design feature so that any failure doesn’t end catastrophically.
Per measurements taken at steady-state in the test fixture, any of the white strips are going to take 0.275A/ft at 45C. The RGB strip will need approximately 0.1A/ft for each of the three channels lit. So, figuring on an absolute maximum of three full strips (all three whites) on at any given time, I’m looking at 0.825A/ft maximum.
My initial plan had been to use larger modules, controlling as much as 30A through a single control board. However, that means larger FETs, larger freewheeling diodes and snubbers, and larger wires everywhere, since any potential short may have to soak up 30A @ 12V until the fuse goes. Given our 0.825A/ft metric, a 30A module would feed ~35 feet of layout lighting. The heavy wire that I would need to handle any possible shorts over such lengths quickly showed this as an impractical approach.
If I used the 10ft length that the steel flashing comes in as a module length instead, that’s 8.25A per module, maximum. That’s nicely under a 10A fuse by a decent safety margin, and most wiring that I would use could handle 10A for a short overload period until the fuse went out. (Mini-ATO blade fuses like I’m considering using will blow in <0.75s at 135% of their rating. So 13A would take it out in less than a second.)
My current plan is modules for every 10ft section, with one single input fuse of 10A. Each board will then have 6 N-channel FETs (likely 3x AO4882 duals), 6 FET drivers (likely MCP1416s), and six optocouplers, along with dual RJ45s for the control bus (one in, one out). A single Cat5 cable will run around the layout, delivering signal ground and 6 light PWM channels from a main lighting control board to the optoisolated inputs on each booster node.
I have the schematic done, but it’s already pushing 2300h and I’m tired. Have to go to that real job tomorrow, so I should probably get some sleep and put the board off for another day.
Addendum: LED Strip Lights and Voltage
As sort of an interesting side research project, I decided to investigate more about the relationships in LED strip lighting between input voltage, power dissipated in the two ballasting resistors, and power actually delivered to the LED lamps themselves. Some of my discussions earlier in the day with a friend had made me wonder what the relationship really was between these three things.
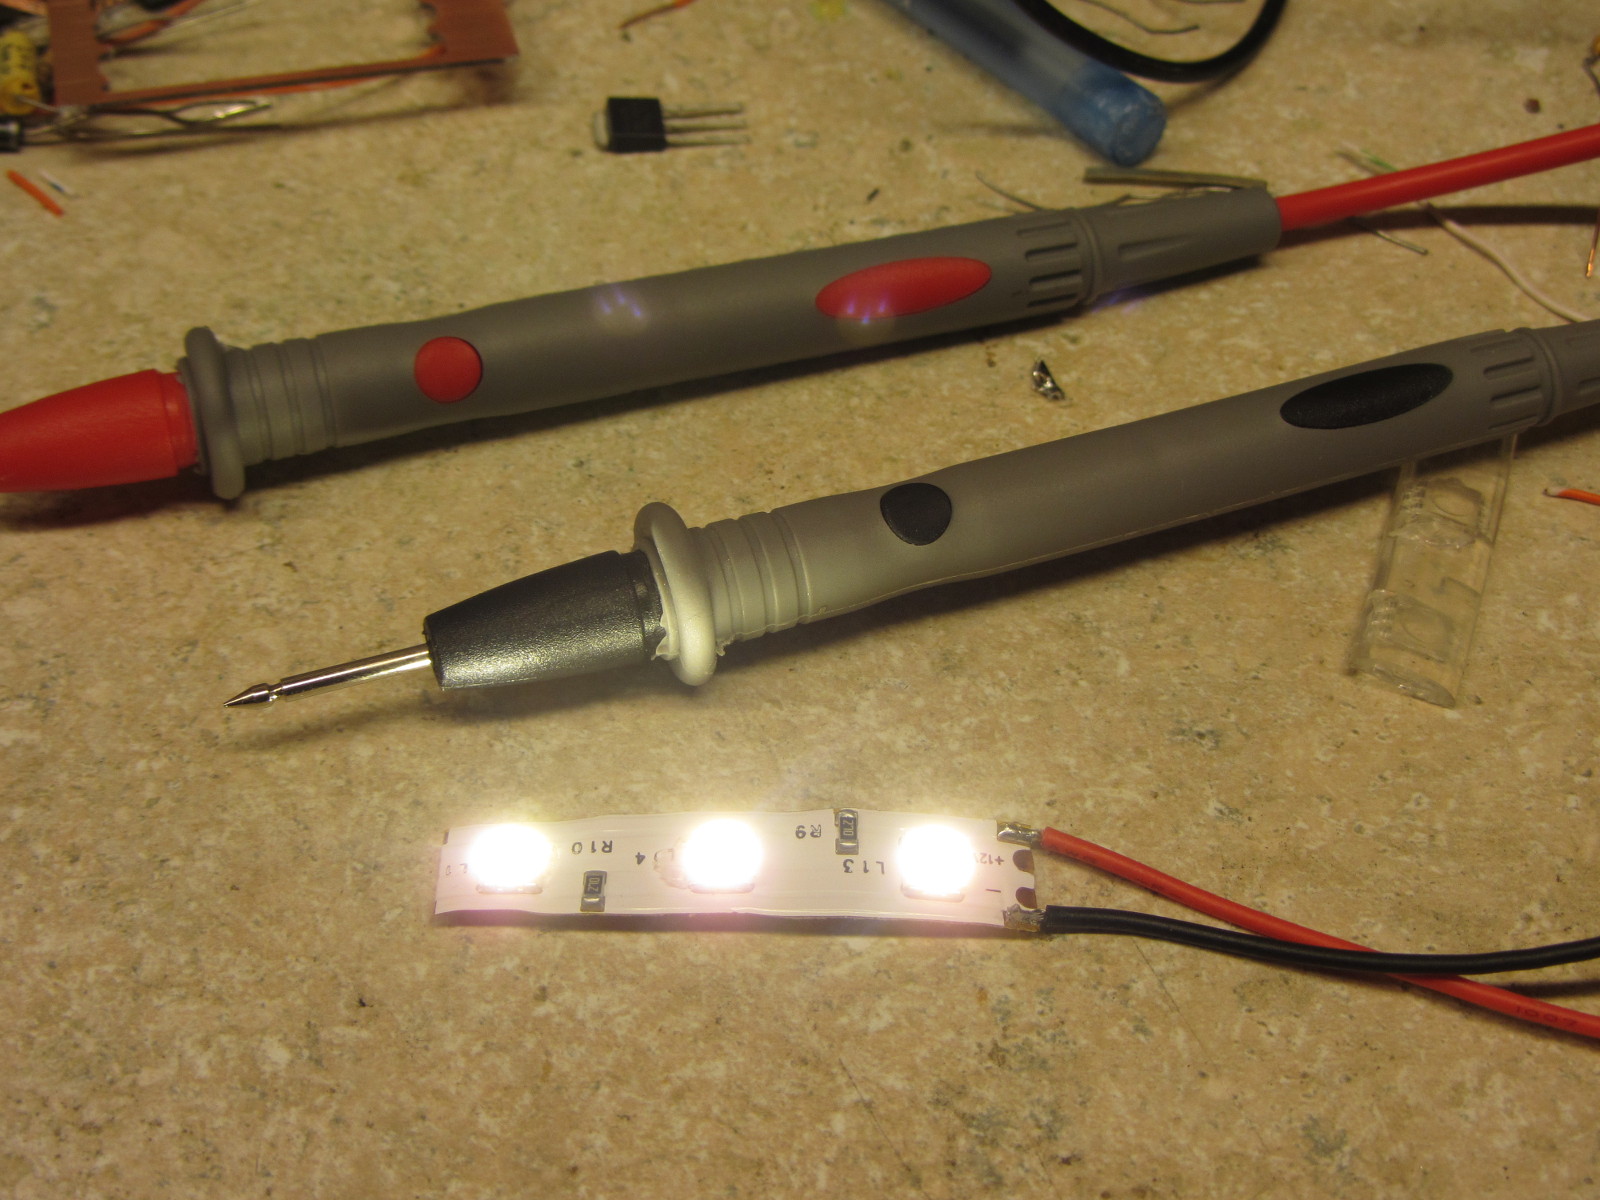
Step one was to just cut off a piece and decapsulate it so that I could get probes right on the pins. Not really that hard – with a little encouragement, the coating peeled right off. I then powered it up and realized that having three death rays shining in my eyes as I was trying to probe was going to be a real problem. So, I used a trick I learned long ago when dealing with warning lights on cars that shouldn’t be on but inexplicably were: grab the electrical tape and – poof – no more annoying light!
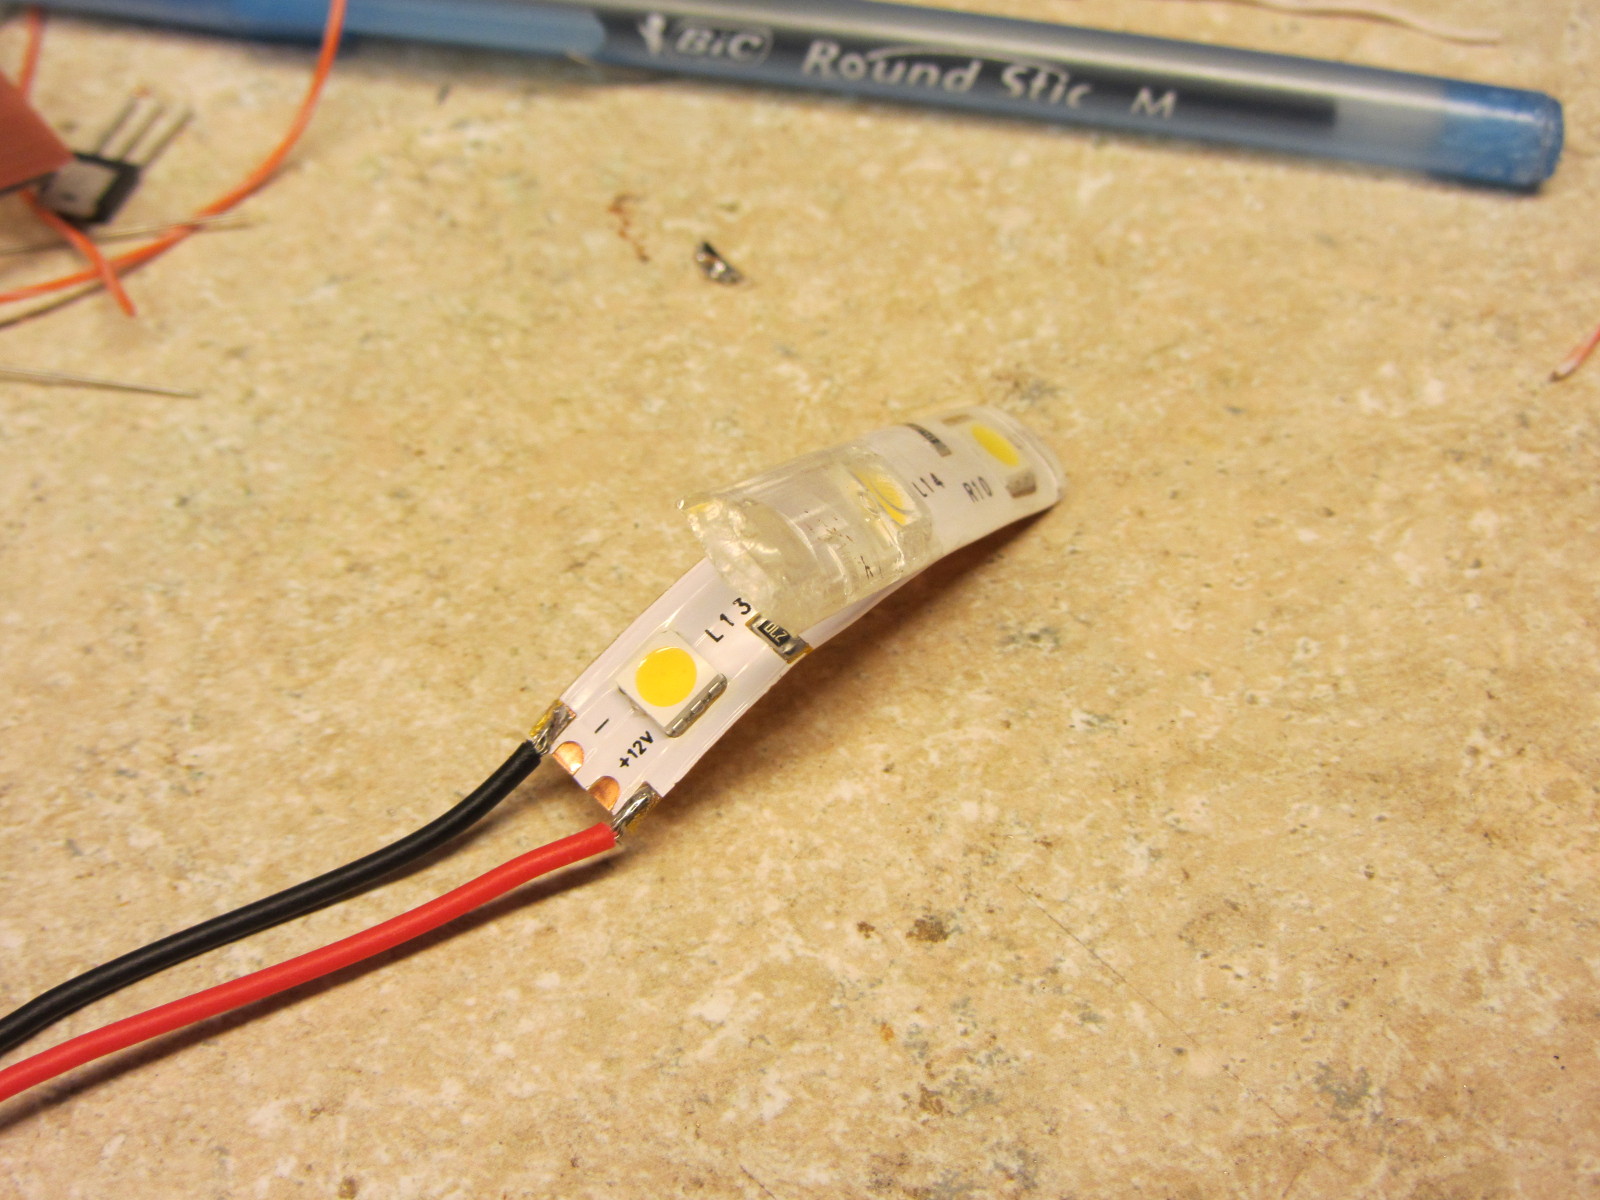
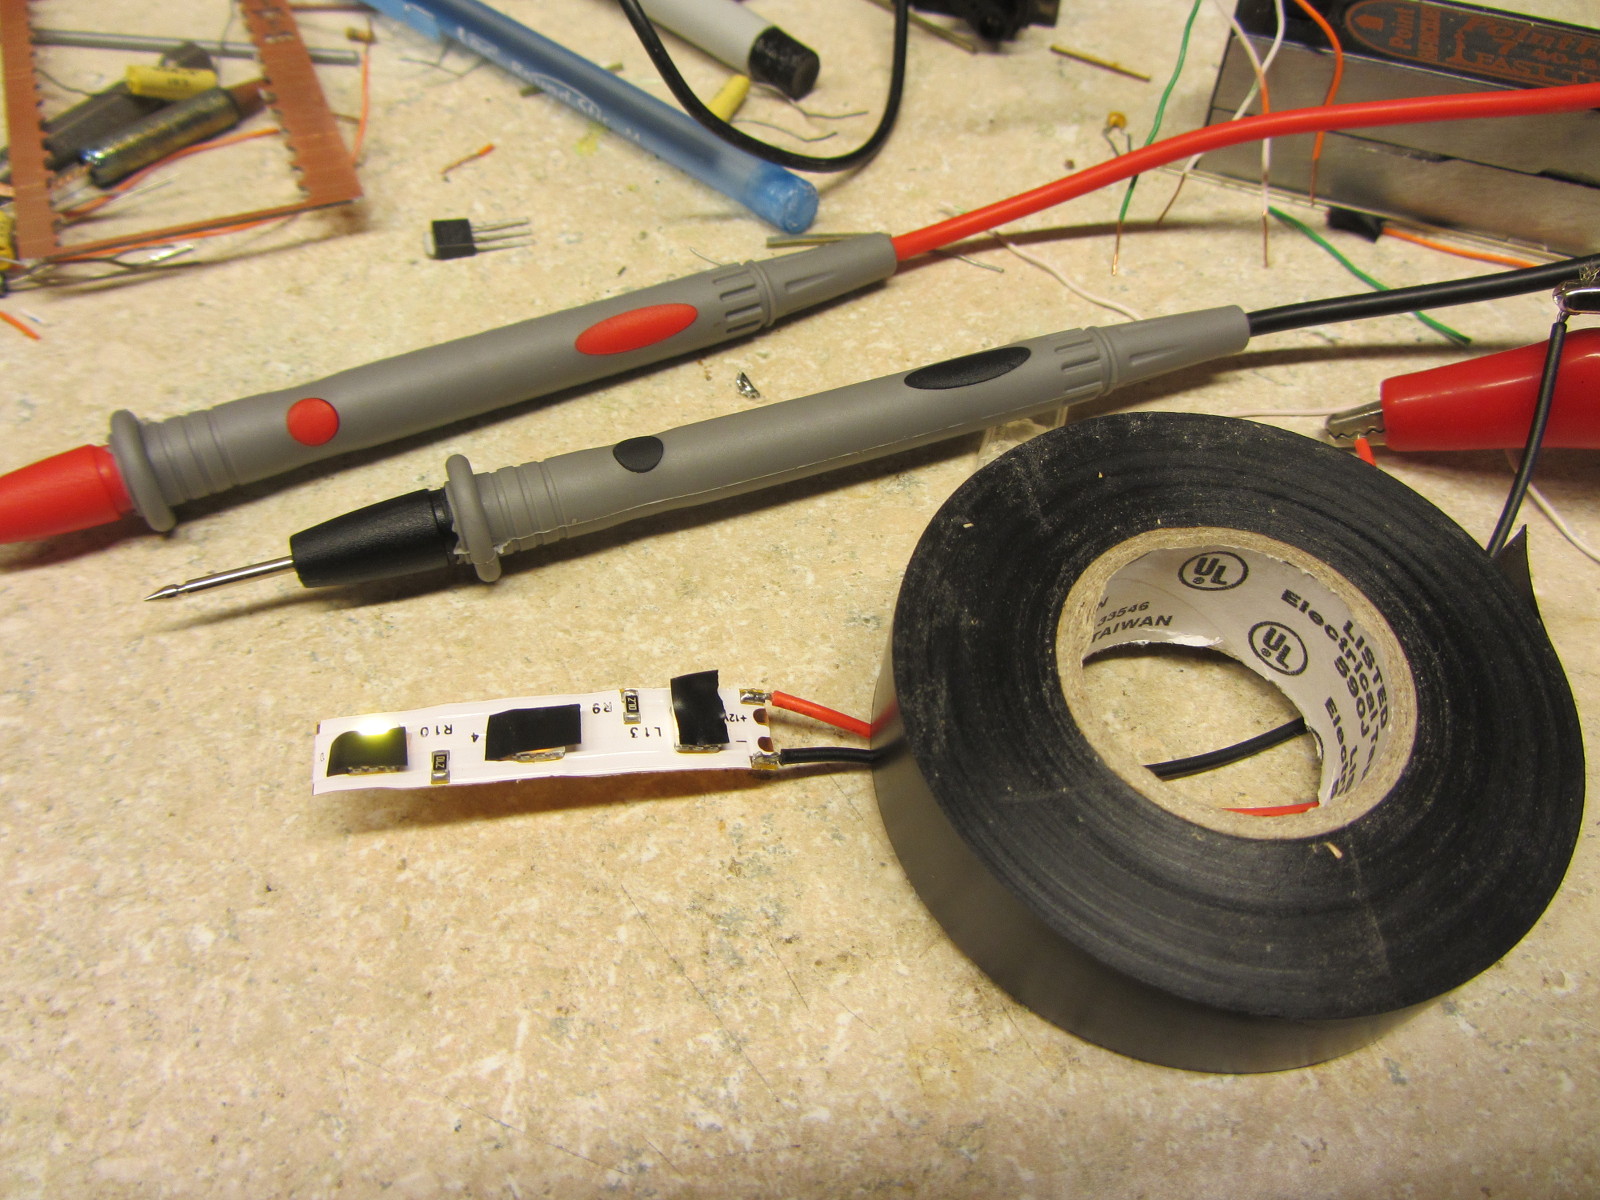
Internal construction of these strips (nominally rated 12V) consists of a 27 ohm, 1206-package resistor (rated for 0.25W of dissipation) between +V and the first LED, then three LEDs in series (each “LED” being a 5050 package with three LED die inside in parallel), and then another 27 ohm resistor to ground.
Procedurally, it was just a matter of punching each voltage into the power supply, measuring the voltage across one of the resistors, and plugging the result into a spreadsheet. Given the input voltage and voltage across one resistor, I could calculate the current through the circuit, and thus the drop in both resistors and consequently the power that must be dissipated in the LEDs themselves.
Here’s a pair of graphs of the results. The first is just power burned in each type of component – blue being resistors and orange being LEDs. In the second graph I stacked them, so that you can see how large of a percentage of the total is burned off as unproductive ballast resistor losses at high voltages.

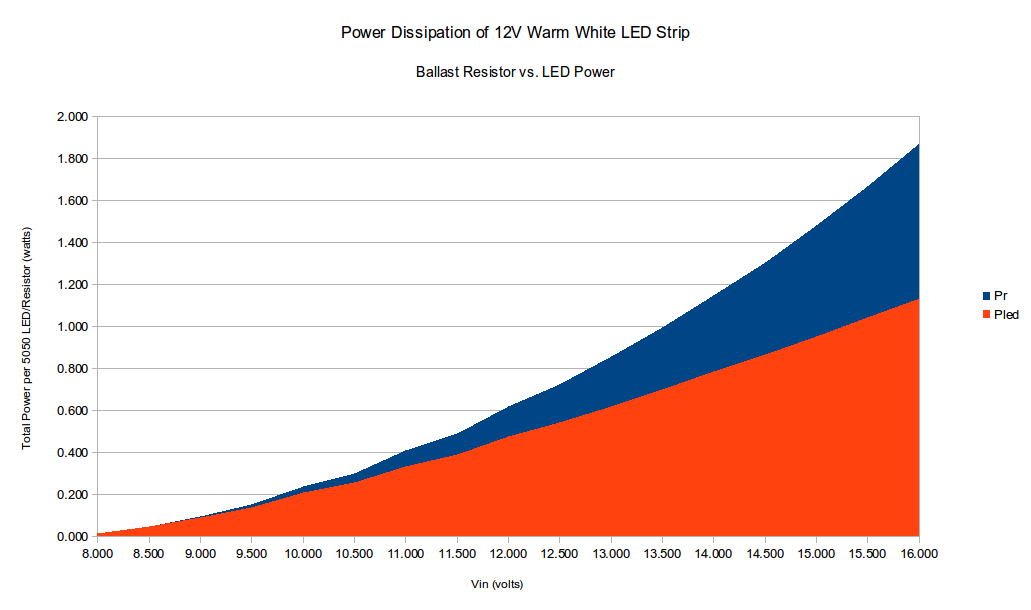
It really makes me wish for a constant-current design, but I realize the additional complexity that would entail. Cheap constant-voltage LED strip is cheap – custom engineering my own is expensive. Darn.